Even small projects can be complex in today’s highly integrated, fast-paced environment. A project roadmap provides a comprehensive approach to defining and managing the work to successful completion. It clarifies what you’re building and how and why you’re building it. Unlike a project plan, which is more granular and tracks progress, the project roadmap communicates high-level goals, project scope, and resource requirements.
A well-executed project roadmap is an important project management tool to keep teams and stakeholders focused throughout the process with a visual, easy-to-understand document. Use this guide to find out how to create a project roadmap to help teams plan, define, and communicate each project’s essential information.
How to create a project roadmap in eight steps

The simplest way to create a visual project roadmap is to break it into steps, beginning with the goals and scope. With that foundation, you can identify the stakeholders, gather the requirements, break down the work into phases, define the tasks and resources, estimate the completion time, and map the dependencies. The outcome is a roadmap communicating what you’re building and how and why you’re doing it. Continue reading to learn how to write a project roadmap in eight simple steps.
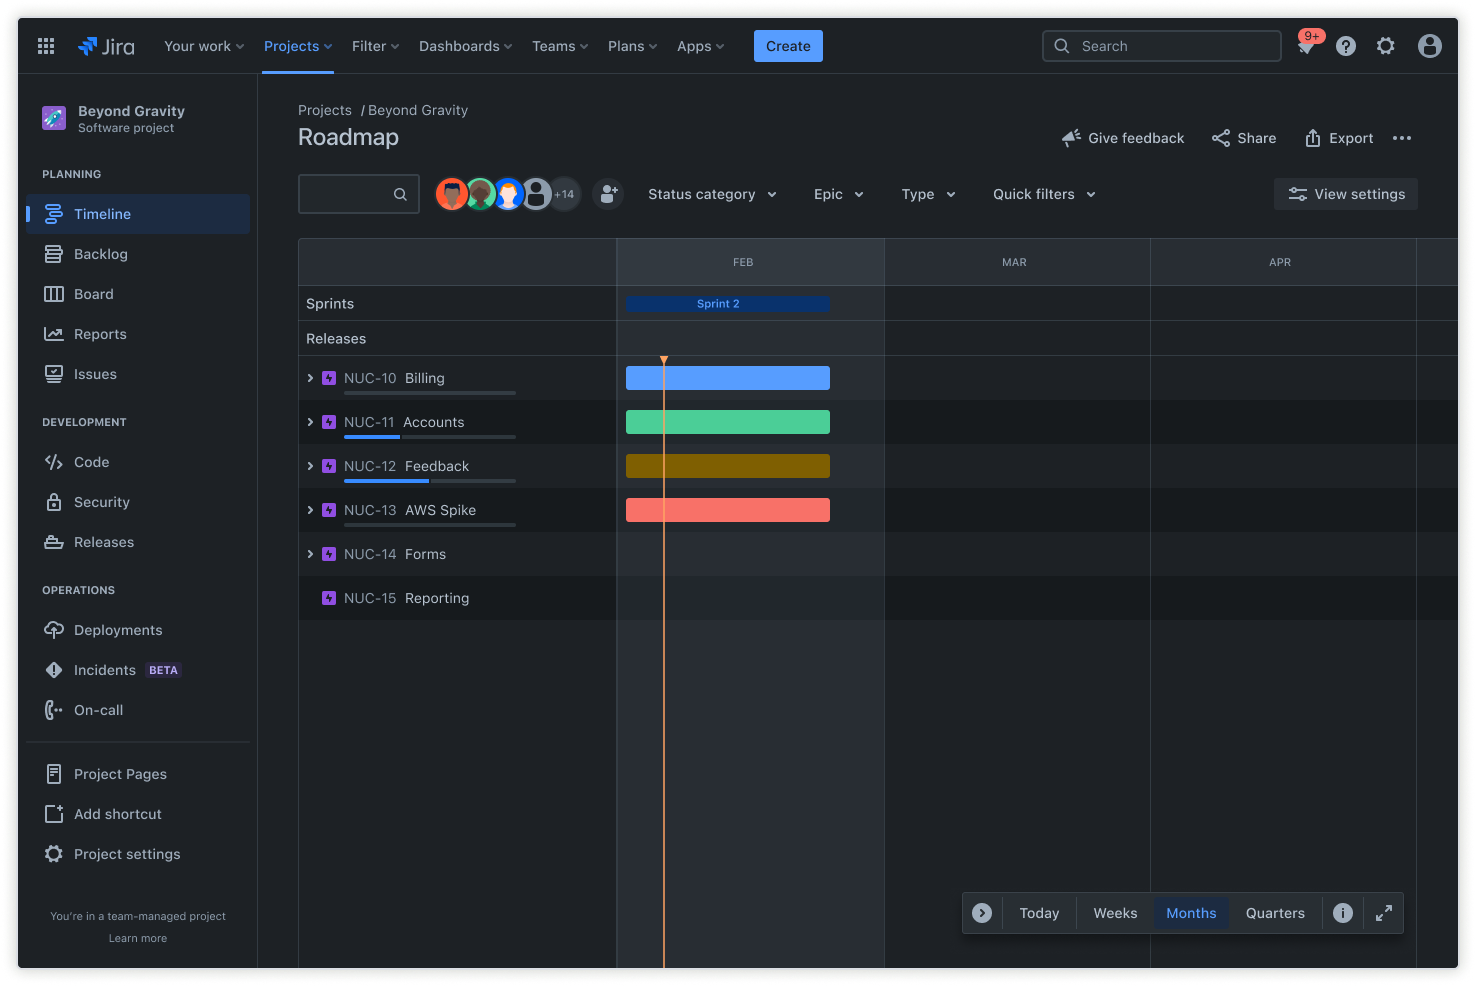
Jira provides top-down visibility to help teams plan work, track progress, and map dependencies. Jira’s trusted platform for creating roadmaps and its built-in flexibility provide the tools to manage projects from inception to market, no matter what comes up in the process. From stakeholders to developers, the visual presentation speeds understanding and promotes informed decision-making.
Step 1: Define the project goals and scope
The first step in creating a project roadmap is defining your project goals, which helps determine what to include and save for later in the roadmap. Businesses that deliver high-quality products understand the advantages of keeping projects focused on SMART goals. Though adding features and options that are not part of the requirements is tempting, it’s wise to plan multiple smaller projects, each with its own focus. This will increase overall quality, and time to market, and ensure customer needs are thoroughly met.
The scope is the work the project encompasses. For example, suppose your goal is to improve the cost estimate for new home construction to within a five percent margin of actual cost. In that case, the project scope may include integrating with current supplier data, implementing trending models from artificial intelligence, and building in real-time updates.
To keep the project focused and achievable, the scope may exclude user experience improvements, and stating so helps prevent scope creep.
Step 2: Identify the stakeholders
Identify the stakeholders, team members, sponsors, clients, and other important parties. Highly collaborative teams improve productivity by understanding who is responsible for each project element. This speeds up decision-making and eliminates redundant work. It also promotes effective communication from the very beginning.
Step 3: Gather the requirements
Requirements provide clear guidelines about what the finished product must achieve. If the scope includes strategic partnerships, the requirements call out the partner, the type of data to integrate, how you’ll incorporate the data, and the project's expected results.
Example statement: The cost-estimating feature pulls real-time inventory data from a supplier via an open API, allowing users to select from available options to see current costs.
Collaboratively rank the requirements according to priority and feasibility. Based on the project timeline, effort, and available resources, this helps the team decide what to schedule versus what to save for later.
Step 4: Break down the project into phases
Break down the work into phases or milestones. Each phase represents a significant project stage with a clearly defined outcome.
For example, phase 1 may be retrieving all partner data reliably on demand; phase 2 may be completing the application user interface based on how the user interacts with the data; phase 3 may be standardizing reports for ongoing user analysis, and so on.
Step 5: Define the tasks and activities
Break down the tasks and activities within the phases to meet the objective. For example, phase 1 may include implementing API keys and validating data accessibility and integrity.
It’s important to engage the team in project collaboration to gain the collective experience of all members. This step refines project planning by ensuring the inclusion of all activities. Identify who is responsible for each activity to prepare for the next step.
Step 6: Estimate the time and resources
You’ve defined the goals, phases, and activities. In this step, a visual presentation helps show the time and resource estimates. Resources include people, technology, materials, and budgets—anything necessary to complete the project.
Draw on the experience of your team to estimate time and resources. Your data engineer likely knows how long it takes to integrate data based on the source's type, volume, and maturity. Security members may identify hardware or policies necessary to comply with regulations. These can impact the budget and timeline, so now is the time to identify them.
Step 7: Identify the dependencies
Map the dependencies to create a project timeline using a Gantt chart, Kanban board, or other visual presentation of tasks. For example, building an interface for external data depends on developing an API or other integration to obtain the data. A visual presentation helps quickly identify bottlenecks, constraints, and resource loads.
Step 8: Communicate and monitor progress
Share your project roadmap with stakeholders and get their approval before the project begins. The outcomes must meet their needs, and adjusting the scope or approach will be easier with a roadmap already in place. Project managers often hold a kickoff meeting to bring everyone together to discuss the work and ask questions.
Communication doesn’t end at the kickoff meeting, though. Be sure to monitor the project's progress and stay aligned on issues. Hold regular status meetings with stakeholders to keep them informed throughout the project.
Essential components of a project roadmap
A comprehensive project roadmap includes the following:
- Goals guide the team’s work in defining what they are building and why.
- Milestones help the team divide the work into achievable phases and show progress.
- Requirements provide the measure of success for milestones and tasks.
- Tasks identify all the work necessary to complete the project.
- Timelines provide the duration and sequence for each milestone and task.
- Dependencies help identify the logical sequence of tasks and improve time estimates.
Choosing the right tool for project roadmapping
Selecting the right tool depends on your project requirements and preferences. Features such as Gantt charts and Kanban boards provide project information in a visual layout that makes dependencies and timelines easier to understand. Jira provides end-to-end project management tools and includes the following roadmap features:
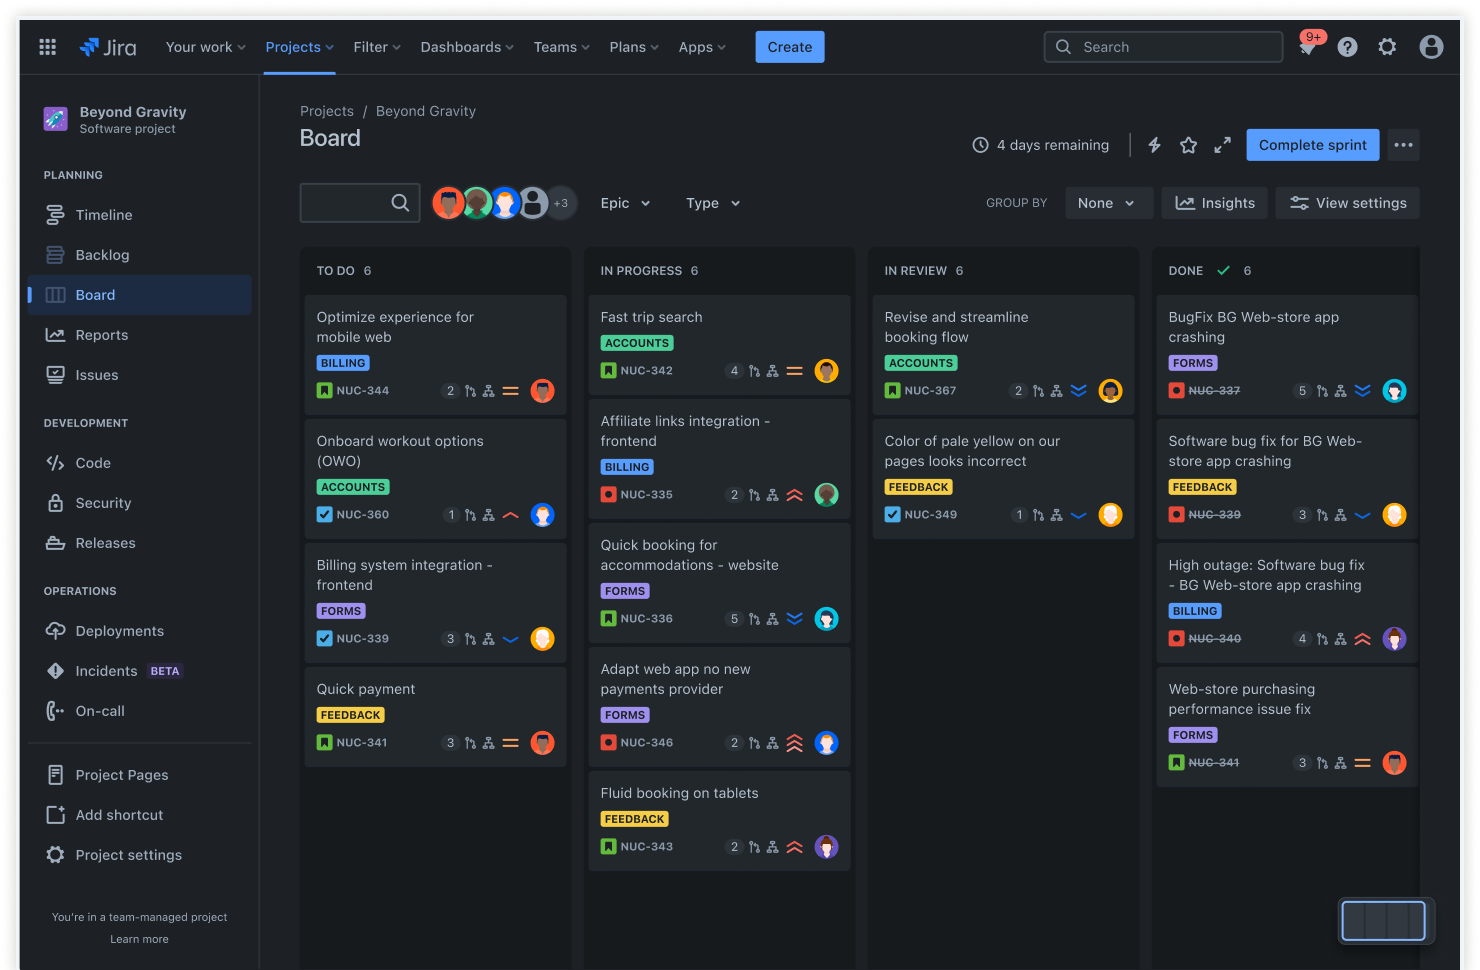
- Boards help teams plan, visualize, and manage the work by displaying pieces of work as visual cards, which you can move between columns or phases and automatically update timeline information.
- Issues break down large bodies of work into smaller, manageable pieces. You can use issues to capture relevant task information and statuses to keep the team up to date.
- Timelines allow teams to add epics and map work items, dependencies, and releases.
If you’re ready to create a project roadmap today, use Jira’s free project roadmap template to seamlessly align teams and enhance collaboration.
Best practices for creating project roadmaps
Involving stakeholders in the planning process helps ensure what you’re building meets their needs. Keeping your roadmap simple and visually appealing keeps teams and stakeholders engaged as the project progresses, and updating the roadmap regularly helps the team remain flexible. Expect and adapt to change.
Jira can help teams adhere to best practices. Breaking down complex work into issues provides flexibility to pivot priorities, identify problems early, and stay on track by managing smaller increments of work. Teams can create Confluence pages directly from Jira, providing a single source of information that keeps the project organized from beginning to end.
Create project roadmaps with Jira

Seeing and understanding overarching goals helps you effectively plan and prioritize the work, map dependencies, manage resources, and track progress. Jira provides flexibility in a visual presentation so everyone’s on the same page. Teams can see what they’re working on and what’s coming next in the context of the project goals and effectively collaborate across the business using a central repository.
Project roadmap: Frequently asked questions
What should a project roadmap include?
Nearly every project roadmap, no matter its size, includes the same elements: goals, milestones, requirements, tasks, resources, timelines, and dependencies.
What is an example of a project roadmap?
The project roadmap format can vary based on the type of project. A software development roadmap may include planning, development, testing, and deployment phases. Within each phase, there may be specific milestones based on the tasks and deadlines.
For example, the development phase may include milestones for data standardization, third-party integration, and pricing and discount computations. Detailed tasks, dependencies, resource assignments, and timelines are within those milestones.
Can you use a template to create project roadmaps?
Teams often use templates to speed up the creation of a project roadmap. Choosing which tool to use should be based on your specific project needs. Highly flexible tools allow you to tailor the process no matter the size and scope of your projects.
Jira provides the flexibility to customize your project roadmap, including templates, and offers end-to-end project management tools to help you move from idea to project to support with a single centralized tool.