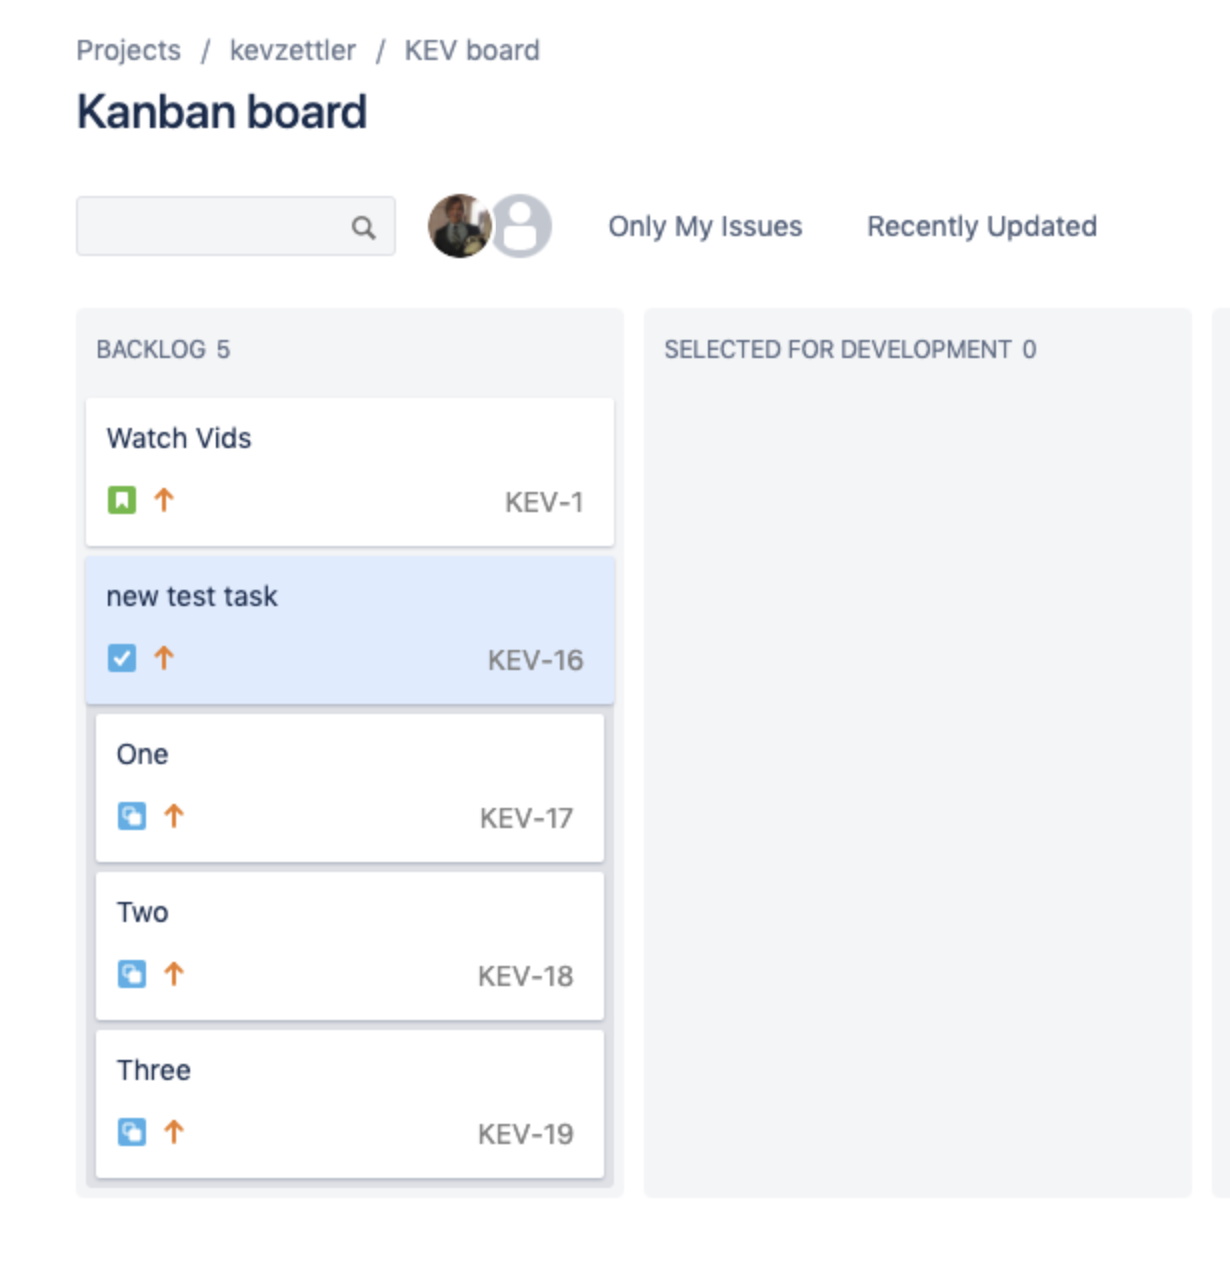
Automation rules in Jira help teams move fast and stay organized. Explore the automation template library, and read on to start automating in Jira!
New Trigger
The first step is to select a trigger from the New trigger selection screen.
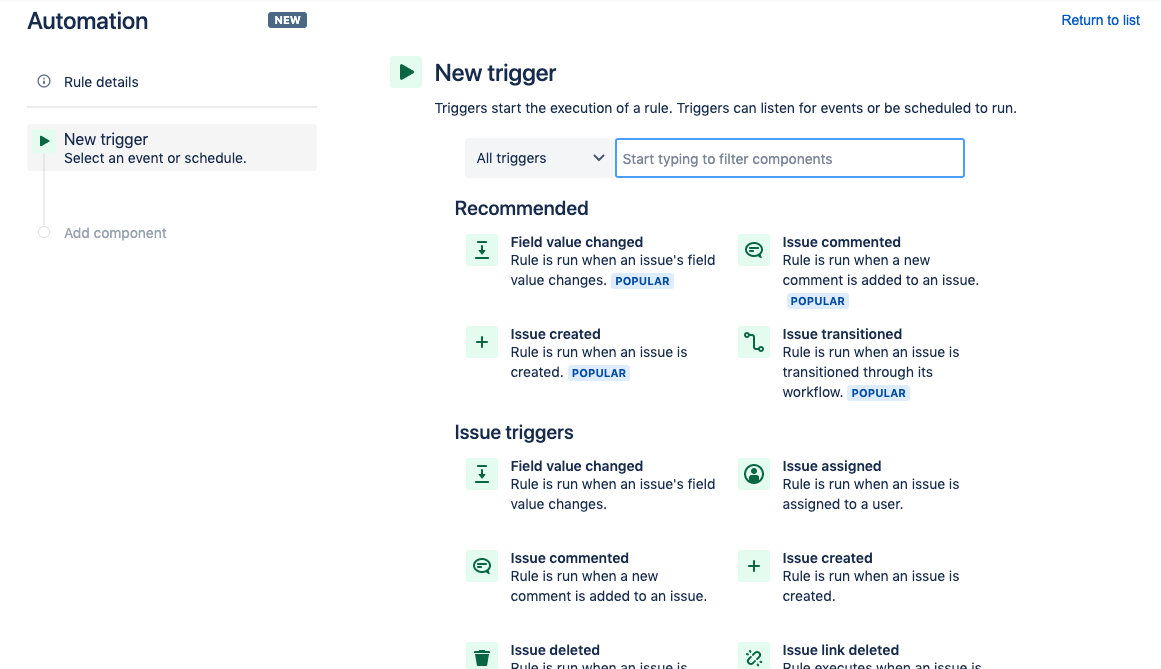
Next, find the Issue created trigger from the list of triggers
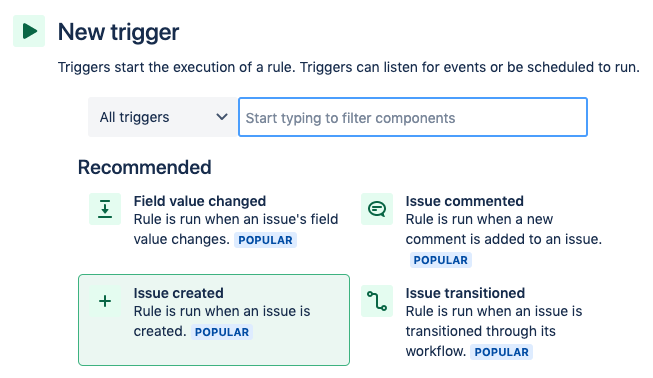
You can also find the Issue created trigger by searching for it in the search bar. Once you have selected the Issue created trigger, click the Save button.

New Condition
Next we will add a New condition component that will perform an action if the issue type is a Task. Click on the New Condition option on the Add component page.

Next, click the Issue fields condition:
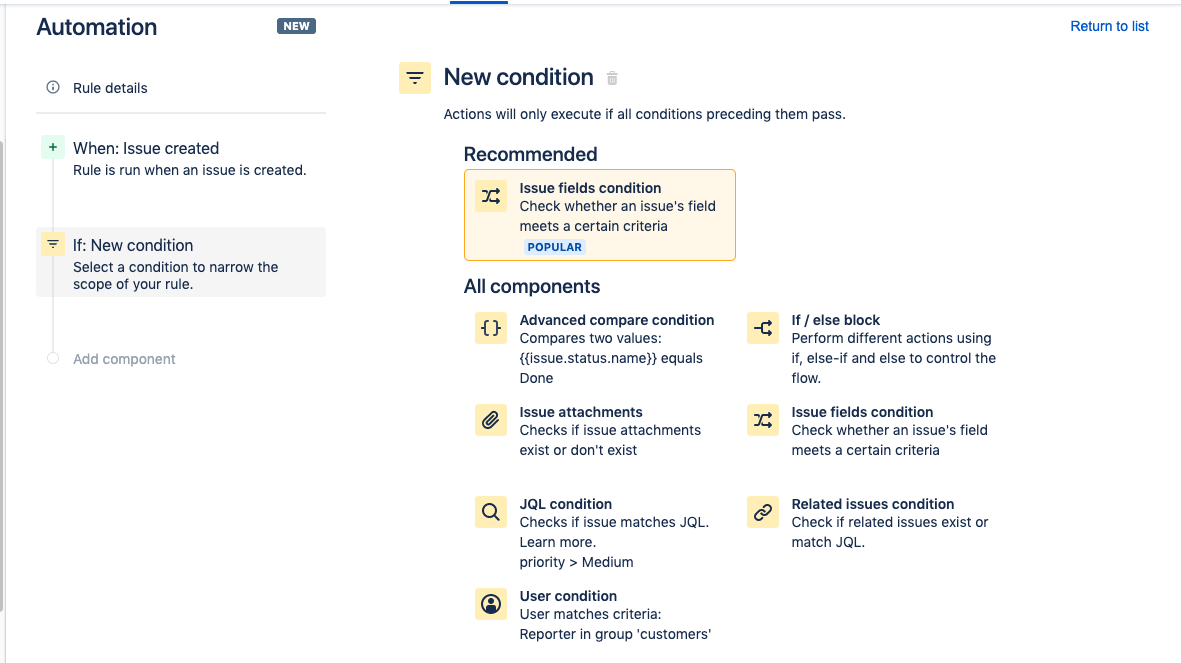
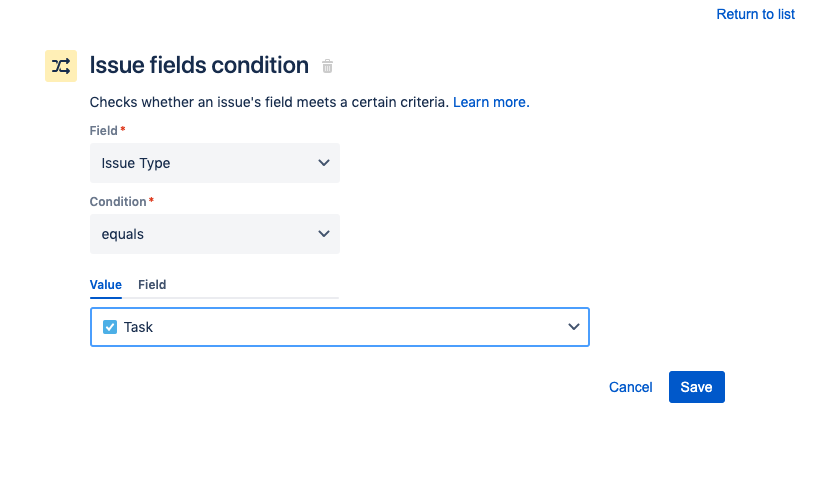
This will direct you to the Issue fields condition configuration page. From the Field drop down, select Issue Type, change the Value to Task, and click the Save button.
New Action
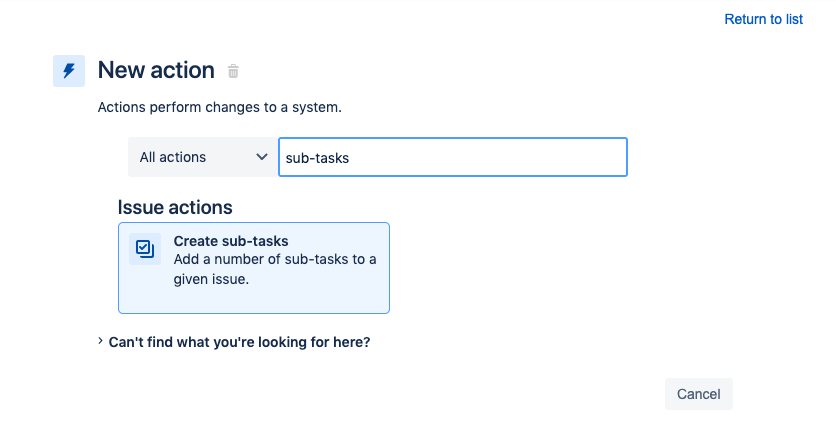
To add an action to the rule, click on the New action item on the Add component page and filter for the Create sub-tasks action. Click the Create sub-tasks item to proceed.
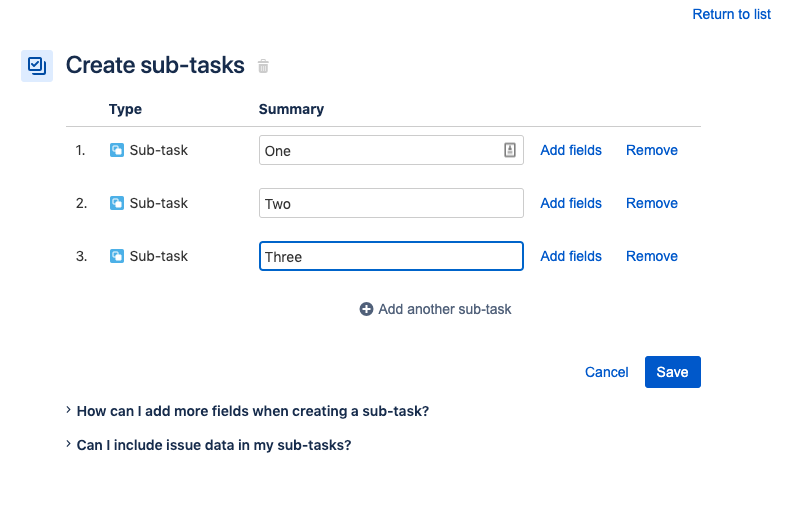
On the Create sub-tasks page add one or more sub-tasks by clicking the Add another sub-task and fill in the Summary fields as you like. You can also configure the fields that you’d like in each sub-task.
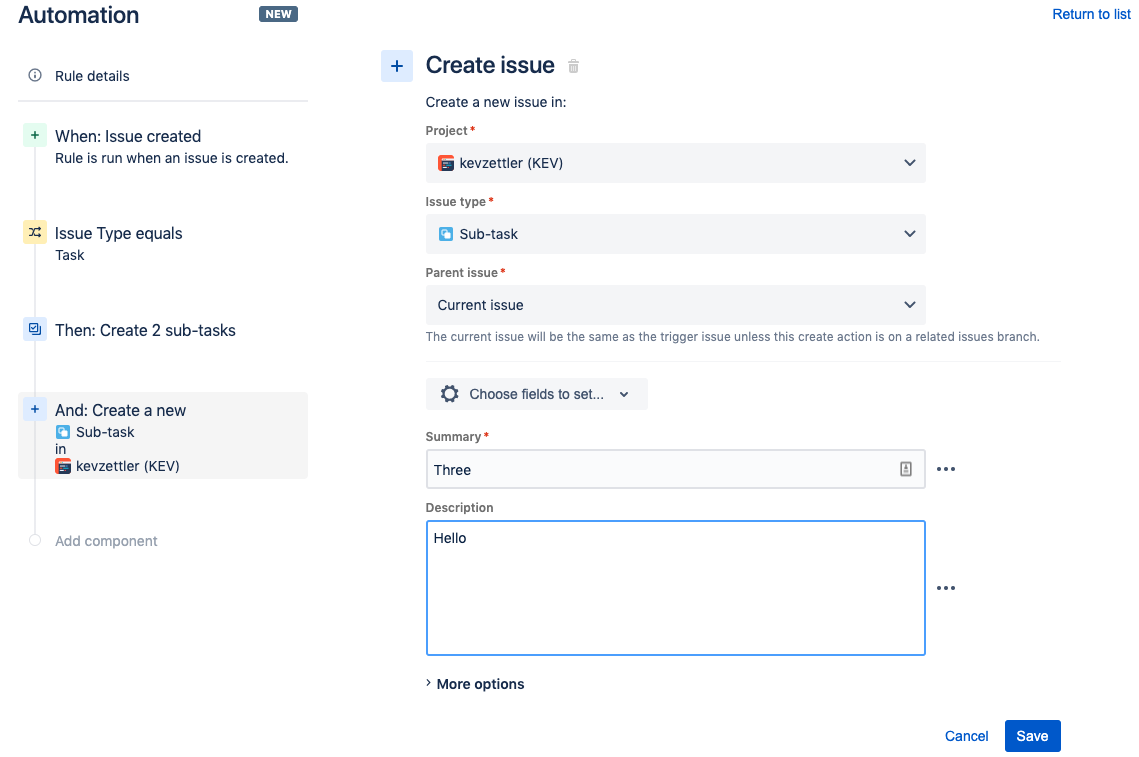
When you click Add fields on the third sub-task the other two sub-tasks will be created as a separate action. You will be taken to a new Create Issue screen where you can configure additional fields. Click the Save button when finished.
Turn it on
This brings you to the Add component view where you can name the new Automation. Once you do, click the Turn it on button.
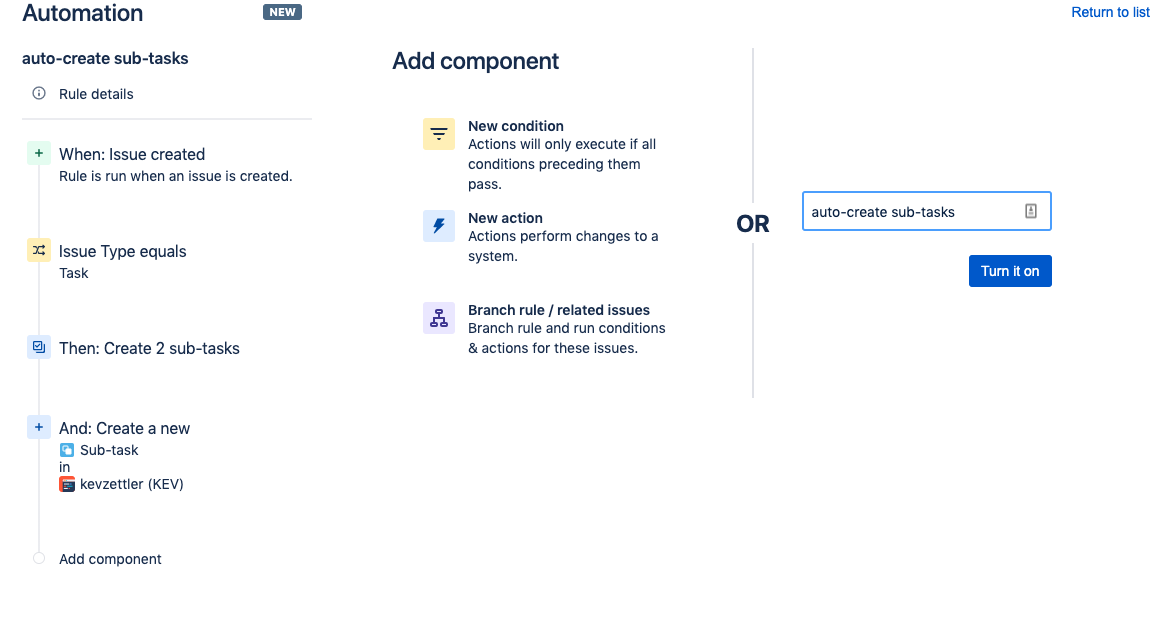
Try it out
Now that you created and activated a new automation rule, it’s time to try it out! Go back to your project, create a new issue, and set the type to Task.
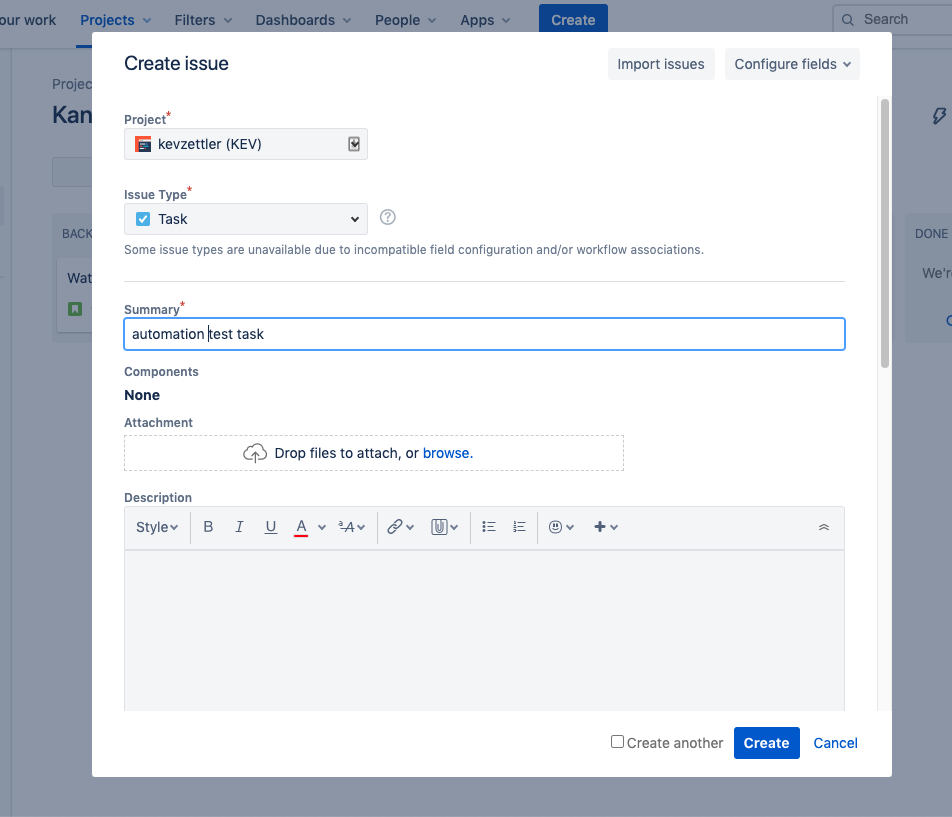
Once you’ve created the new task, the automation rule will activate in the background. You can confirm if the automation rule succeeded by visiting the Audit Log. Navigate to Project Settings -> Automation, find your new Automation rule, and click the Audit Log tab. You should see a view similar to the following:
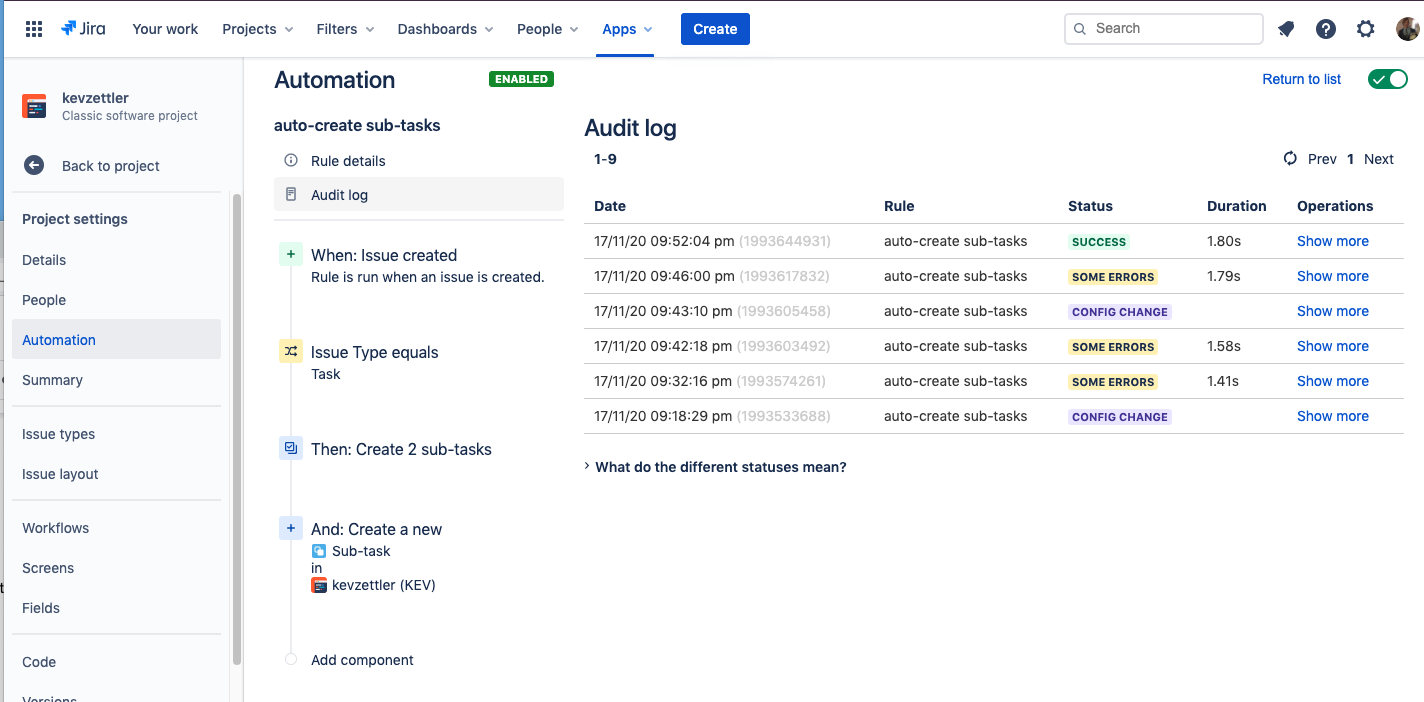
In the Audit log, if you see a row under the column Status labeled SUCCESS you’ve successfully built the automation rule. If you see the label SOME ERRORS, click on the Show More operations links to debug those errors. As you can see in the screenshot above we had to test and reconfigure our automation rule a few times before we were successful.
Once you have confirmed the automation rule operates successfully, return back to your project and you will see the new sub-tasks!
