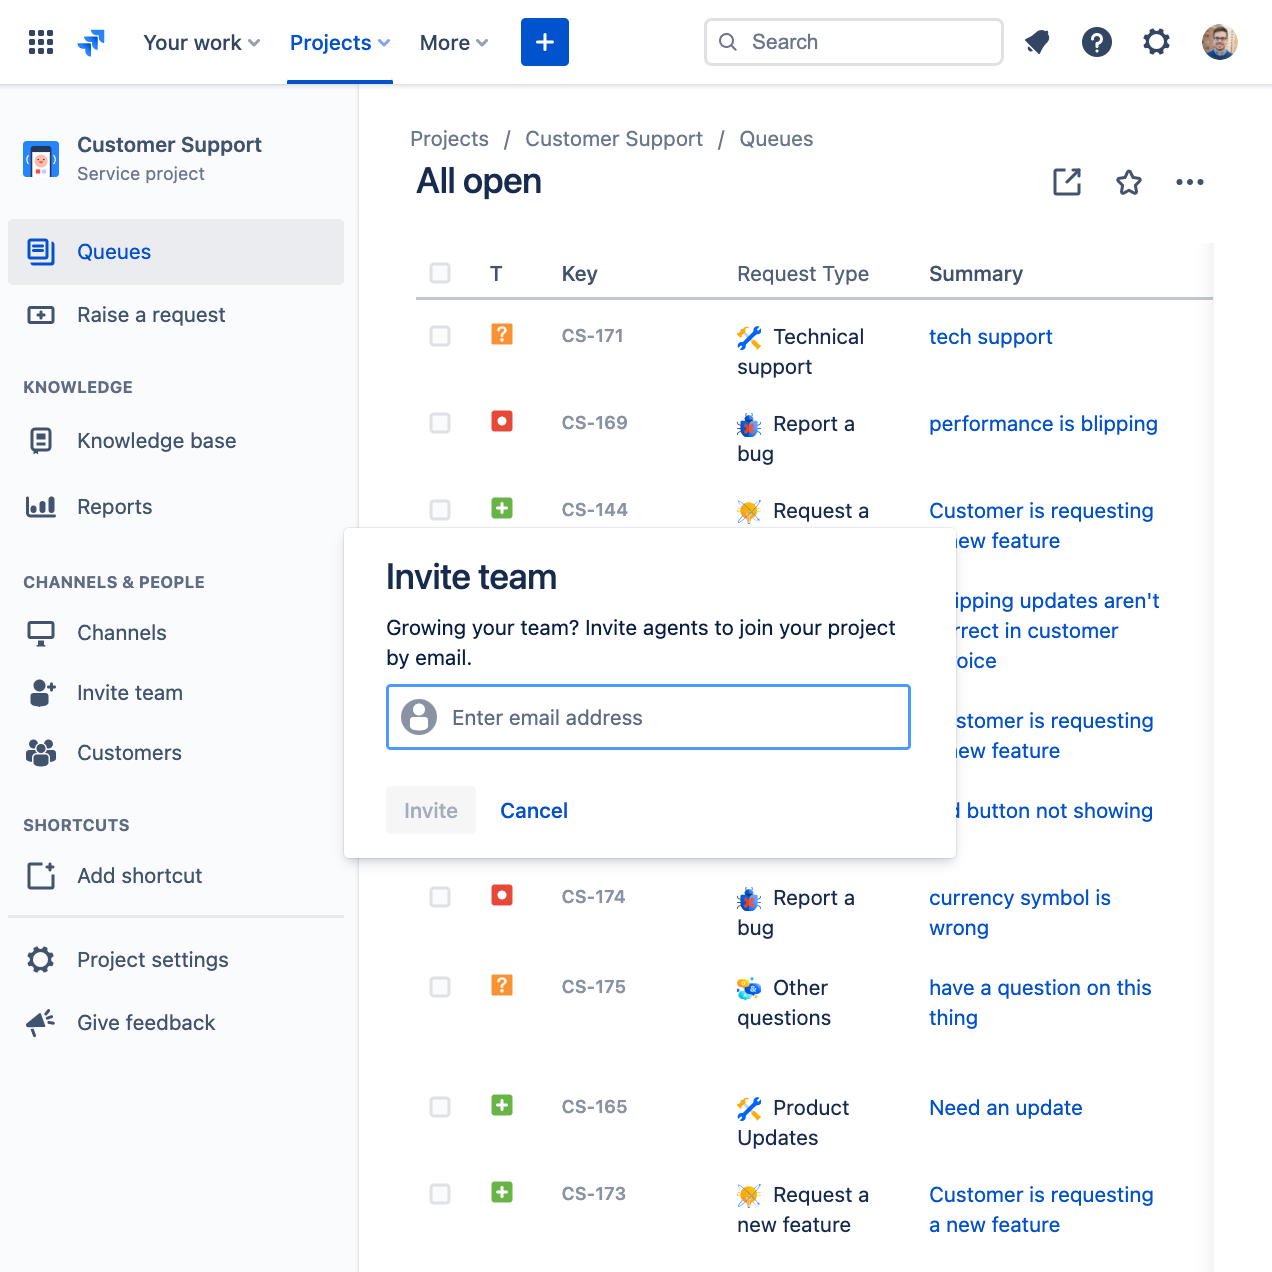
Service management for customer support teams

Overview
Jira Service Management isn’t just for internal-facing teams – you can also use it to deliver exceptional service experiences to your external customers. Equipped with the customer service management template and powerful features designed specifically for external support, customer service teams can set SLAs, answer customer questions, prioritize requests, and collect feedback to ensure customers and business partners quickly get the help they need.
This guide is intended to help external-facing customer service teams get started with Jira Service Management and configure it to meet their unique needs.
Customer service for digital-first organizations
In today’s digitally-transformed world, a company’s technology is often synonymous with its value, blurring the lines between customer support and the teams that build and maintain digital products. There is growing pressure on customer support agents to move quickly and resolve requests efficiently, despite having little to no visibility into the root cause of technical issues. The typical model where Dev, Ops, and support teams work in disparate systems is no longer enough.
Jira Service Management helps bridge this gap by uniting teams on the same platform and giving them the ability to work the way they want, while staying aligned throughout the customer journey.
- For developers, it means having a better understanding of customer needs and challenges.
- For operations, it means being able to quickly assess the customer impact of an outage.
- For customer service, it means transparency into the work that’s happening so they can address every customer’s request.
Below we’ll walk through how you can get started with the Jira Service Management template for customer service and how to increase visibility across teams to build, ship, and support products all from one unified platform.
How customer support teams get started with Jira Service Management
Get up and running quickly with the customer service management template
To get started, you’ll need to create your first customer service project. While you’re welcome to do so using a custom project, we highly recommend you use the customer service management template which includes out-of-the-box request types and workflows for common external customer support processes like bug reports and feature requests.
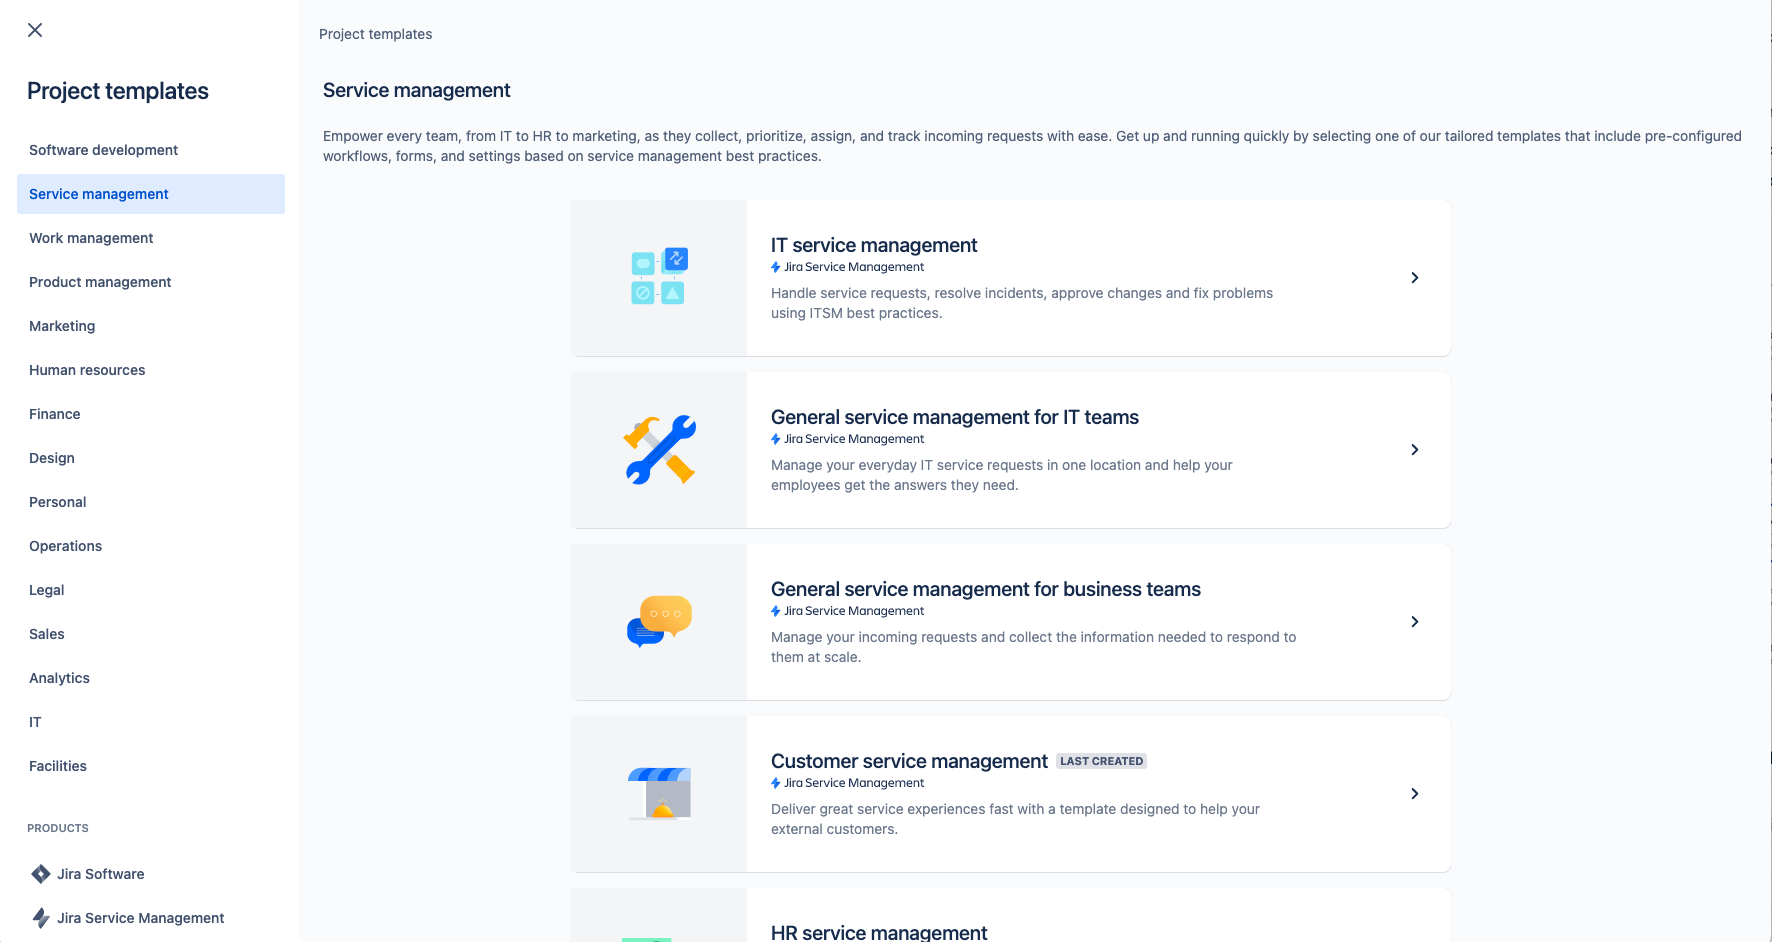
To create a project with the customer service management template:
- Select Projects in the top menu bar > Create project.
- Select the Customer service management project template > Use template.
- Name your project. A project key is automatically generated based on the project name, or you can create your own project key if you wish. We recommend choosing a descriptive prefix for your project’s issue keys to recognize work from this project easily (e.g. “CS”).
- Choose if you want to share settings with an existing service project. If yes, click the box and select the name of the existing project from the drop down.
- Select Create project.
Set up your customer service request types and fields
Request types help you define and organize incoming requests so your team can capture relevant information and help employees more efficiently.
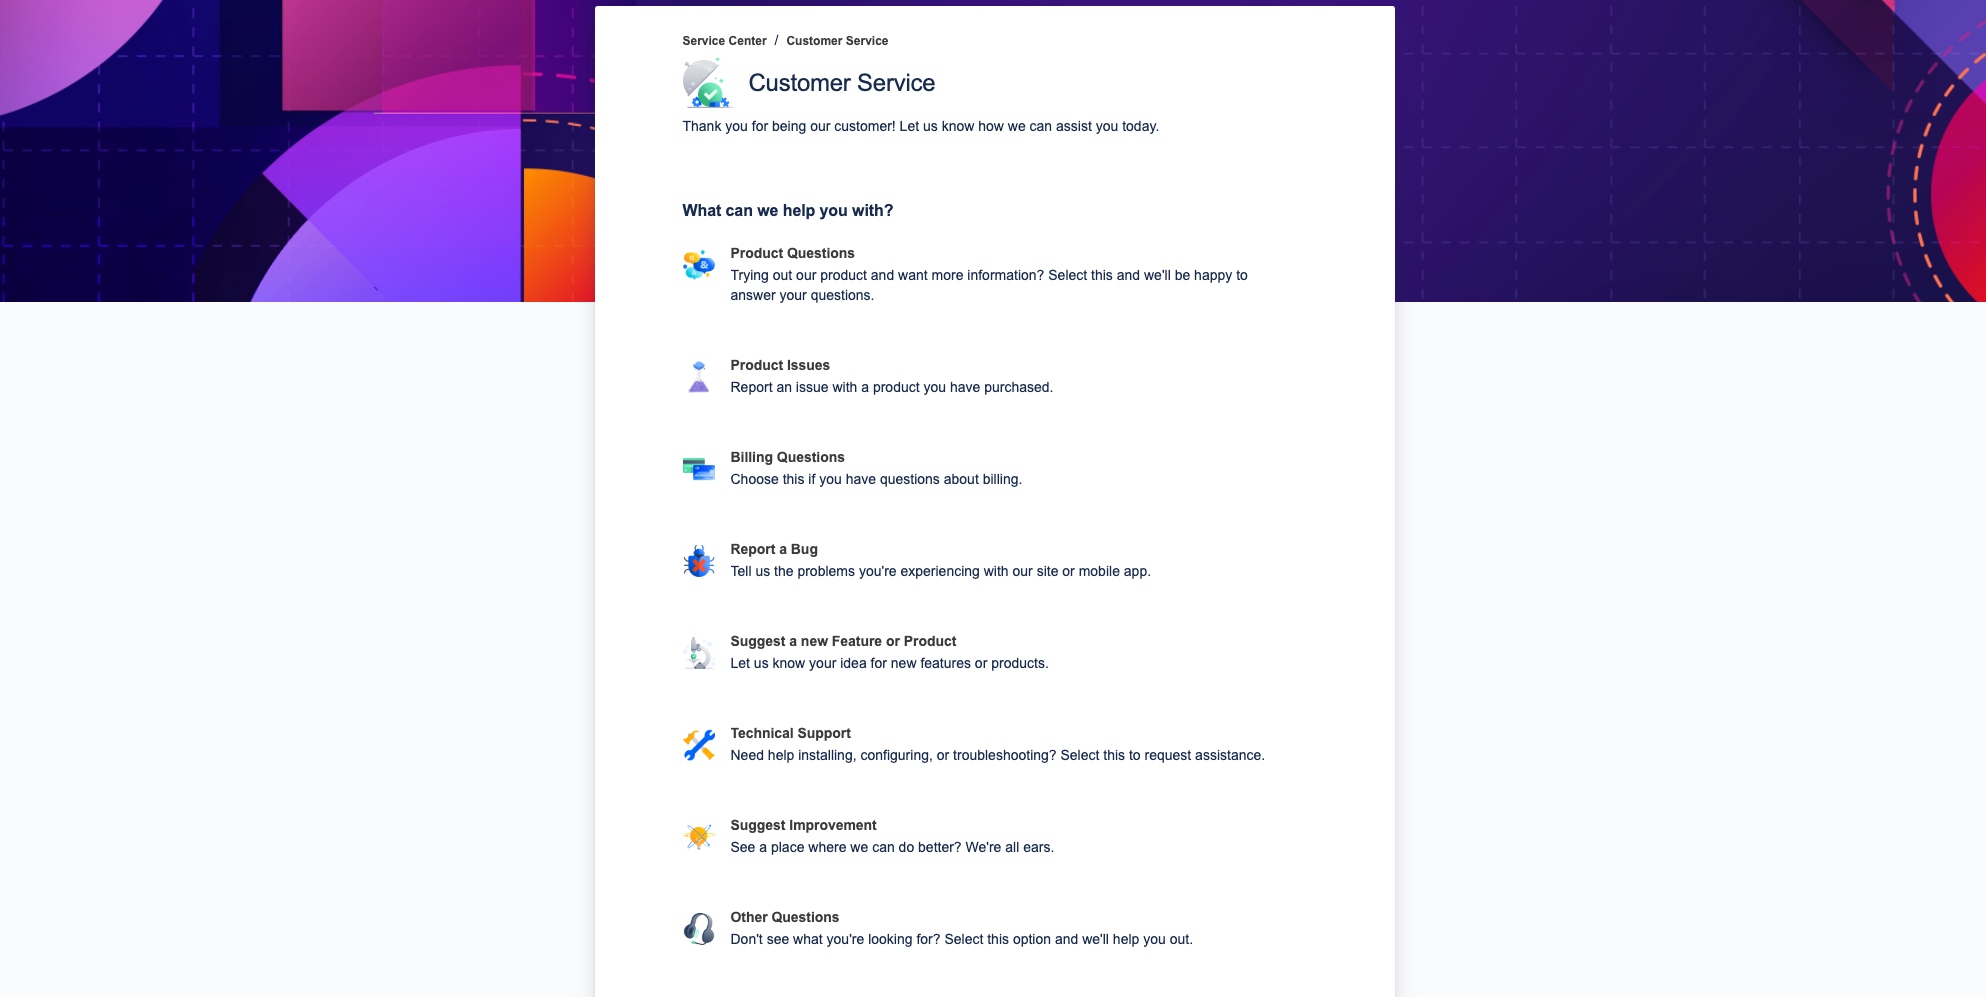
The customer service template includes the following out-of-the-box editable request types for common external support issues:
- Licensing and billing questions
- Product trial questions
- Report a bug
- Suggest a new feature
- Suggest improvement
- Technical support
- Other questions
- Developer escalations (hidden from portal)
- Emailed request (hidden from portal)
In addition to these default request types, you can create your own that are specific to your team’s external support services, like data privacy reviews, licensing updates, order status, and more.
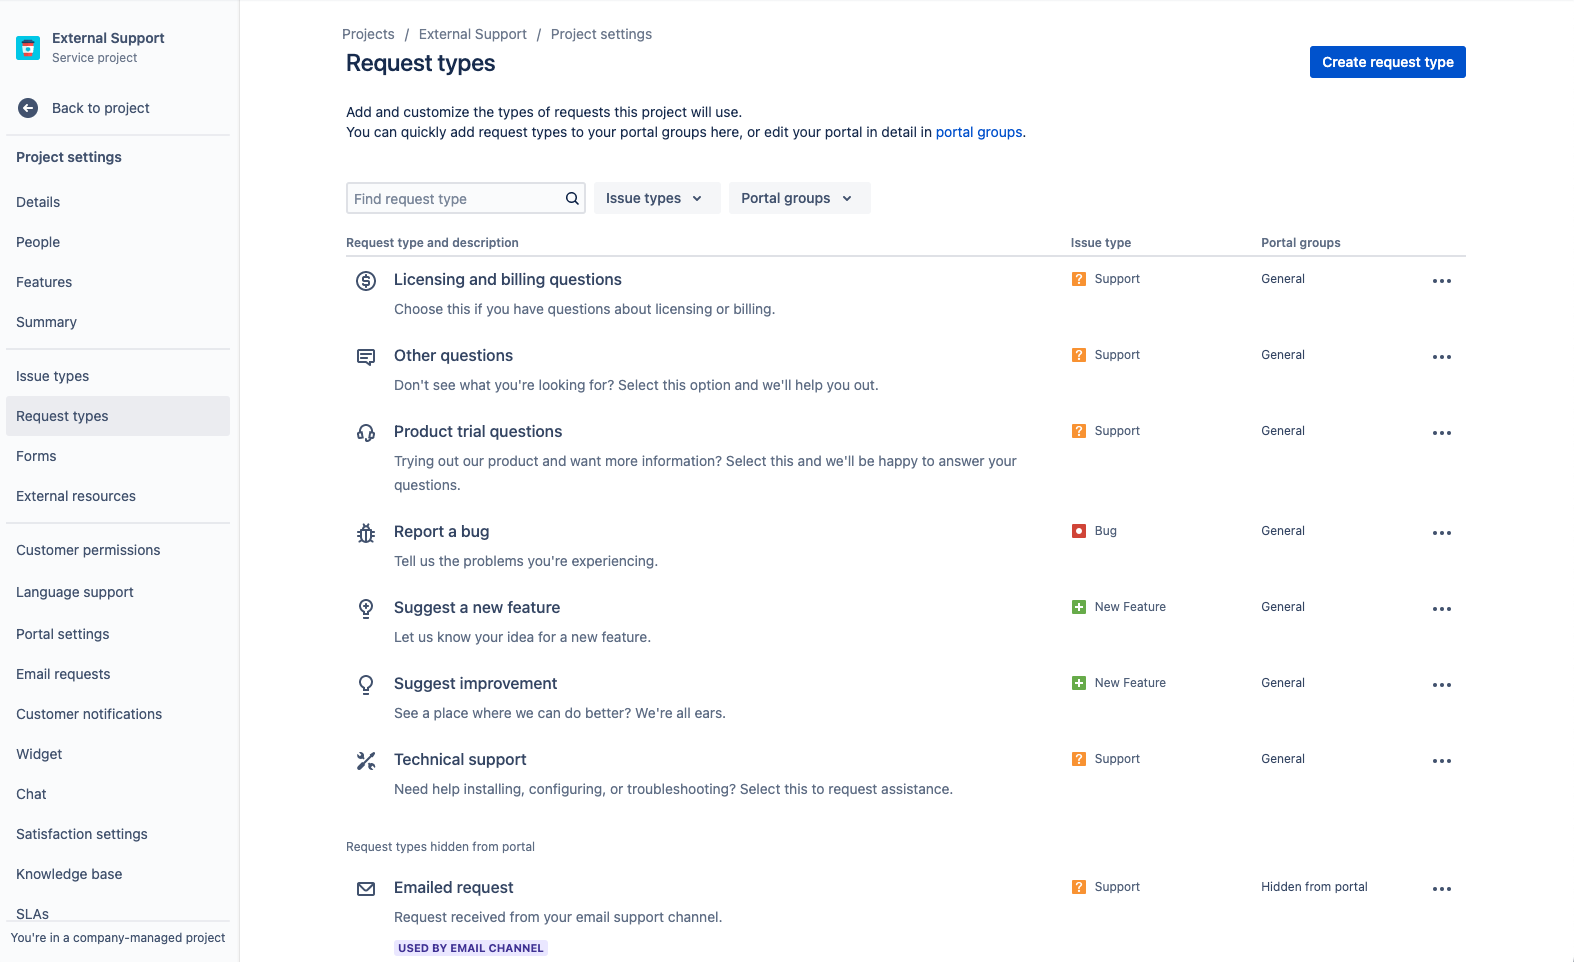
To access your default request types or create your own:
- From your customer service management project, select Project settings in the left-hand menu.
- Select Request types.
- Select an existing request type to edit or create a new one by selecting Create request type.
Add fields to your request types
Request types are automatically configured with multiple fields (e.g., Assignee, Reporter, Request type, Description, and more). Fields allow you to customize the information captured from and used by your agents. You can also add custom fields, which provide additional information that’s helpful to your team.
After your desired customer service request types are created, simply search for, drag, and drop fields from the right-hand column as needed to ensure you capture all the necessary information. Field values can also be edited by simply selecting the field.
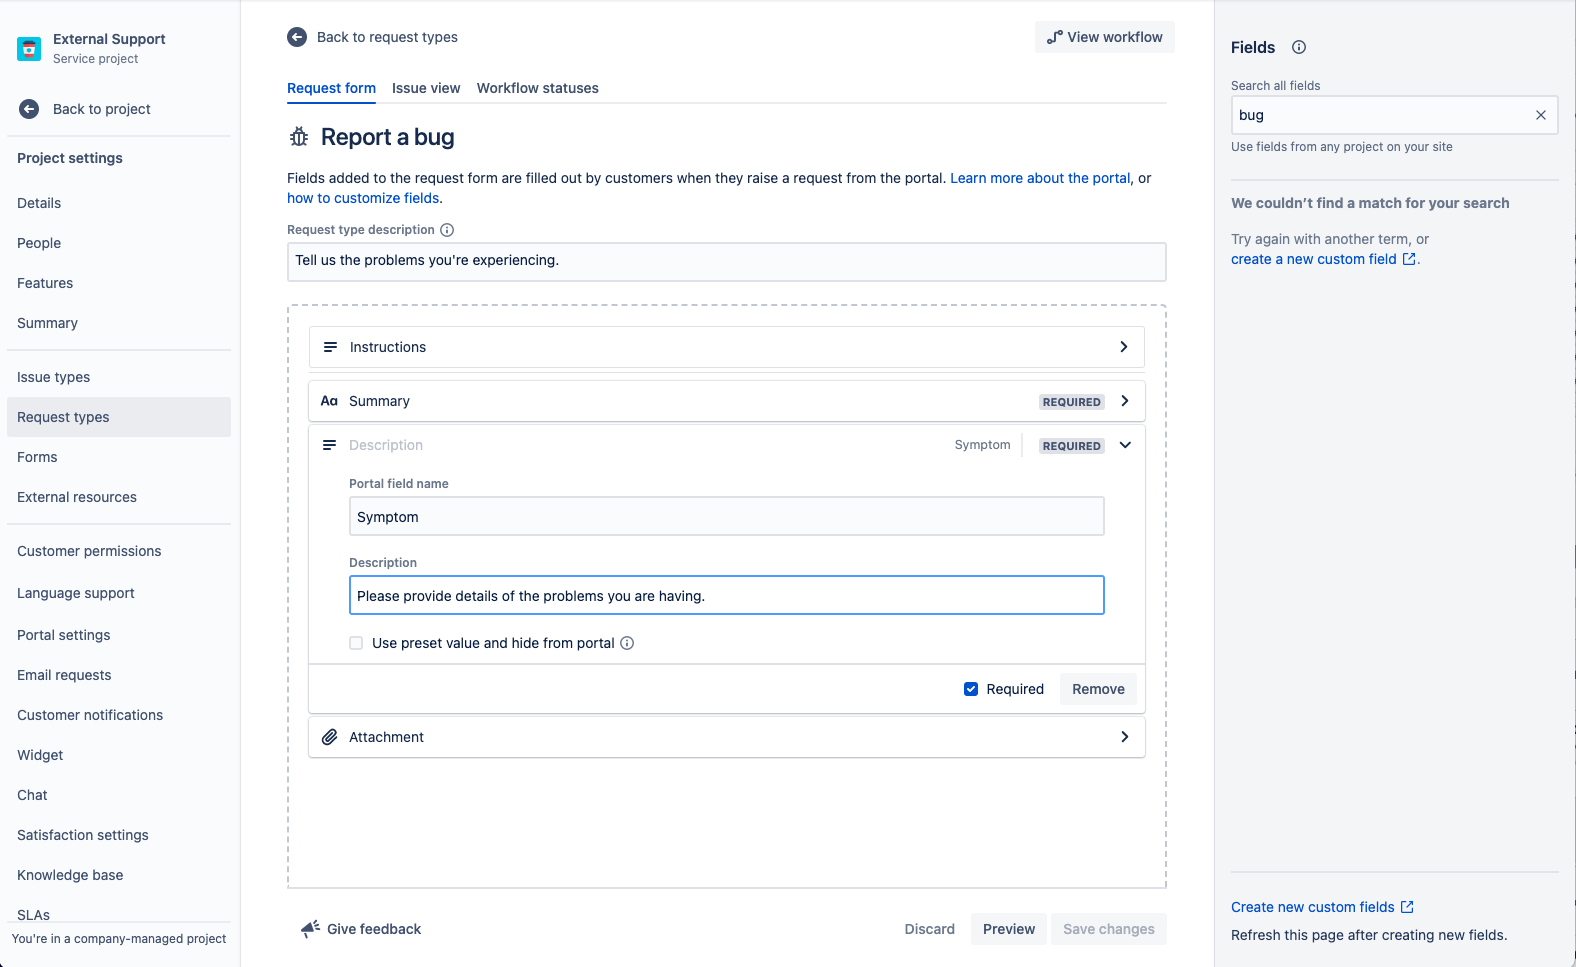
When you add fields to your request types, they appear in the portal request form. Fields can be required or optional for customers. You can also add issue view fields for your agent’s eyes only.
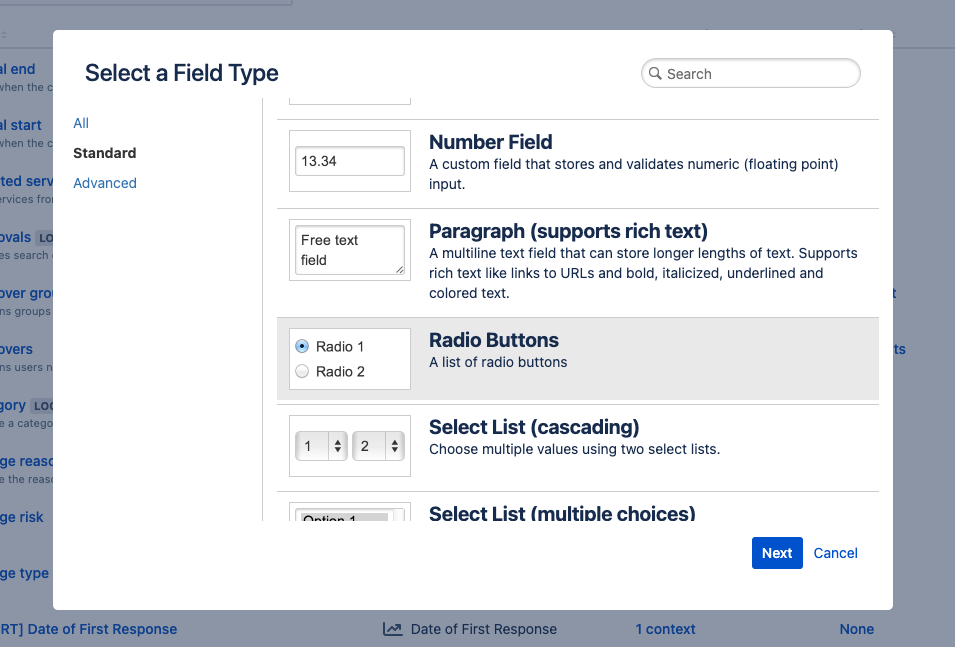
If the fields you’re trying to add aren’t available, you’ll need to create them first. Choose from a variety of options like checkboxes, labels, radio buttons, and more.
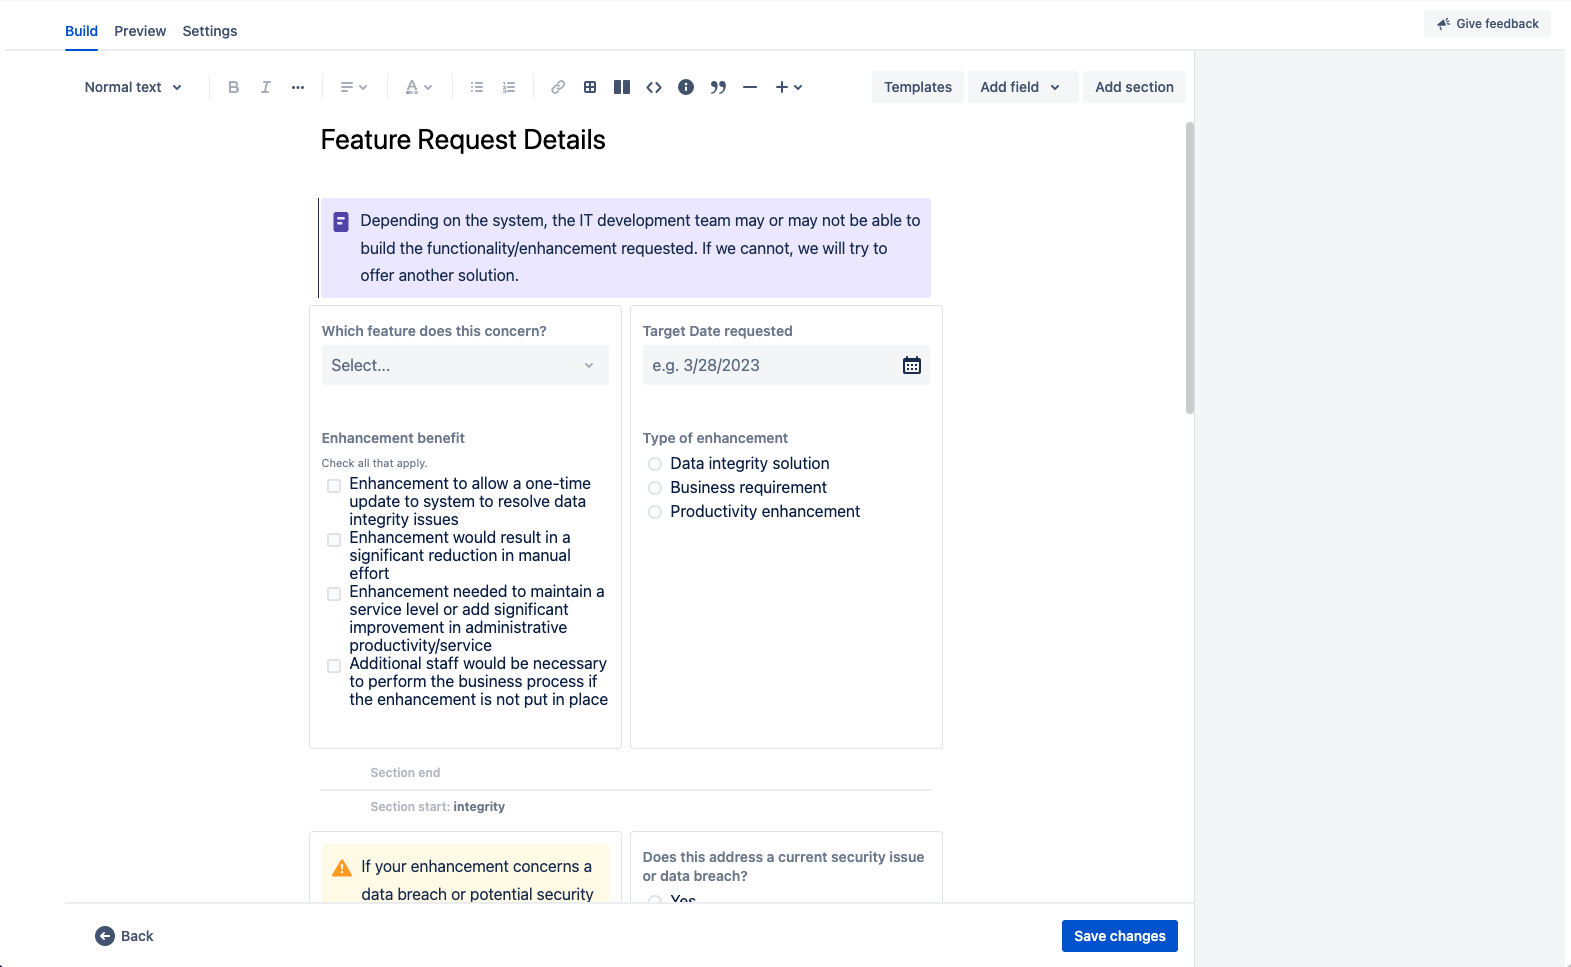
Capture more relevant information faster with forms built for customer service teams
Forms can use conditional logic to dynamically show or hide fields, and can include headings, field validation, tables, and rich formatting. Forms include all of the fields you need in one form to ensure employees know exactly what information to provide.
You can use the pre-configured queues in your service project, or create your own custom queues that organize requests in a way that makes sense for your team. For example, your team can create queues for requests from a specific customer or particular account tier, or for issues that have breached SLAs. The possibilities with queues are endless, so you can easily find a setup that works best for your team.
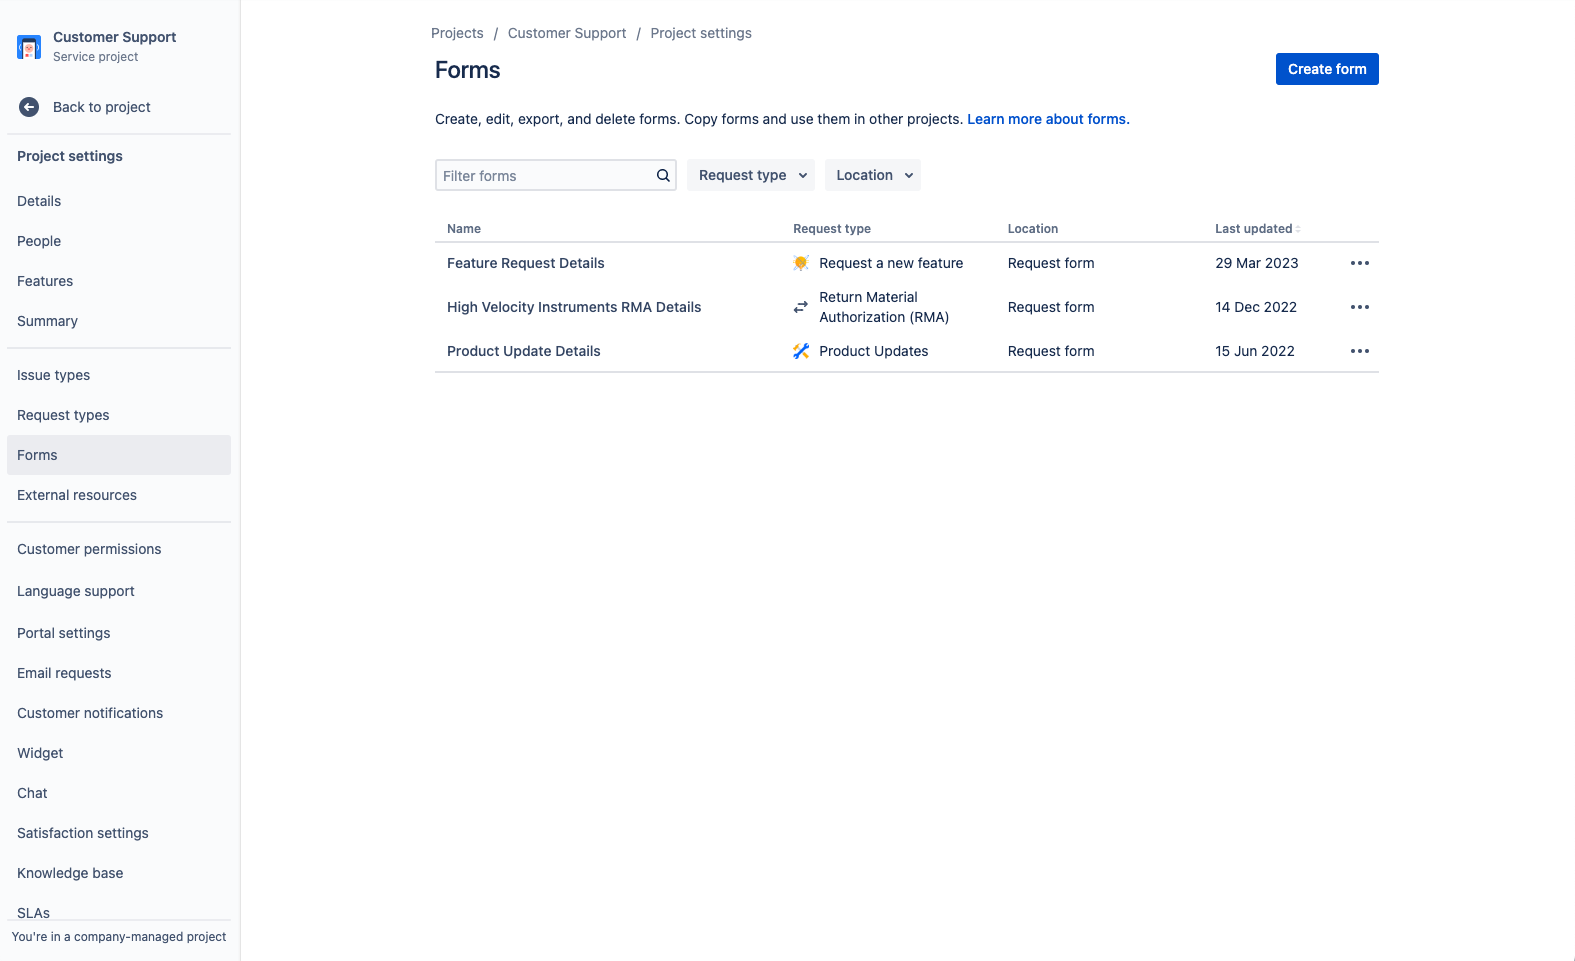
To access your forms in Jira Service Management:
- From your customer service management project, select Project settings in the left-hand menu.
- Select Forms.
- Create a new form by selecting Create form.
Set up your customer service request channels
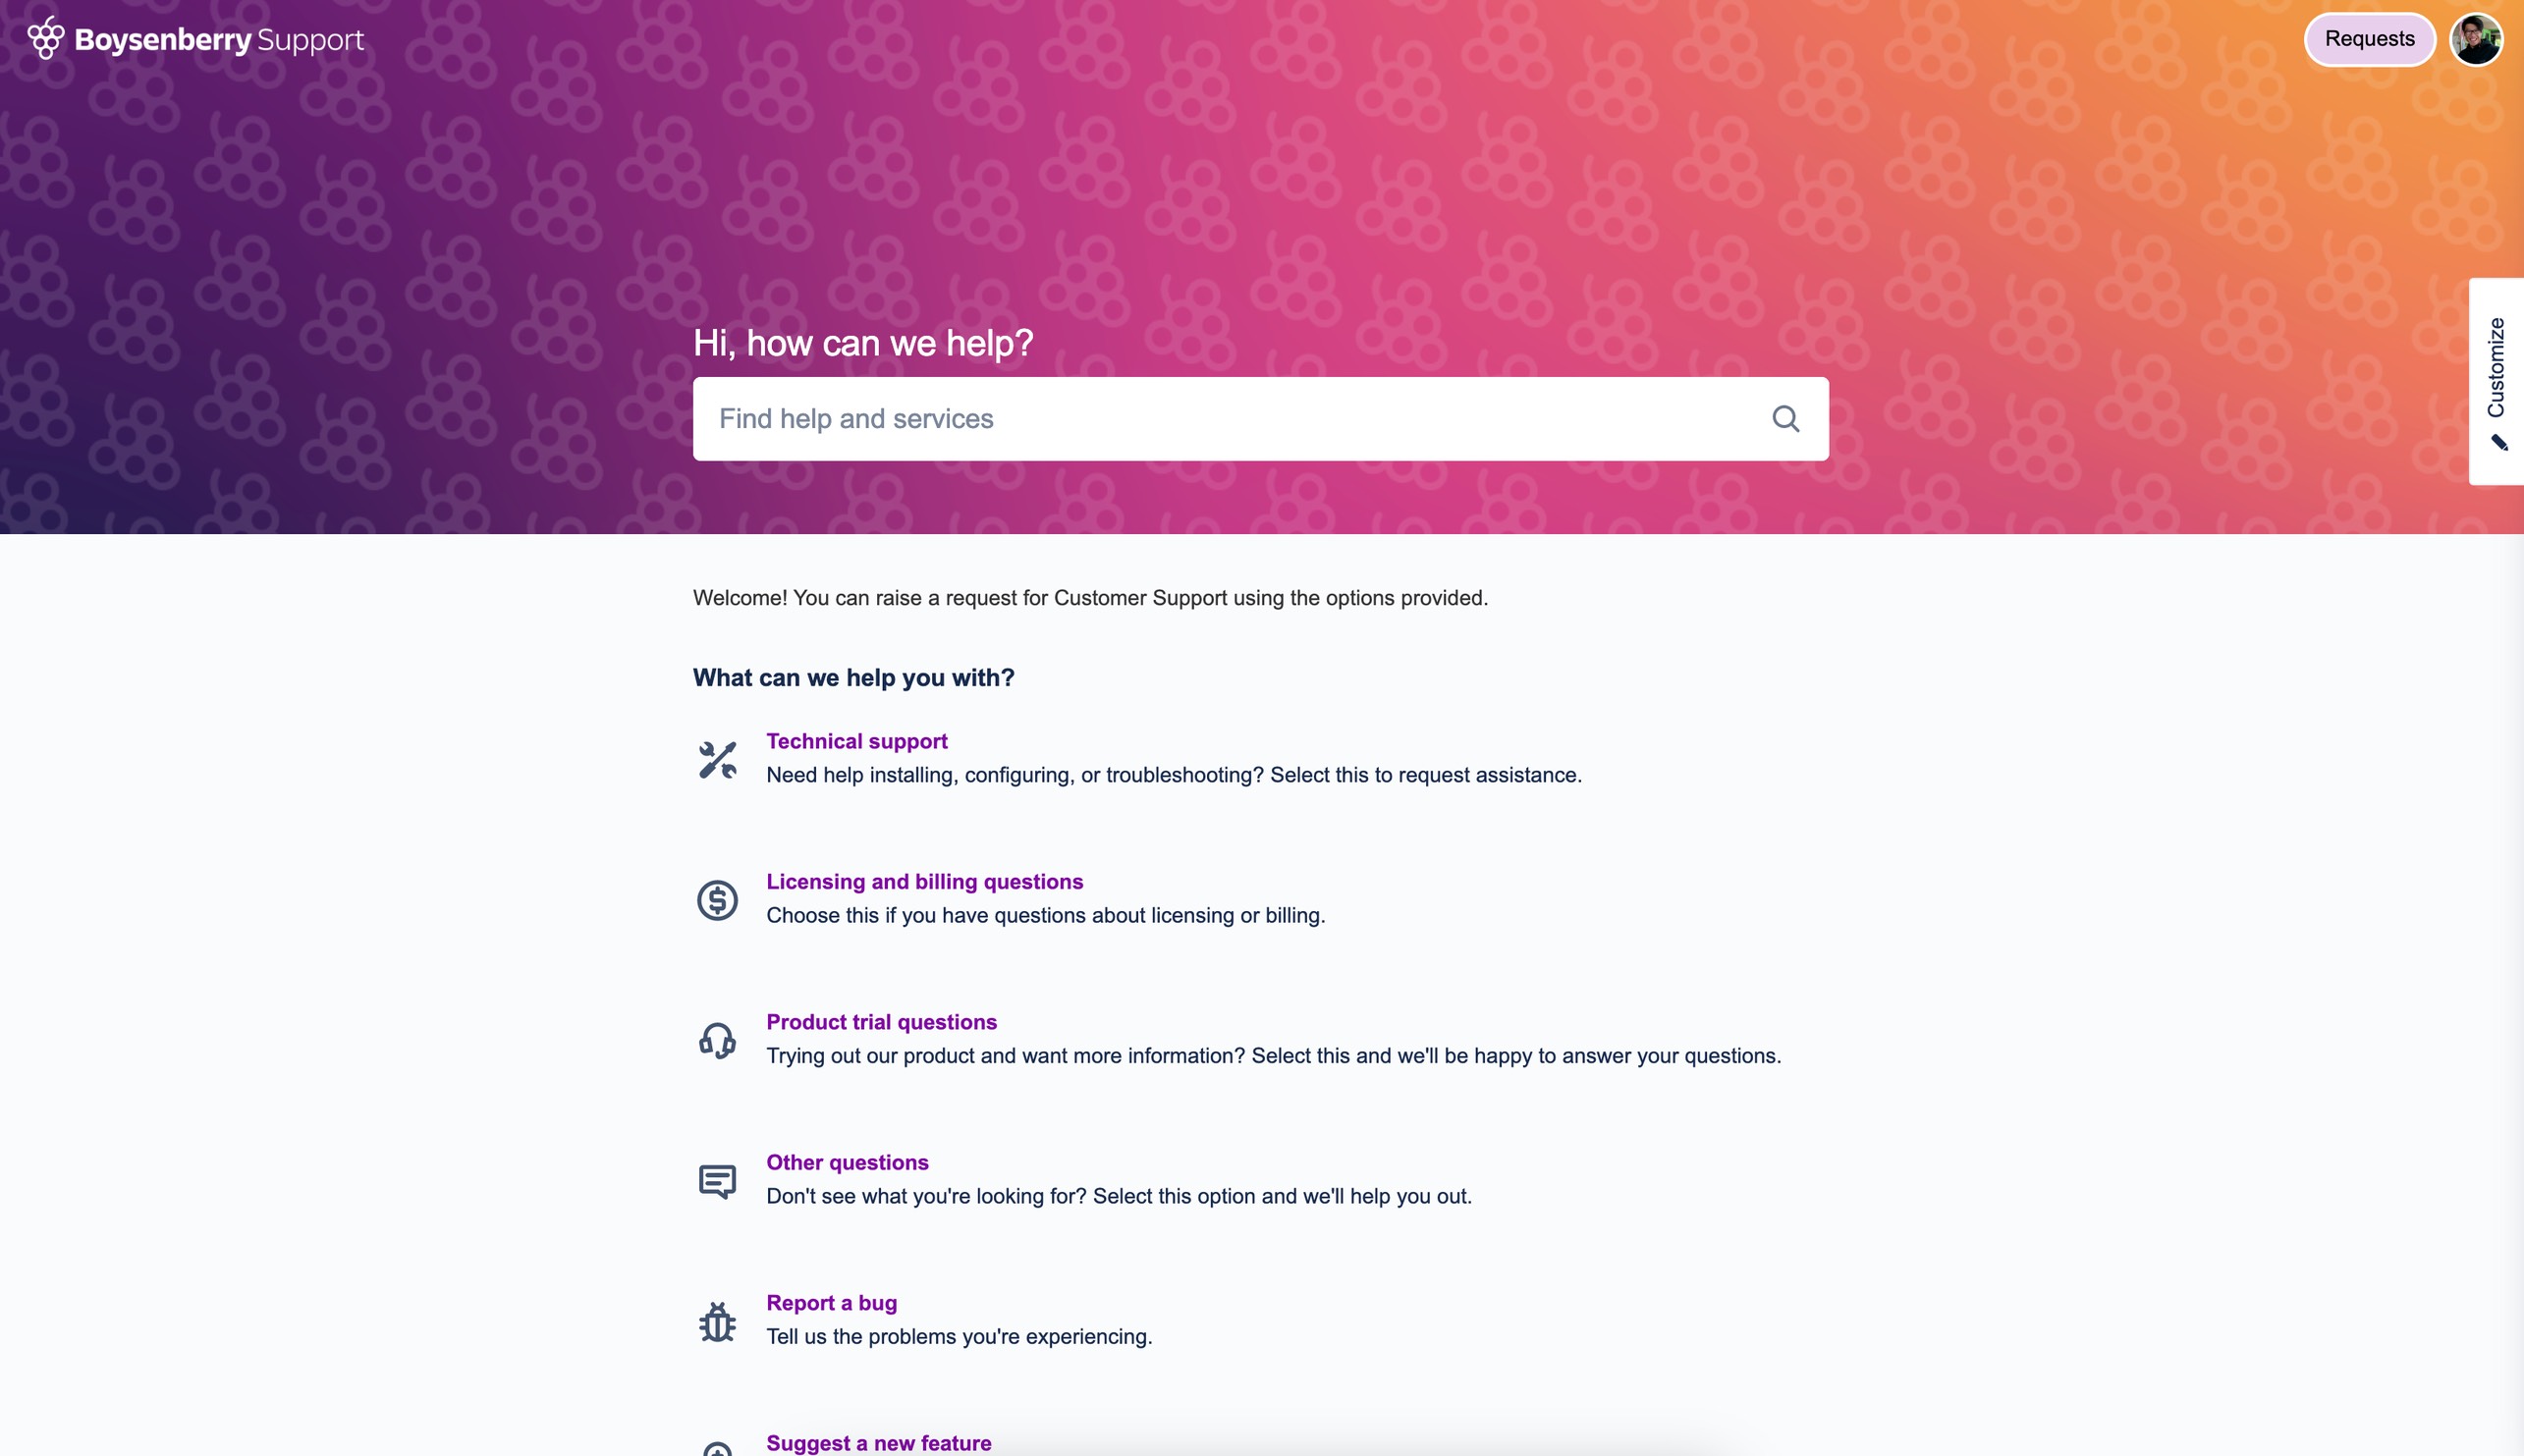
Does your external customer support team have a dedicated email address or chat channel? Connect those channels to Jira Service Management in addition to the included help center portal so you can streamline request intake and maintain work in one central location. Below is an overview of the primary channels available to your team in Jira Service Management.
The help center portal
Your customer service project has a customizable online help center where you can incorporate elements of your brand into the layout for a seamless experience from start to finish. From the help center, customers and partners can browse all service project portals, submit requests, and search your embedded knowledge base to help themselves, potentially deflecting incoming requests. You can further customize by creating topics, which let you group request forms, articles, and external resources.
Your customer service project comes with a pre-configured cloud email address that you can send to customer to start using right away. You can also add a custom email address to link to an existing support account used by your customer service team. Requests sent to the designated email address are automatically added to your queues, so your team doesn’t have to worry about missing requests or managing multiple inboxes.
Embeddable widget
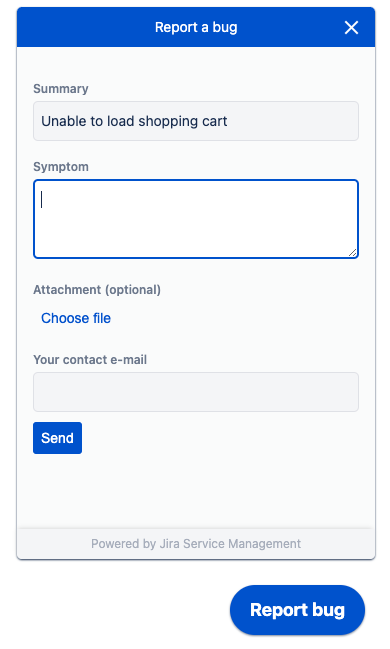
Let your customers raise requests directly from any website you control with an embedded request form widget. You can customize the appearance and available fields in your project settings, including adding knowledge base articles and a search bar.
Additional channels
Some customer might prefer reaching out to you via phone, start a conversation on your website or use social media. To activate additional channels and integrations, we recommend considering working with one of our solutions partners to tailor a solution that fits your needs.
Add context to your customer and organizations
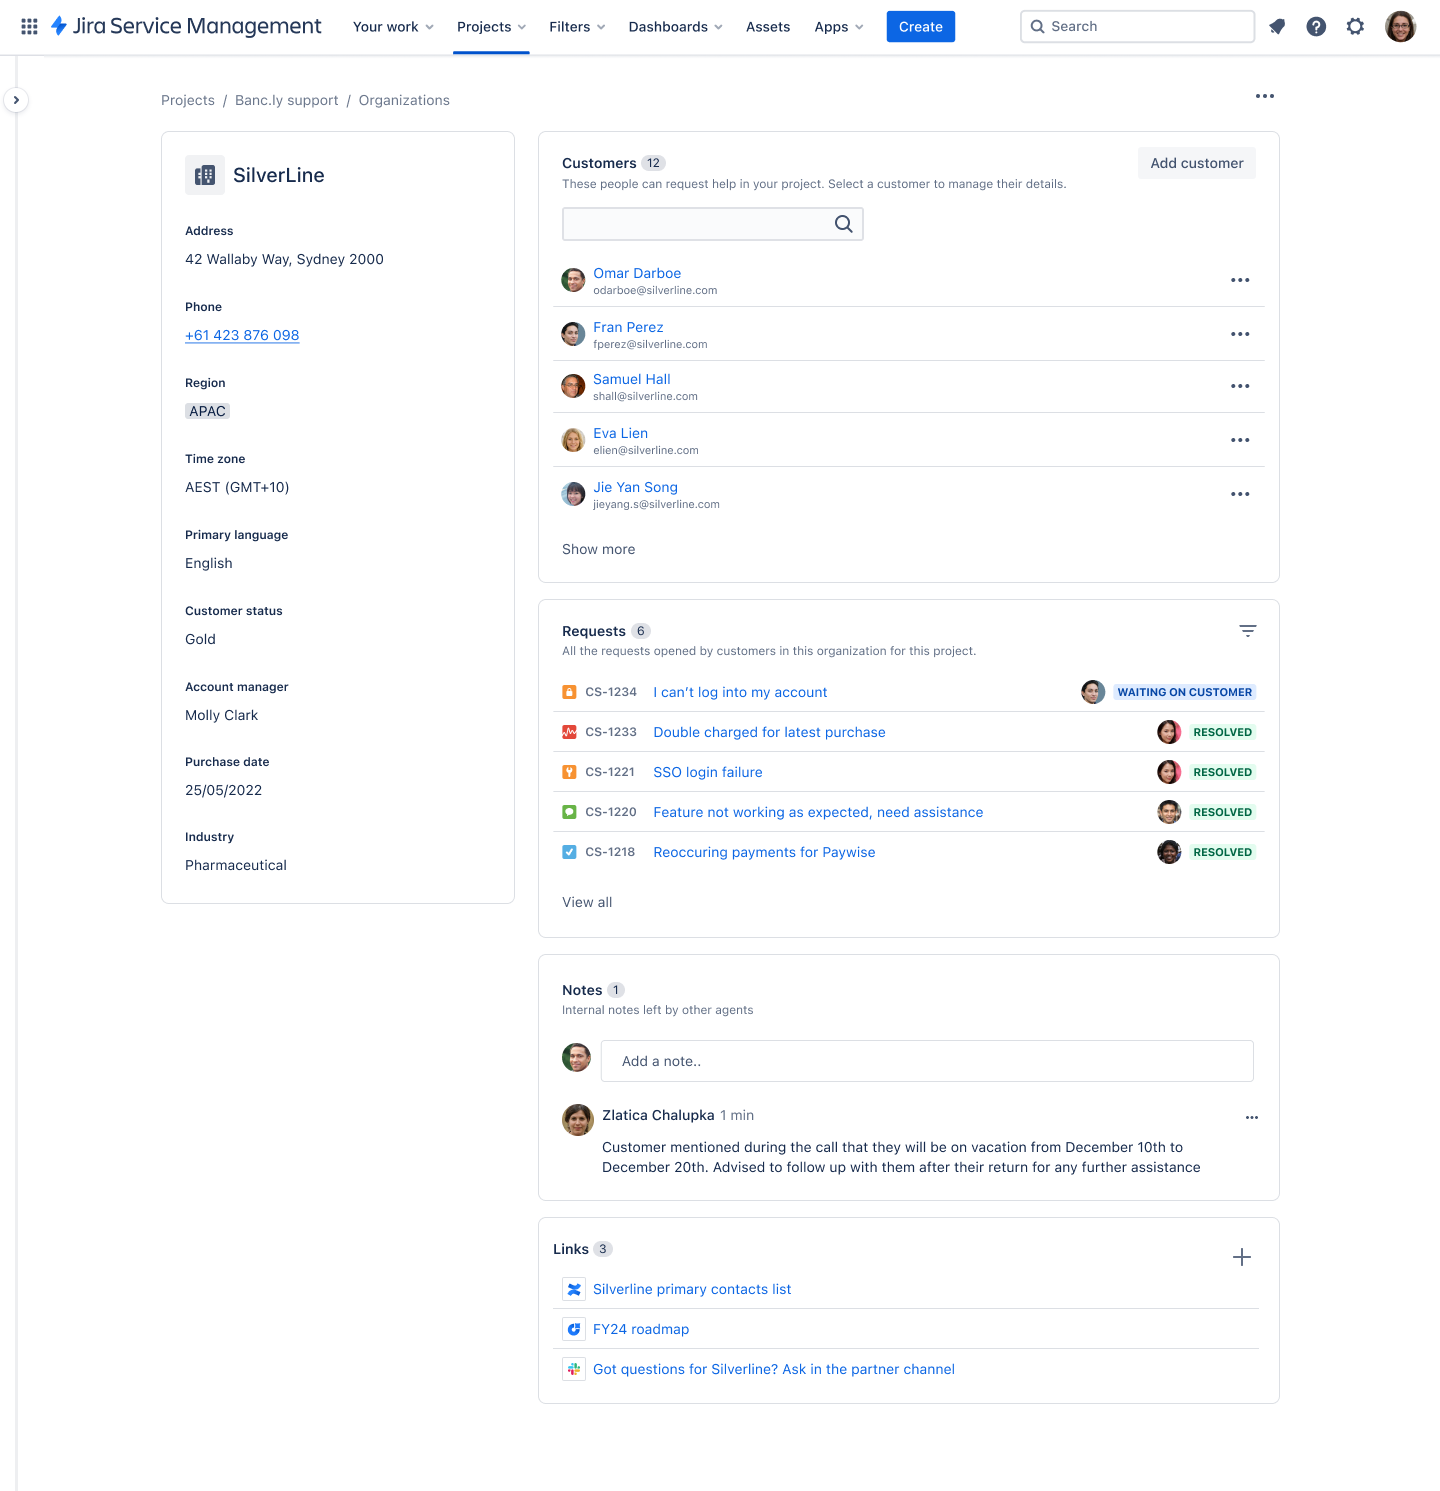
Customer context is critical for efficiently understanding the complete picture around a support request and tailoring the response to that help-seeker’s unique needs. Being able to instantly see details about the customer making a request and their organization empowers support agents to work quickly to solve their issue.
Jira Service Management puts critical customer context at your fingertips, including things like location, purchase history, past requests, account manager, support tier, and more. Not only can these details be accessed through customer or organization profiles, but on the issue view as well. This way, agents will have all the context they need to resolve a request without leaving the issue.
Import customer and organization details
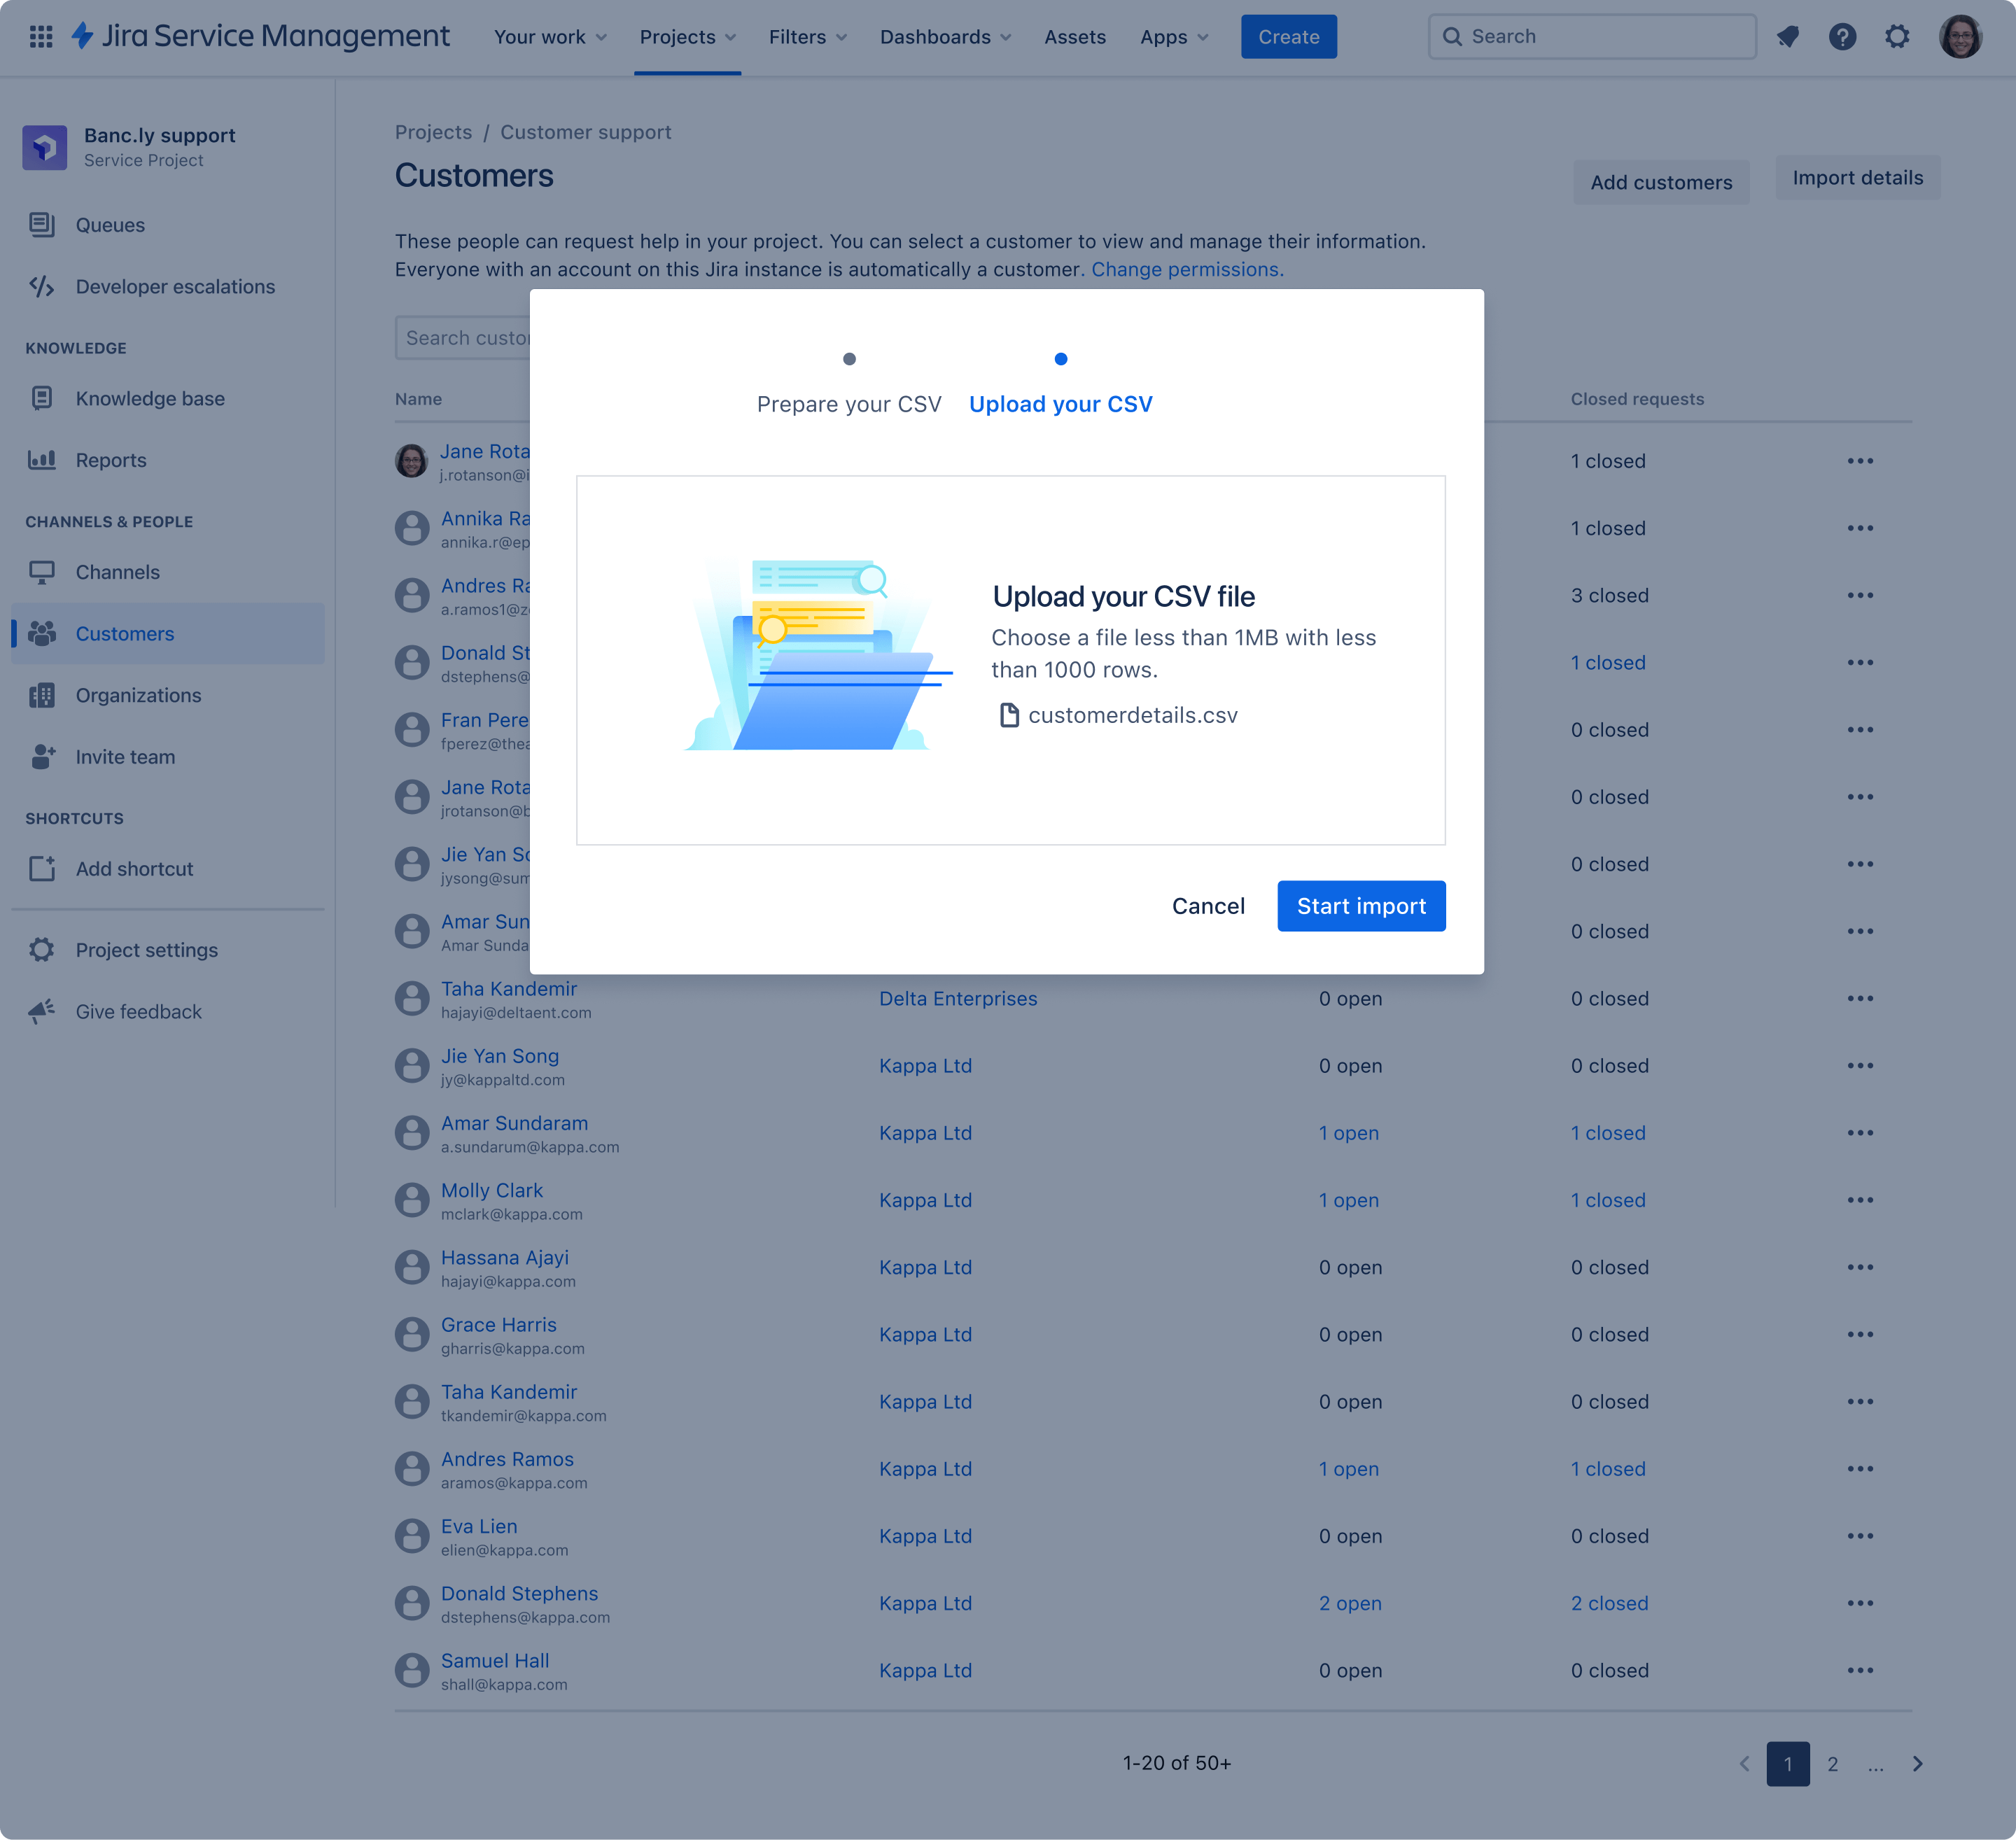
Quickly and easily import customer and organization details from anywhere, through CSV files or APIs, so you can use this information to provide better customer service without switching tools. You can do a bulk initial import of data from a CSV file, and later set up an ongoing sync from your CRM tool of choice using APIs.
To import details via CSV
.png?cdnVersion=2664)
Pro tip: If customers or organizations from other projects are in your CSV file, you can choose whether you want to add them to the project you’re importing to at the same time as importing their details. You will be given this option before you upload your CSV file for importing.
Learn more about importing customer and organization details via CSV
To import details via API
Read about our available customer service management APIs here. You can use these APIs to update details in Jira Service Management, or to sync details from Jira Service Management back to your CRM or other system.
You can find APIs to manage create and manage customers and organizations within Jira Service Management here.
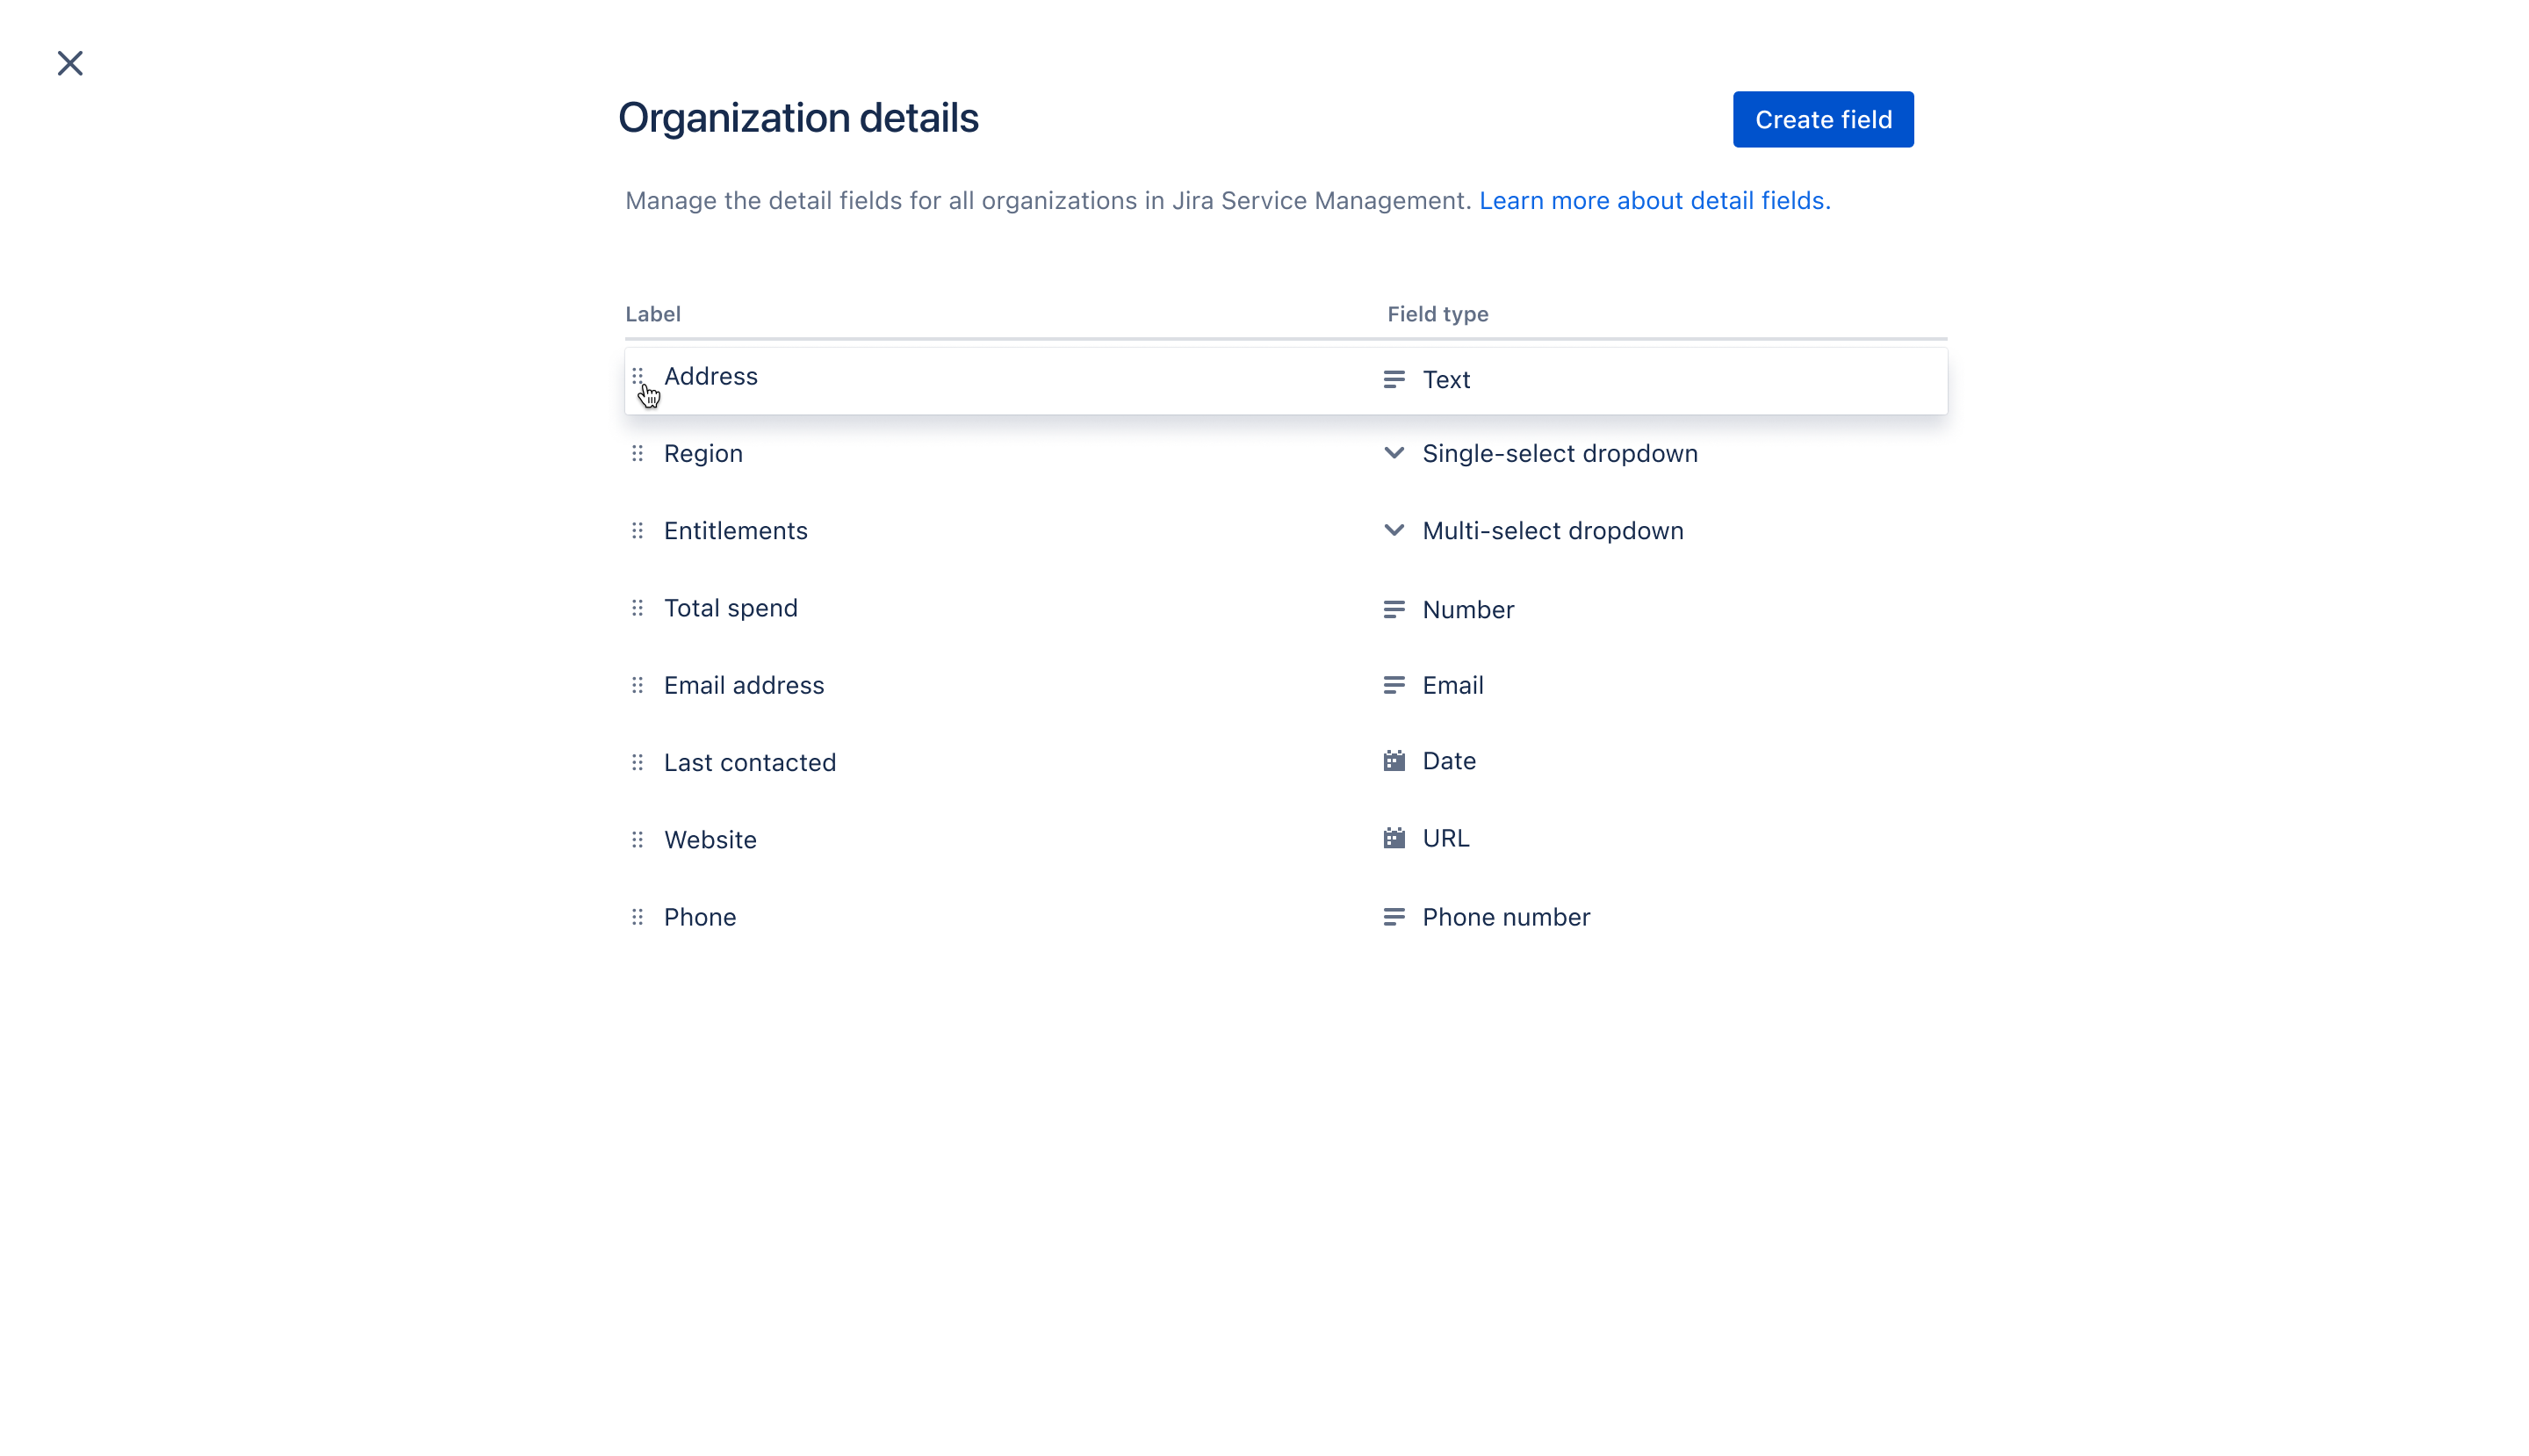
Make profiles your own by reordering details
Reorder your detail fields on customer and organization profiles, so you can organise information however works best for you. Simply navigate to a customer or organization profile page, select ‘Manage details’ from the top right meatball menu, and drag into the right order.
Create and optimize your queues
Your queue brings together requests from all your intake channels to help you track, triage, and assign incoming customer support requests, as well as see high-level information on an issue like summary, status, and customer name.
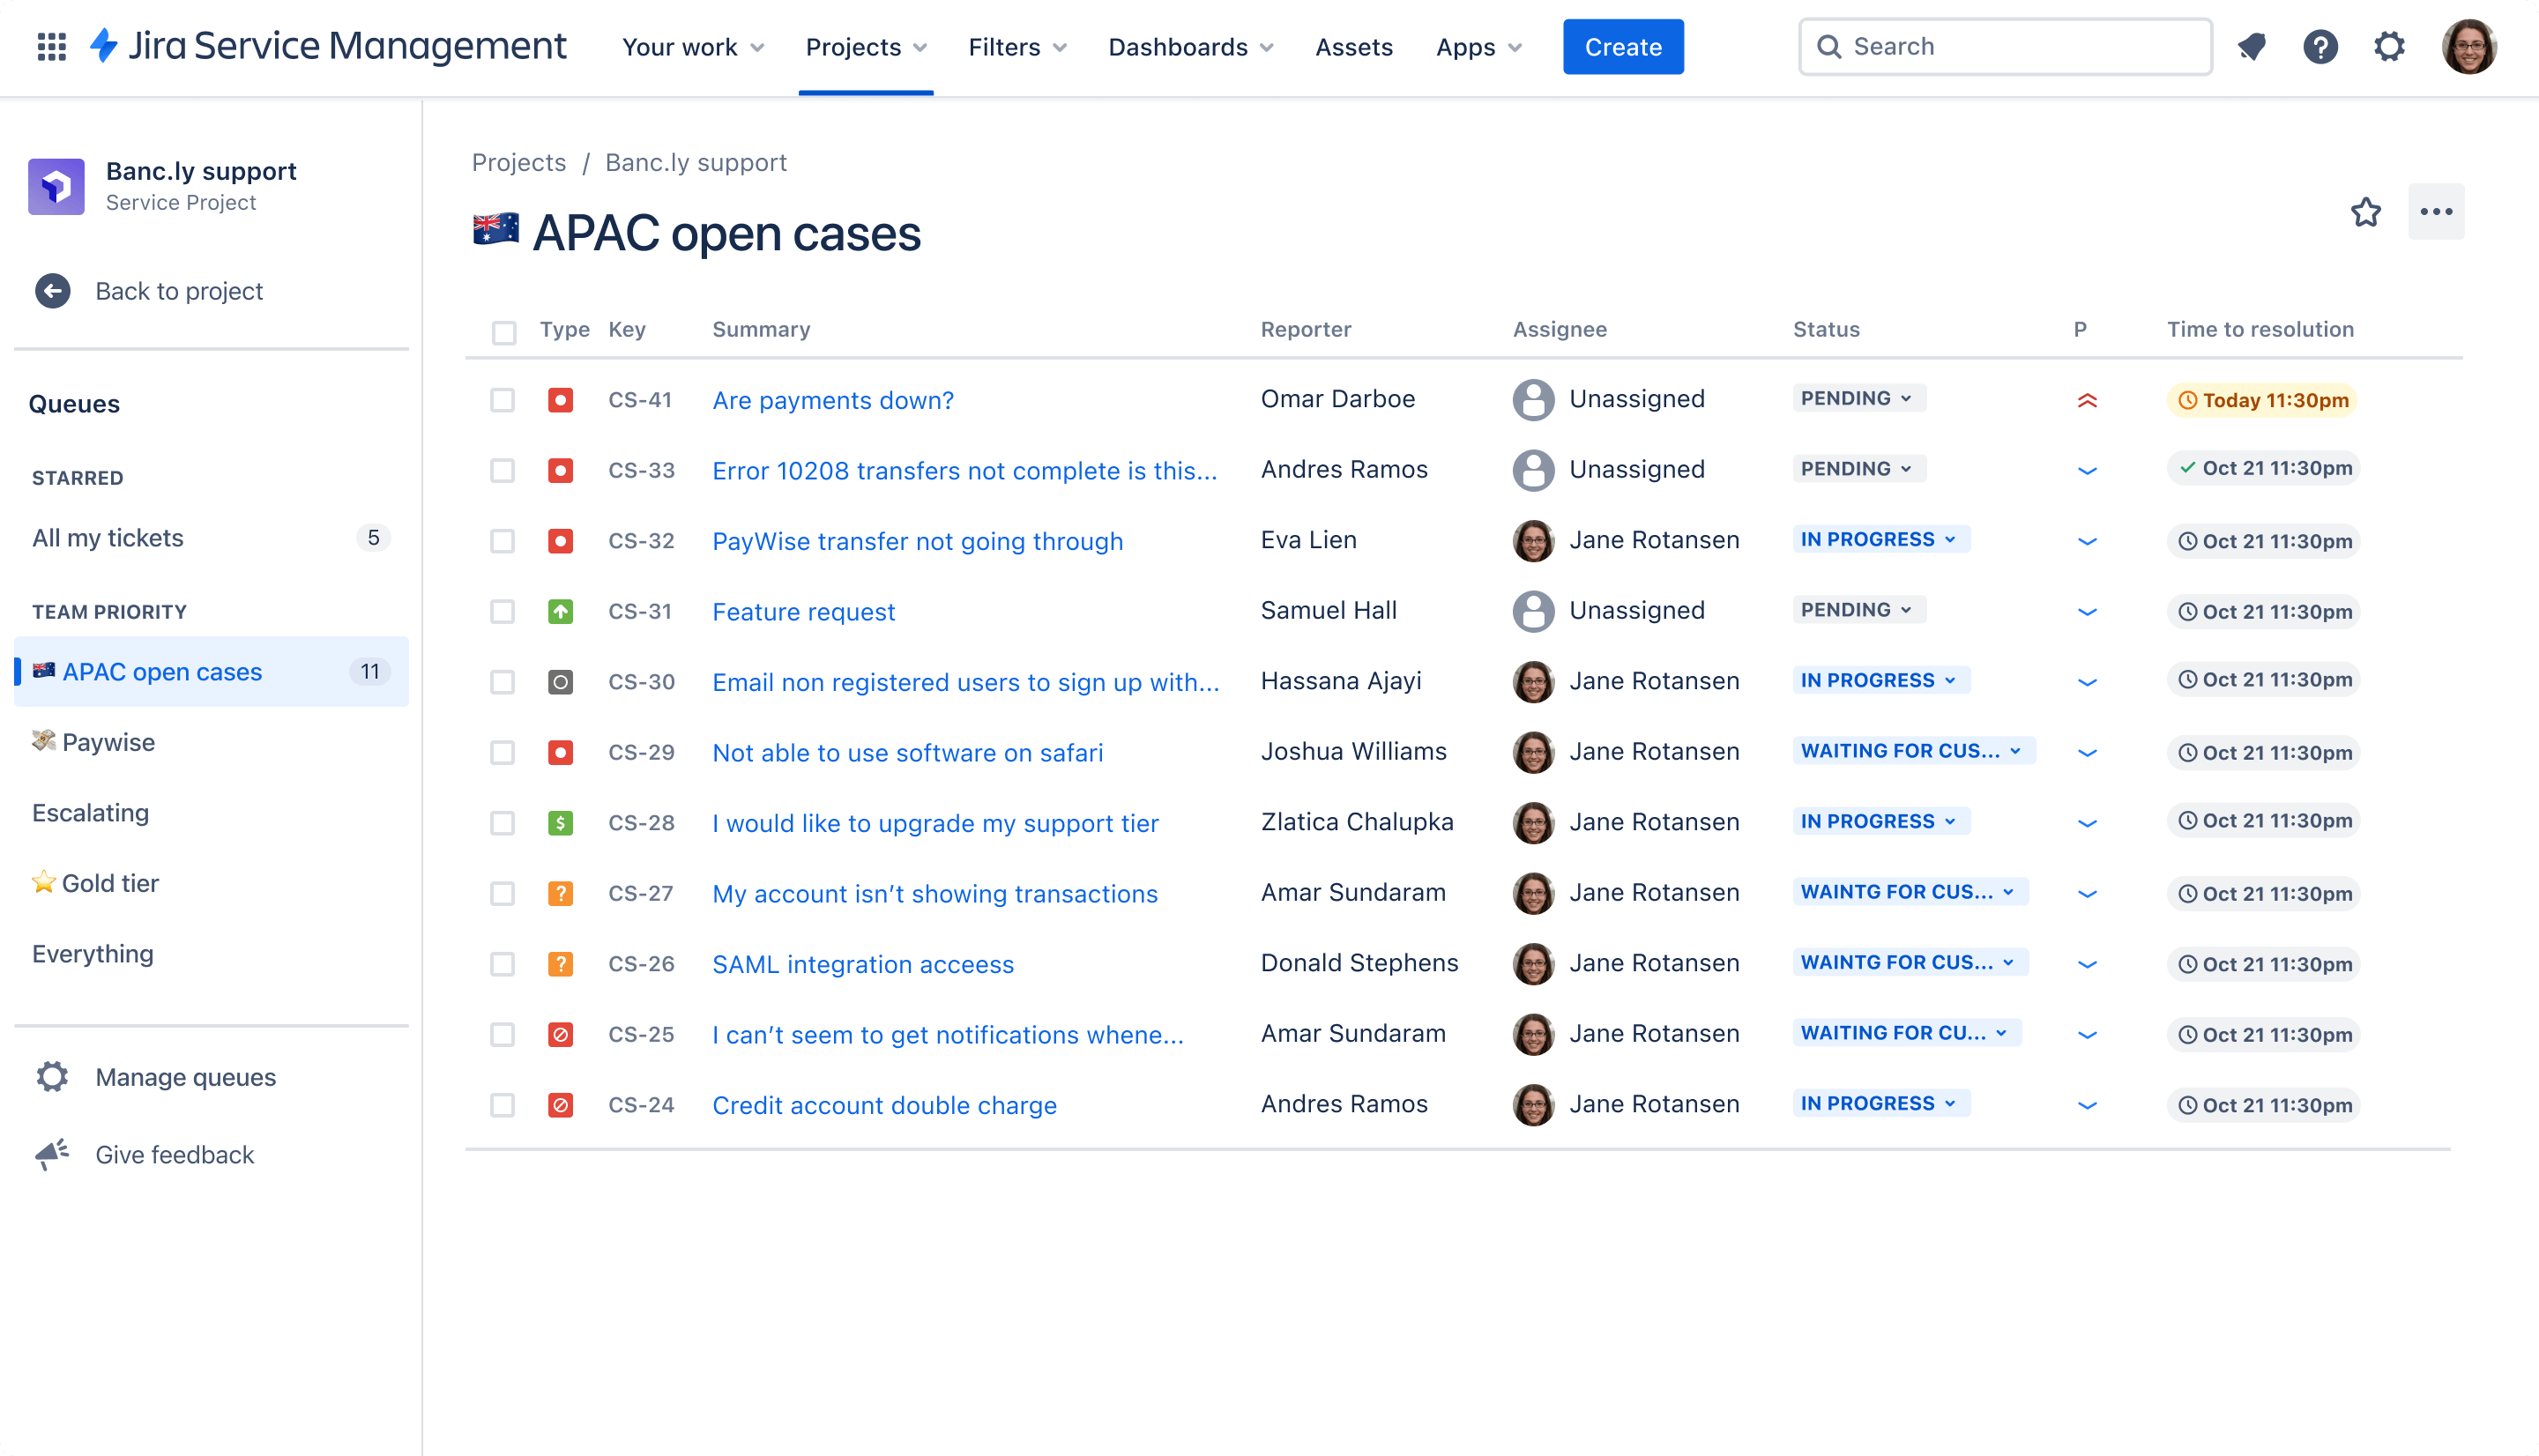
Pro tip: Arranging queues into groups can help your agents stay on top of the work that’s most important to your teams, for example adding a queue for Platinum tier customers to the Team Priority group so that they appear to your agents at all times. You can also create queues based on customer details like region, support tier, and more using Jira Query Language (JQL).
Issues within a queue are normally sorted by a Service Level Agreement (more on that below) or goal for your team's service interactions. A clock on the issue indicates the time until your team's next target is due.
To create a new queue:
- From your service project, go to Queues.
- Select Manage queues from the navigation sidebar.
- Select Create new queue and enter a name.
- In the Filter by section, select the required issue, status, resolution and label from the drop-down menus. You can also select Advanced to enter a JQL statement.
- If required, select criteria from the More drop-down menu.
- If required, select an order from the Order by drop-down menu.
- From the Columns section, update columns by dragging and dropping to the required location. This is the order the columns appear in your queue.
- Select Create.
Set Service Level Agreements (SLAs)
Measure customer satisfaction and improve their service experience with Service Level Agreements (SLAs). Keep track of deadlines based on elapsed time or request categories, and use automated notifications and alerts to prevent breaches.
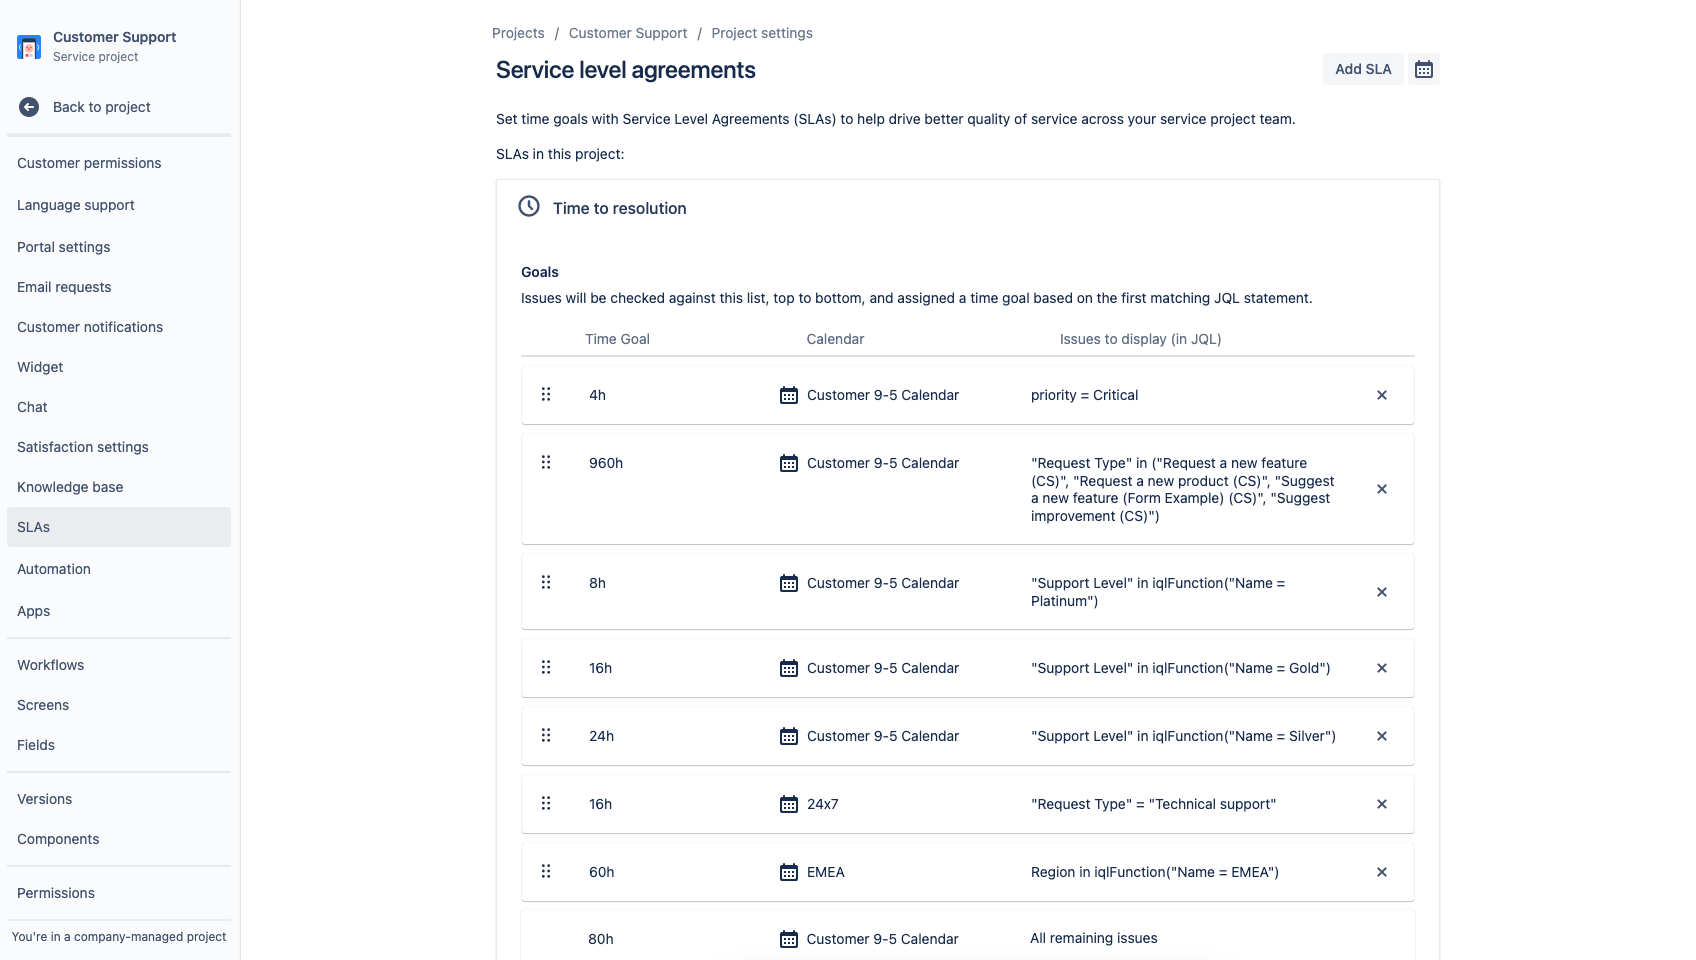
Project admins can create SLA goals that specify the types of requests you want to track and the time it should take to resolve them. From there, you can define the conditions and calendars that impact when SLA measurements start, pause, or stop (for example, stopping when your office is closed for a public holiday). Once you have set up SLAs for a project, agents can view their SLAs and plan which tasks need to be resolved first and the timeframe in which they should resolve them.
Pro tip: We recommend assigning all your customers a tier (e.g. Platinum, Gold, Silver, Bronze) that maps to a designated SLA for customer support. This ensures that your most important customers get their issues resolved quickly.
To add or edit an SLA:
- From your customer service management project, select Project settings in the left-hand menu.
- Select SLAs.
Add your customer service team to your project
Once your project is ready to go, it’s time to add the rest of your team. You can start inviting team members by adding each team member as an agent to your service project.
To add team members:
- From your service project’s sidebar menu, select Invite team.
- Enter the email(s) of the users you would like to add as an agent.
- Select Invite.
- Your agent is added to the Service Project Team role and receives an email with a link to the service project.
Closing the loop between customer support, development, and product
Connect customer service to your development team
Some requests can be fully resolved by frontline support teams. Others, require escalations to subject matter experts like developers to resolve. To allow developers to work on the escalations, project admins must also add them as collaborators to their service project either individually or as a group.
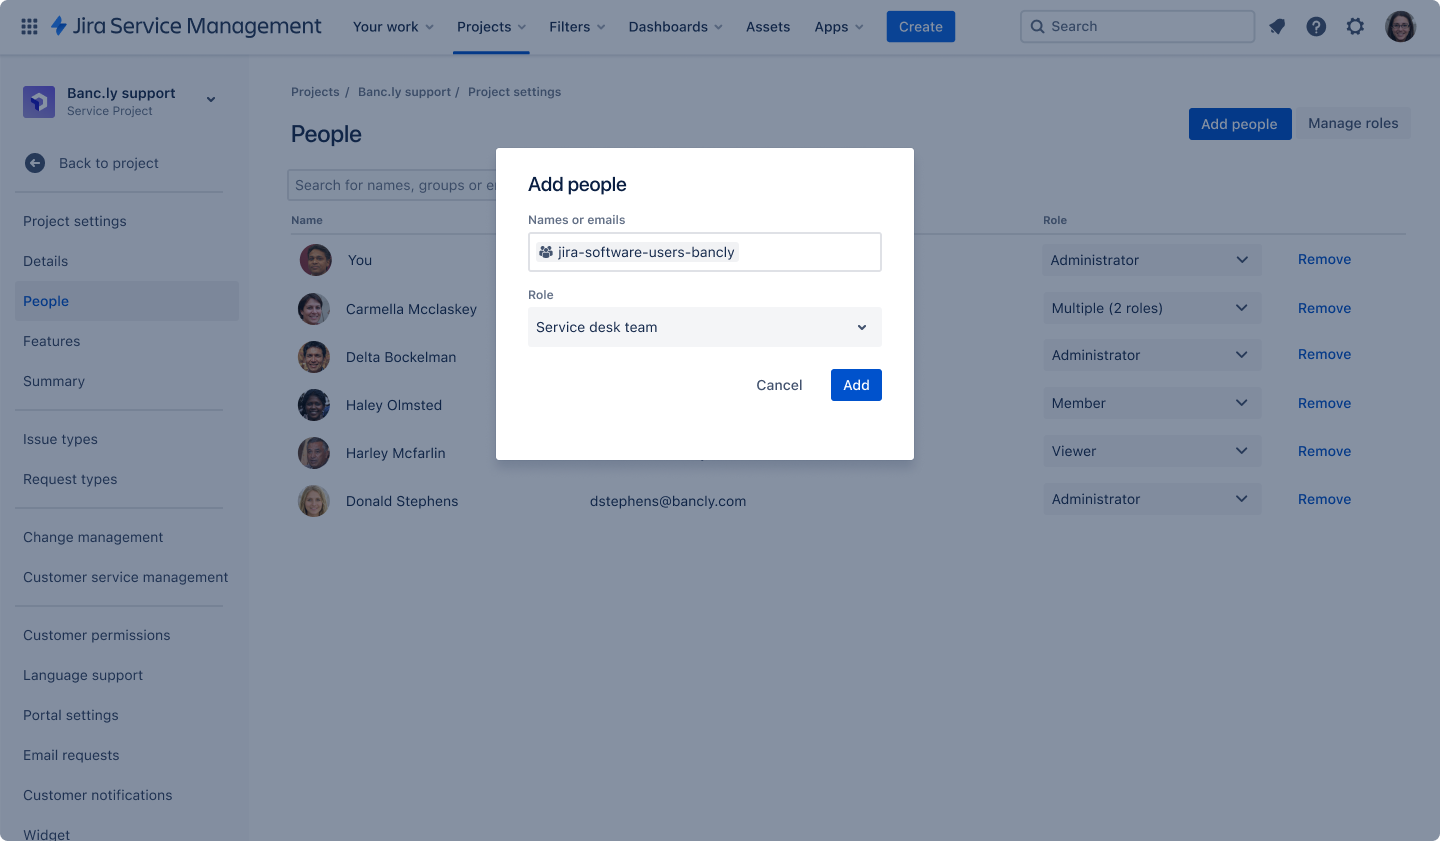
To be a collaborator, developers should be added to the Service Desk Team role in your service project. Once they are are added, they can view, comment, and work on developer escalations easily by using the dedicated view.
Escalate support requests to development teams
To allow a seamless collaboration between developers and customer service agents, project admins can enable developer escalations for their projects. Here, developers can view, comment, and collaborate with customer service agents on escalated issues that require input from subject matter experts. In new projects, developer escalations are configured out of the box with dedicated new issue and request types. Whenever any agent creates an escalation issue, it will appear on this view.
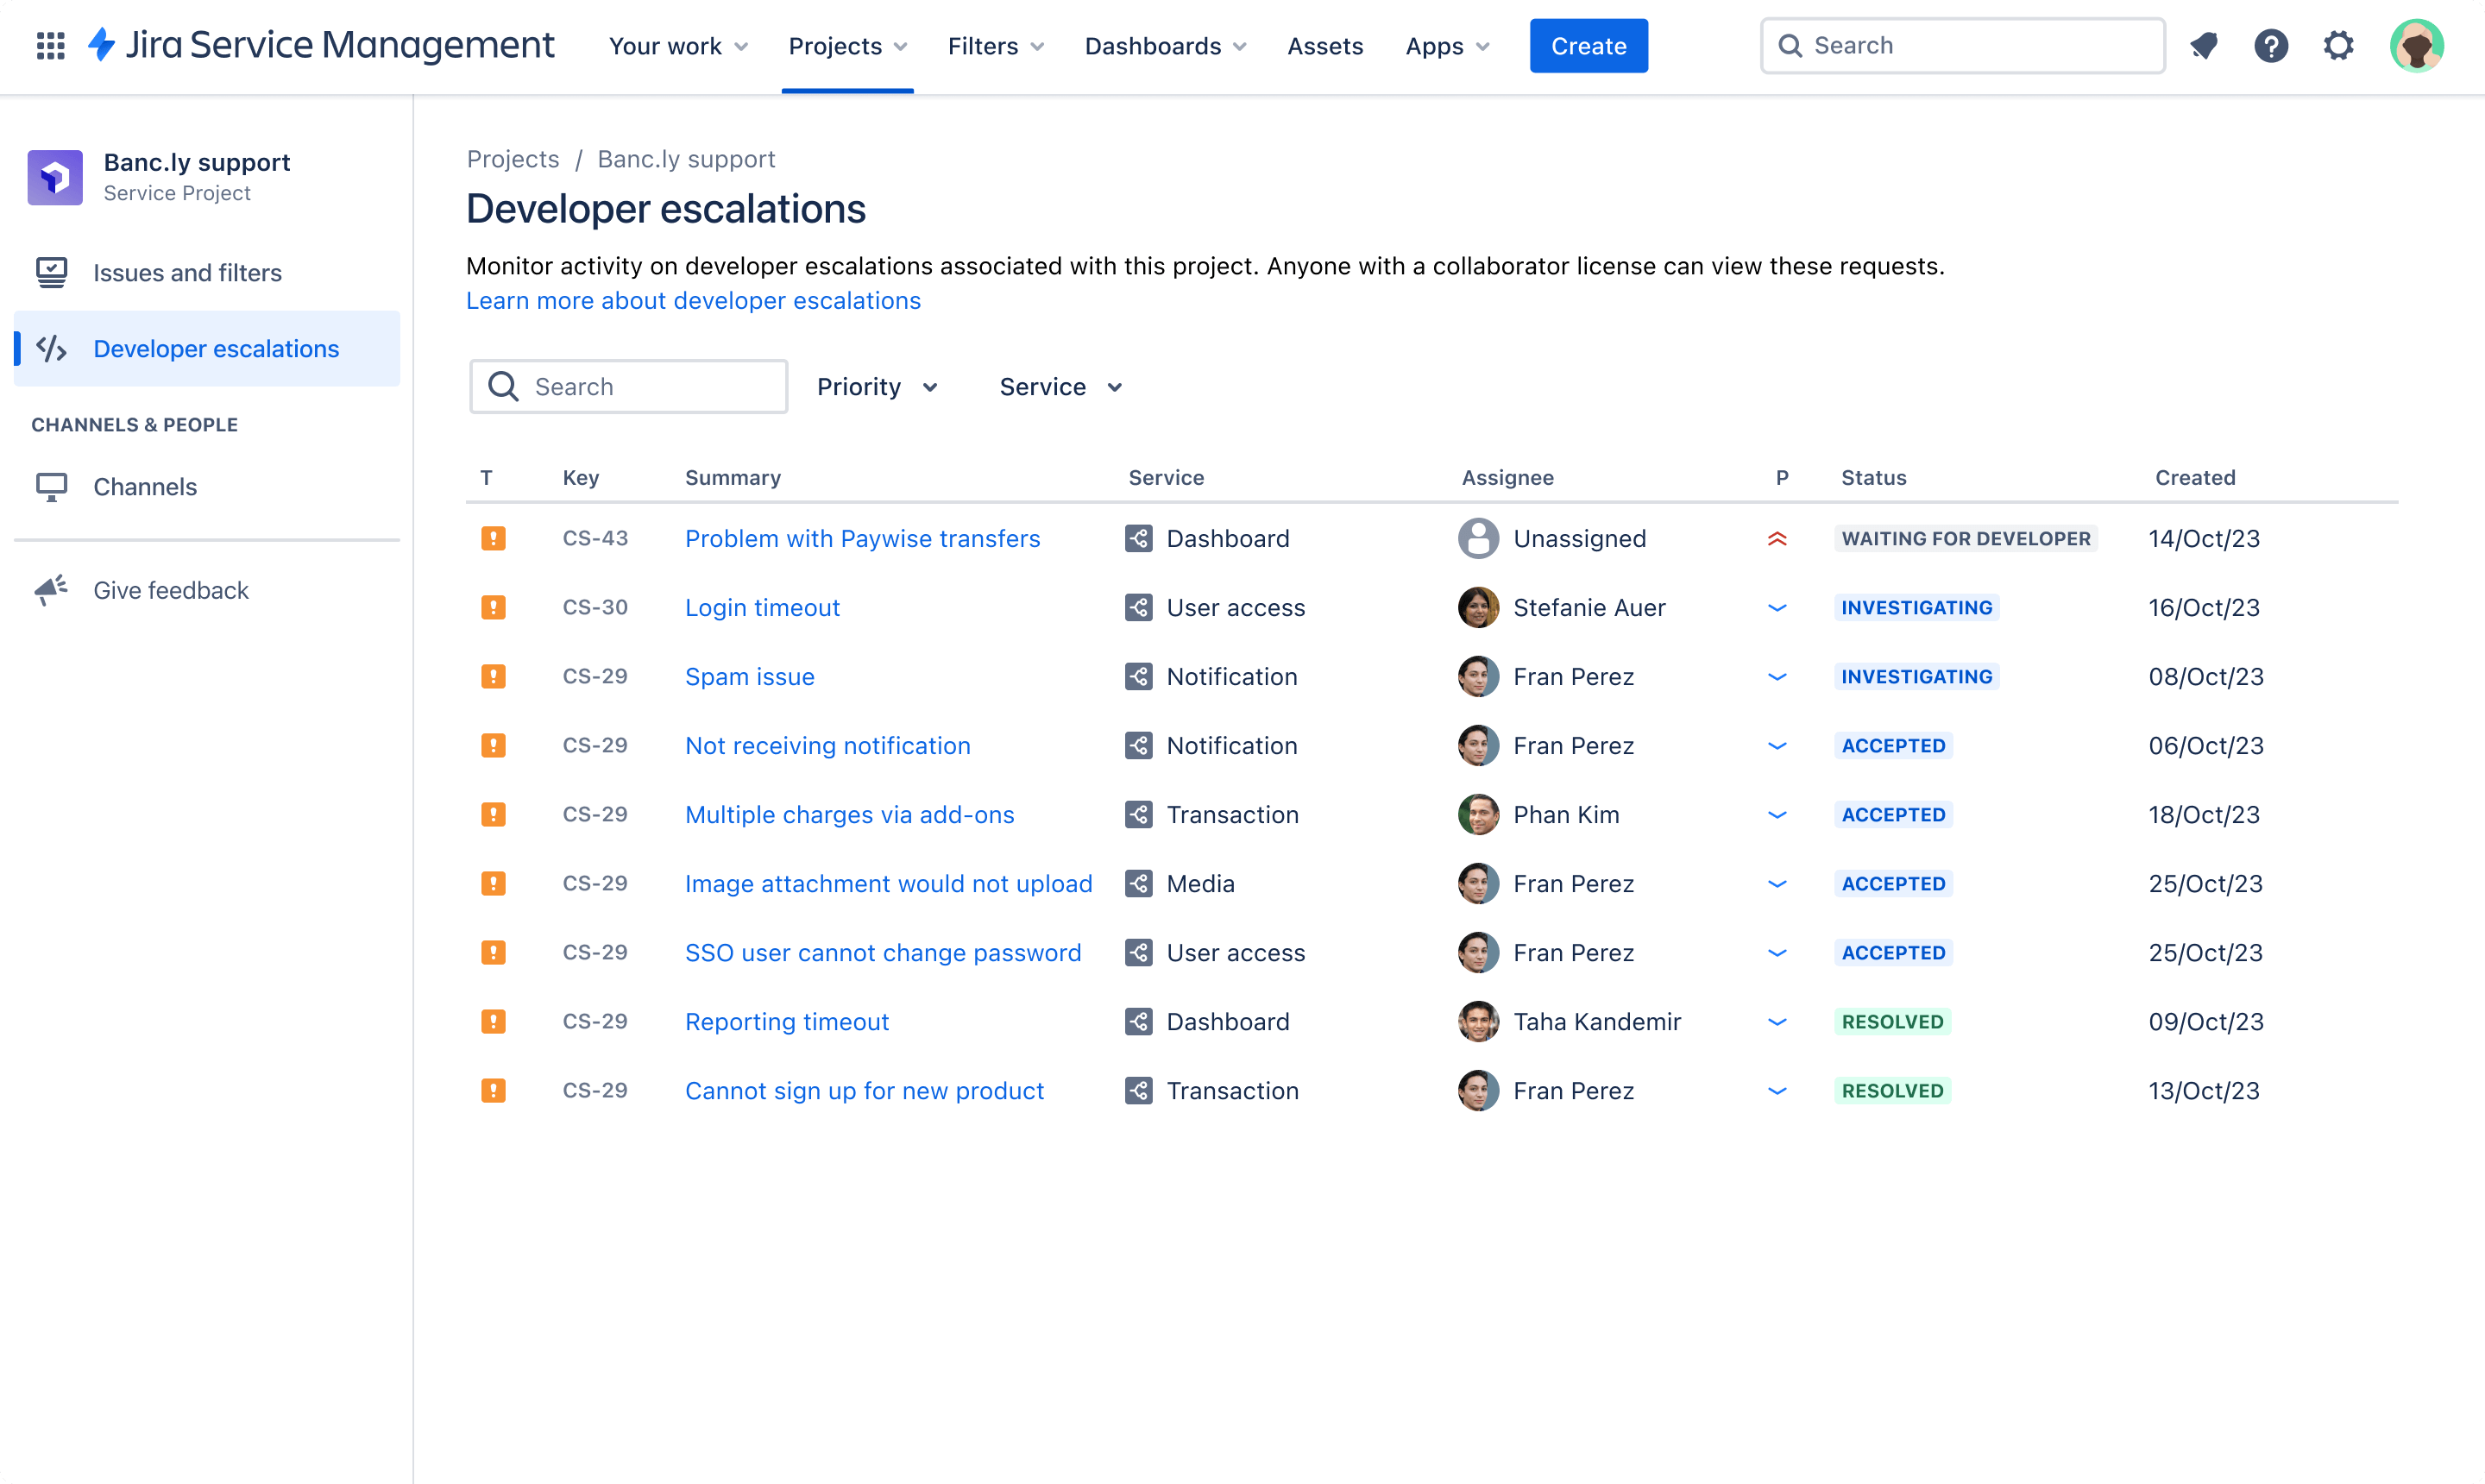
To set up developer escalations:
- From your service project, select Project settings > Request types.
- Select Developer escalations work category.
- Select Create request types from template.
- Select Get developer support from Customer Service category.
- Select Review then Continue once you're happy with your selection.
- Select Save to assign your selected request types to their new category.
Once your project admin has assigned the request type to the ‘Developer escalations’ work category, your support agents should be able to create developer escalations.
You can also set up automations to notify development teams in Slack or Microsoft Teams when an escalation is created on a service they own, synchronise issue statuses, and more. Read more about automations here.
To create a new developer escalation for a particular issue:
- Open the issue view of the request.
- Select Escalate issue.
- Fill in the developer escalation create form, then select Create.
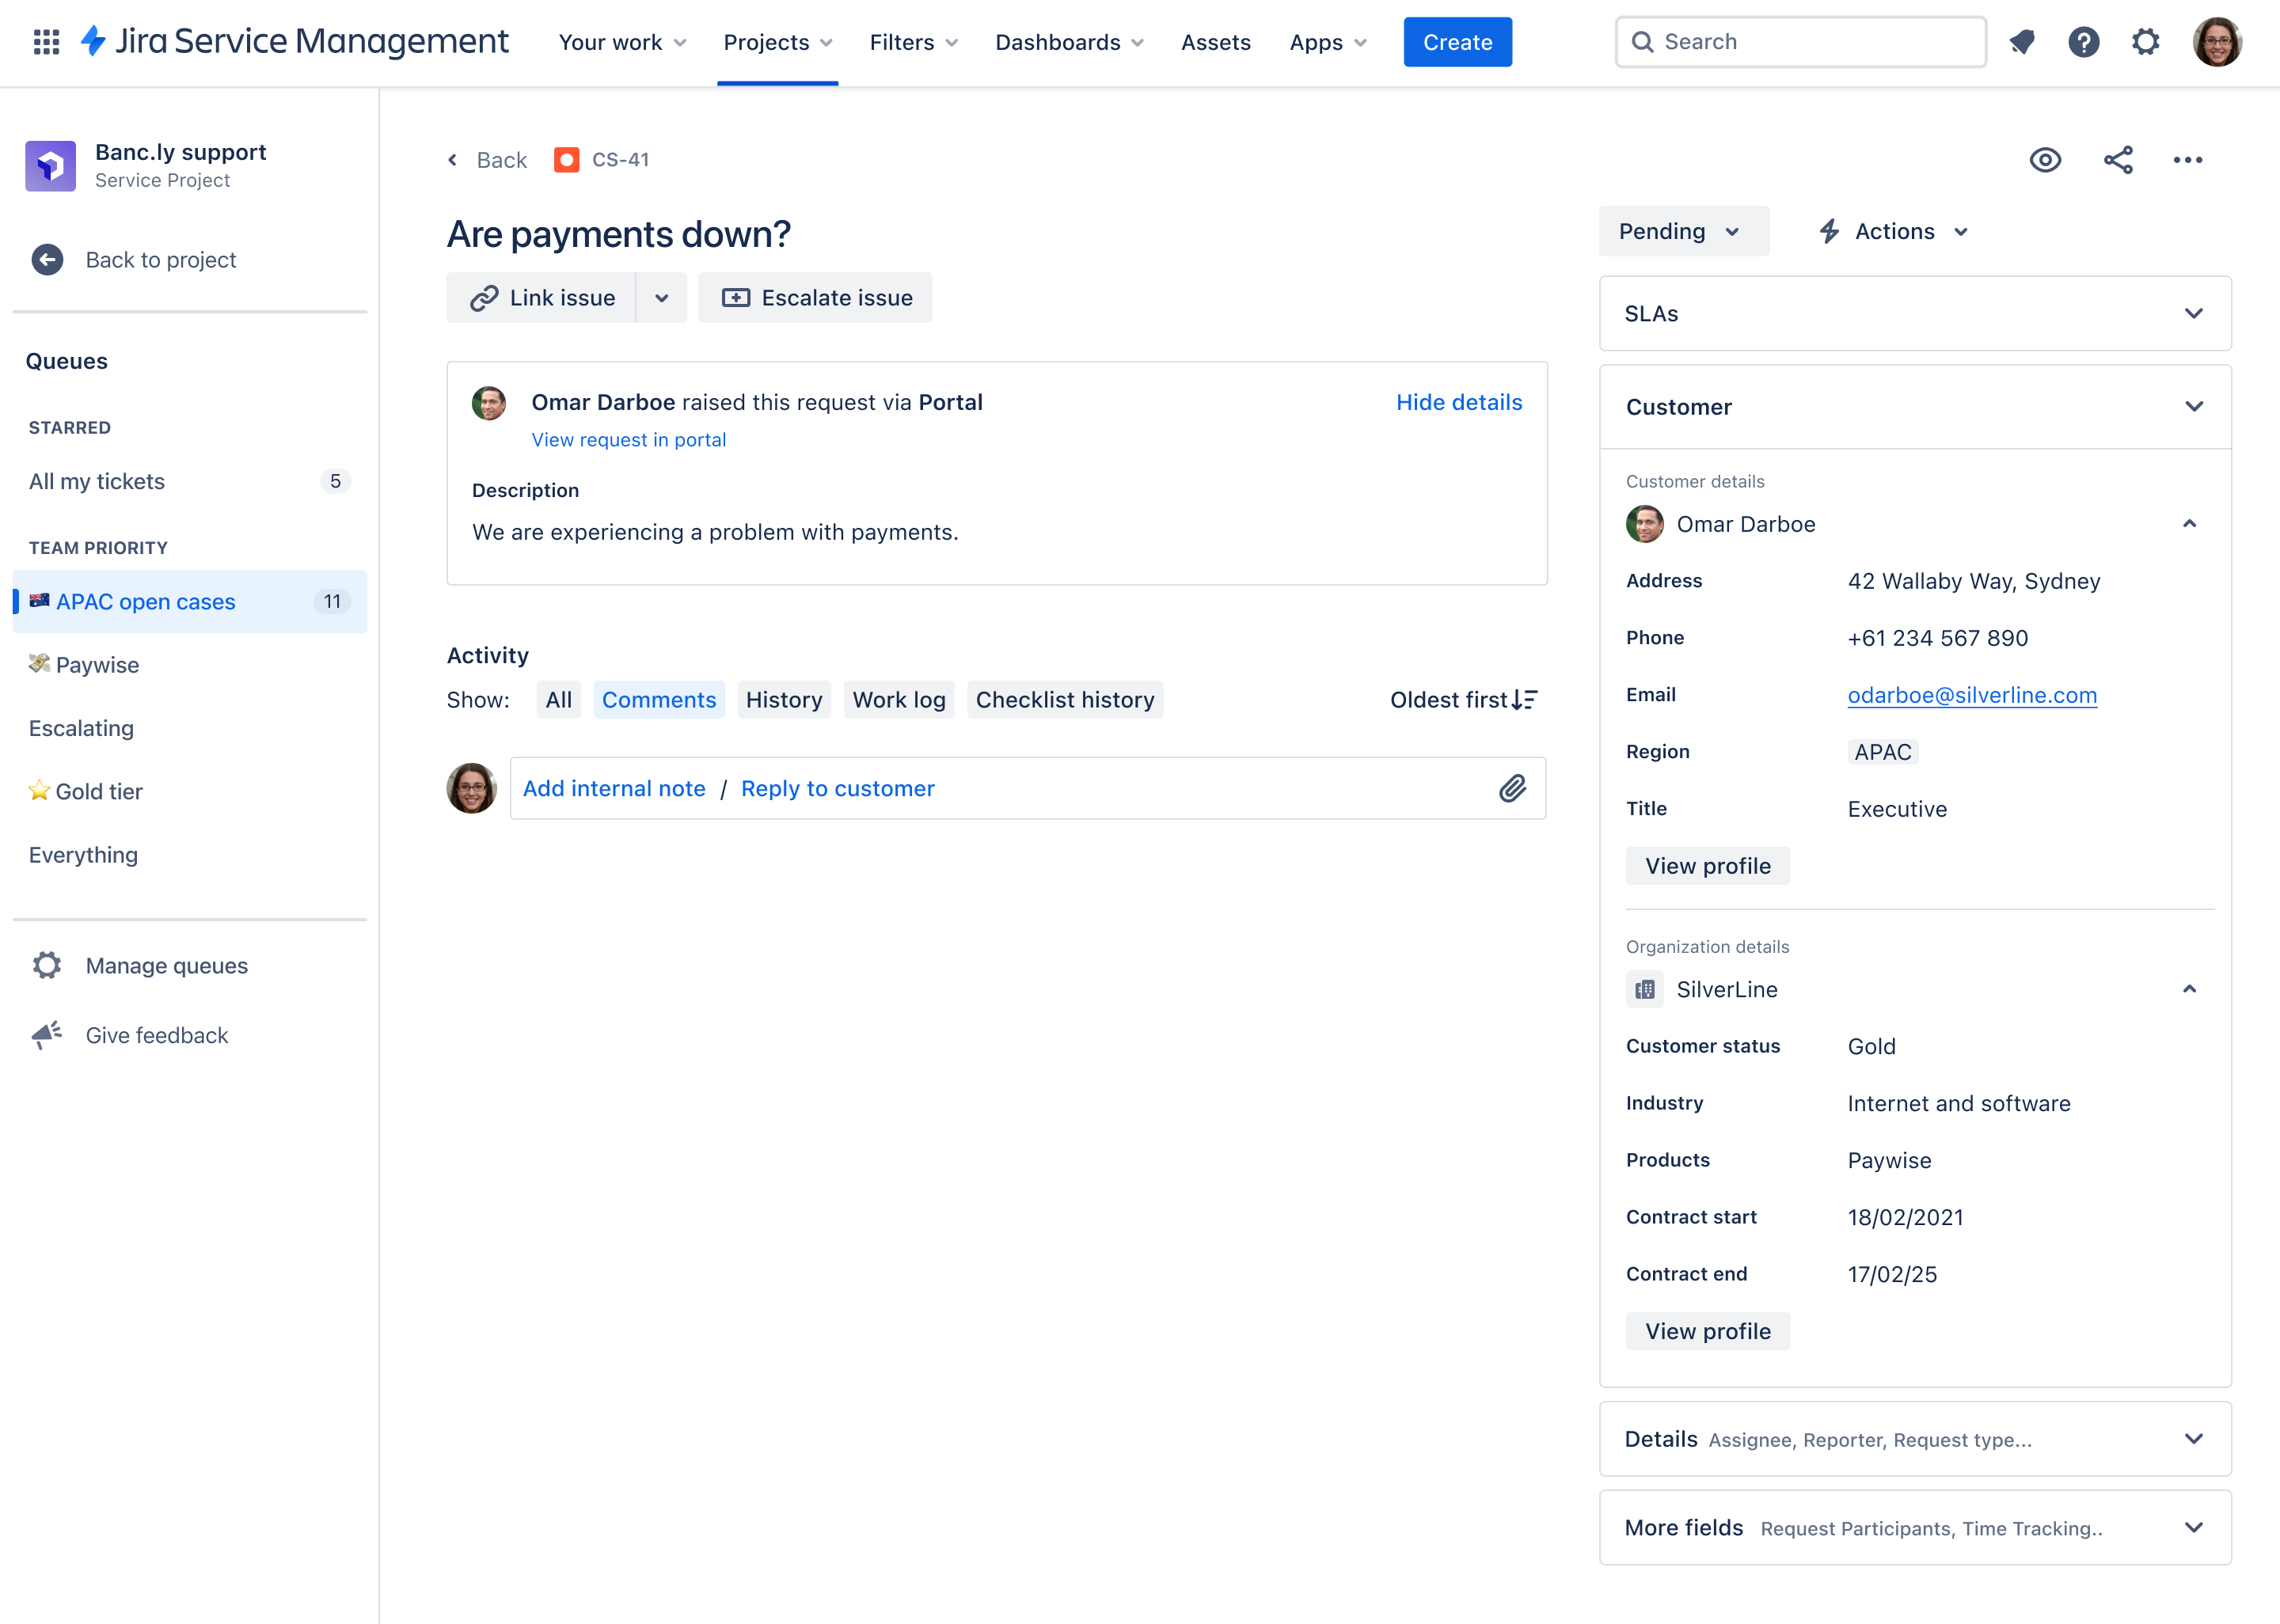
Developers can access escalations as collaborators, without needing an agent license. To be a collaborator, the user should be added to the Service Desk Team role in your service project. Read more about roles here.
Connect customer support to the product roadmap
To better incorporate customer feedback and feature requests into the product roadmap, you can connect your external support requests to product planning in Jira Product Discovery.
Once you have a queue set up in Jira Service Management, if your product team is using a Jira Product Discovery project you can follow the below steps to link customer requests as insights in your product roadmap:
- Install the Chrome extension.
- Follow the steps to add insights.
- Once you’ve added an insight, go to Jira Product Discovery > Open the idea you added the request to and click Insights.
You can also create a linked idea to Jira Product Discovery within the Jira Service Management issue. Just go to create linked issue, and choose the Jira Product Discovery project.
Connect your self-service knowledge base
Jira Service Management’s out-of-the-box knowledge base enables your service teams to easily manage and share knowledge so that the right answers are always at your customer's fingertips. This flexible tool leverages the power of Confluence, enabling your team to create and curate articles directly within your Jira Service Management project so you can help your customers help themselves!
You can build out your knowledge base directly from Jira Service Management, or integrate existing FAQs and docs you already have in Confluence.
To access and set up your knowledge base:
- From your customer service management project, select Project settings in the left-hand menu.
- Select Knowledge base.
Tips and tricks for customer service teams
Automate your help desk
Automation in Jira Service Management is a “low-code/no-code” capability that only takes a few clicks to set up. By automating your processes and workflows, you remove the need for you and your team to perform manual, repetitive tasks – and you can focus on the work that matters. If you’re unsure where to get started, you can choose from a library full of template options.
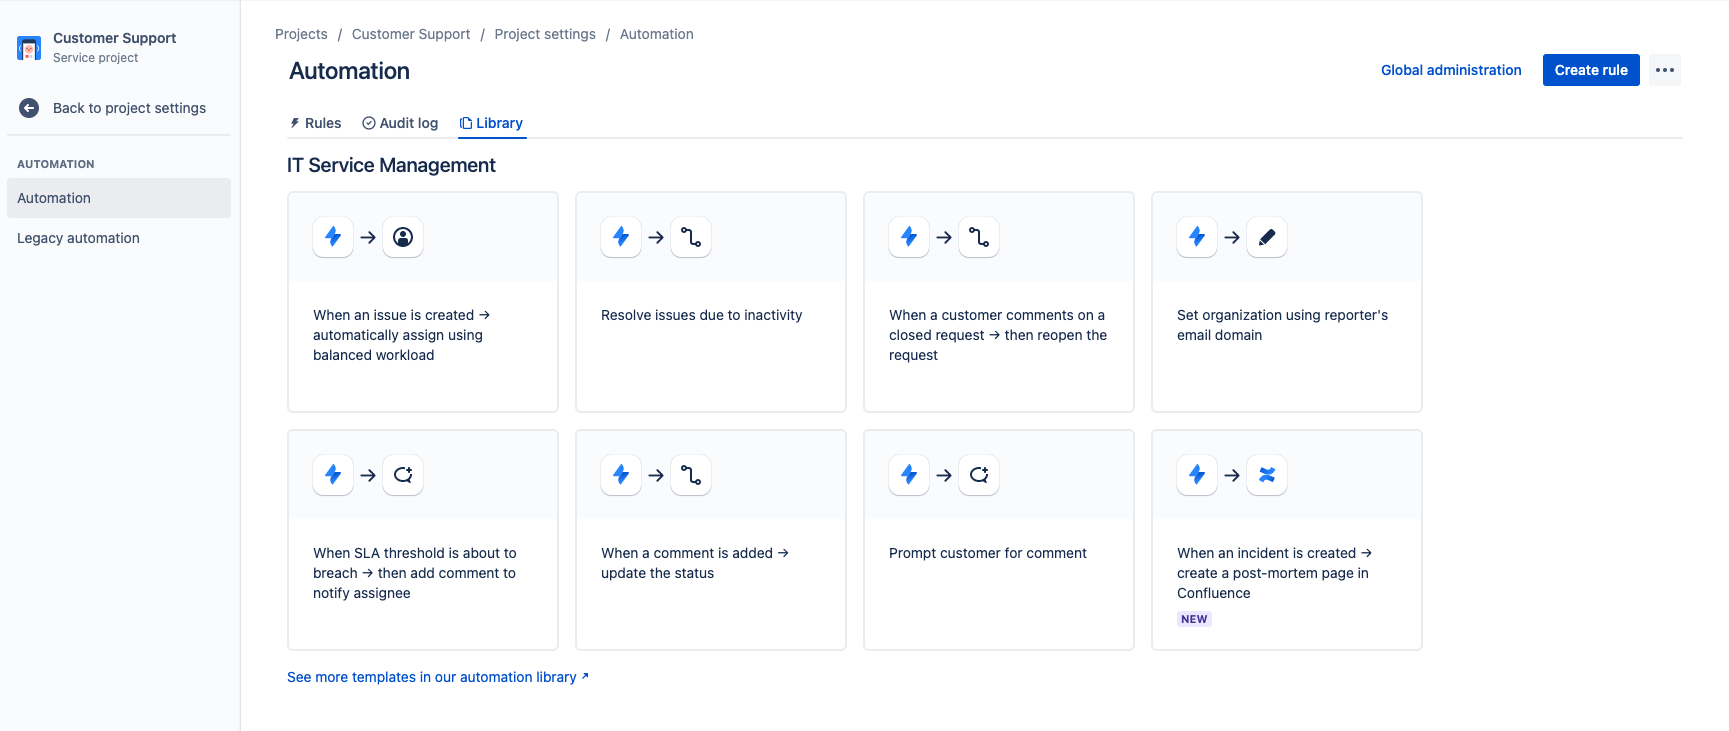
Some examples of automations you could create for common request types include:
- New product subscriptions: Check to see if the company is already licensed for the product requested.
- Report a bug: Send issue to different Jira Software projects based on the product family the bug relates to.
- Product trials: Add company and support level details based on contact info.
Reporting on service metrics
Reports allow your team to identify areas for improvement and make data-driven decisions. With Jira Service Management, you receive a set of out-of-the-box reports and can create custom reports of your own. Any agent can then view the reports to see how they are tracking toward their goals.
Pro tip: Review your reports on a regular cadence to understand the volume of requests coming in and how is your team tracking against SLAs.
To access reports:
- From your service project sidebar menu, select Reports.
- Select the report you want to view.
Customer Satisfaction Score (CSAT)
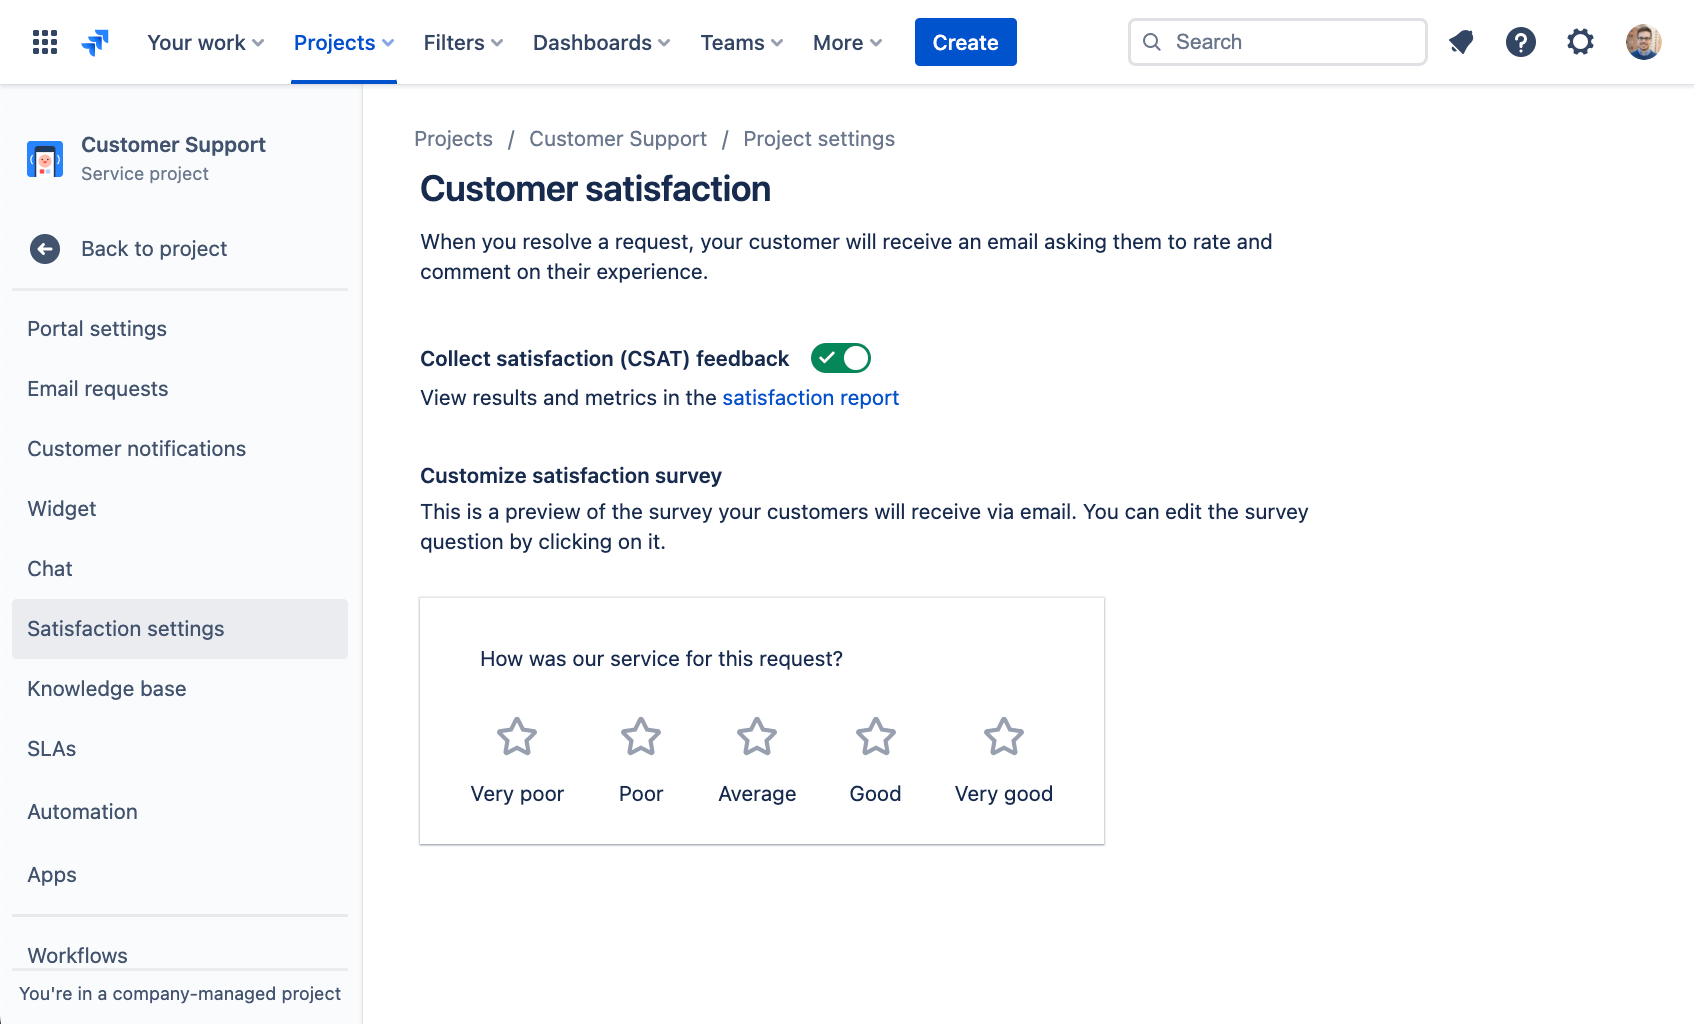
Jira Service Management offers a customer satisfaction survey to collect feedback. When a request is resolved, an email is automatically sent to the customer. If customer satisfaction surveys (CSATs) are enabled for your service project, this email will include a form that allows customers to leave a rating and some written feedback about how their request was handled. Once submitted, these customer surveys live in the satisfaction report.
To access the customer satisfaction survey settings:
- From your project, select Project settings in the left-hand menu.
- Select Satisfaction settings.
Connect your help desk to Slack or Microsoft Teams
If you’re using shared channels in Slack or Microsoft Teams to support your customers, we recommend setting up the chat feature. Accessible through your project settings, chat allows you to connect your help desk to Slack and capture, manage, and resolve requests directly from your conversations.
Getting Started
Enterprise Service Management
Tips and Tricks
Form design
