Regola di automazione di Jira quando una pull request viene sottoposta a merge
Connect to your PostgreSQL server instance using pgAdmin > right-click on ‘Group Roles’ and select ‘New Group Role’.
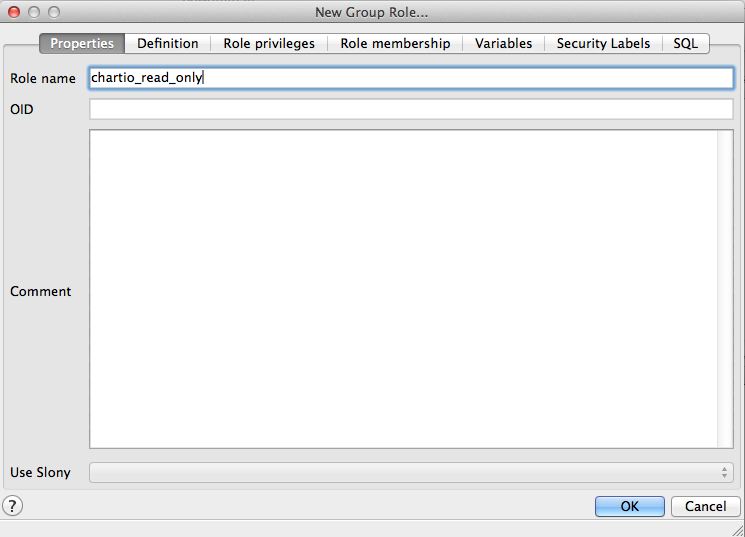
Give the role a descriptive name > click ‘OK’. You do NOT need to create a password for the Group role; we will create a password for the Login role created later in this document.
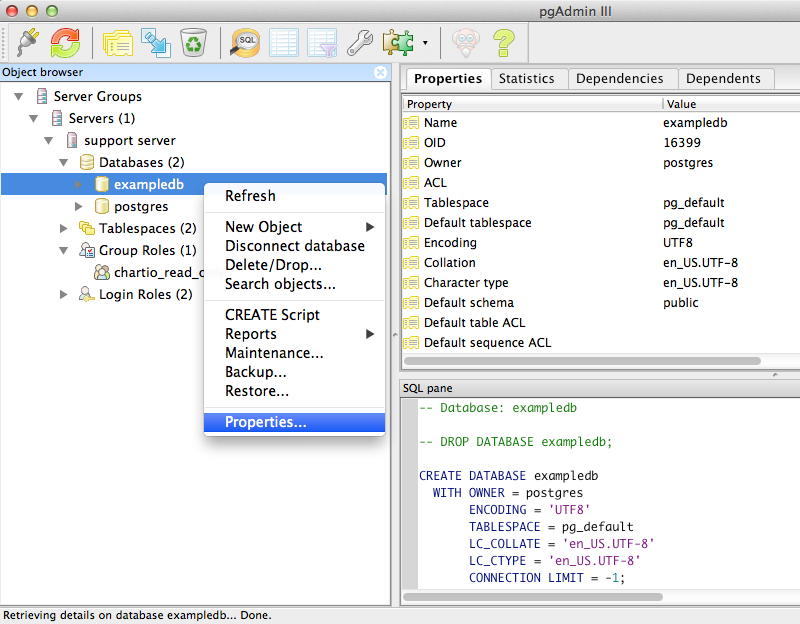
Expand ‘Databases’ > right-click on the database you would like to connect to Atlassian Analytics > select ‘Properties’.
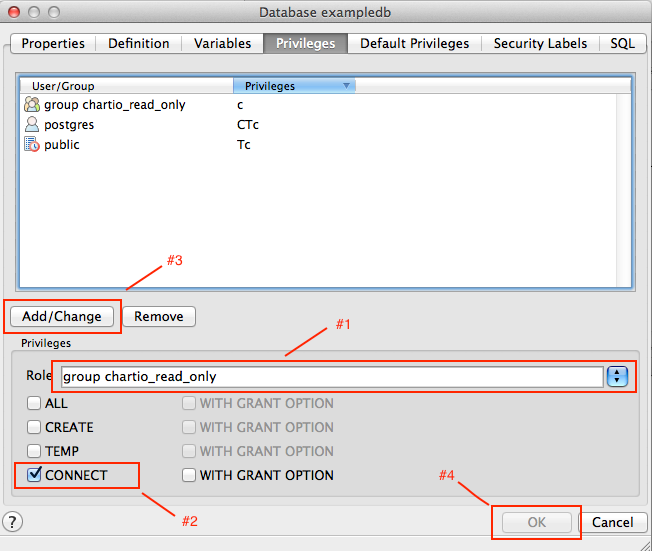
In the ‘Privileges’ tab select the newly created group from the ‘Role’ drop-down menu > check the ‘Connect’ box > click ‘Add/Change’ > click ‘OK’.
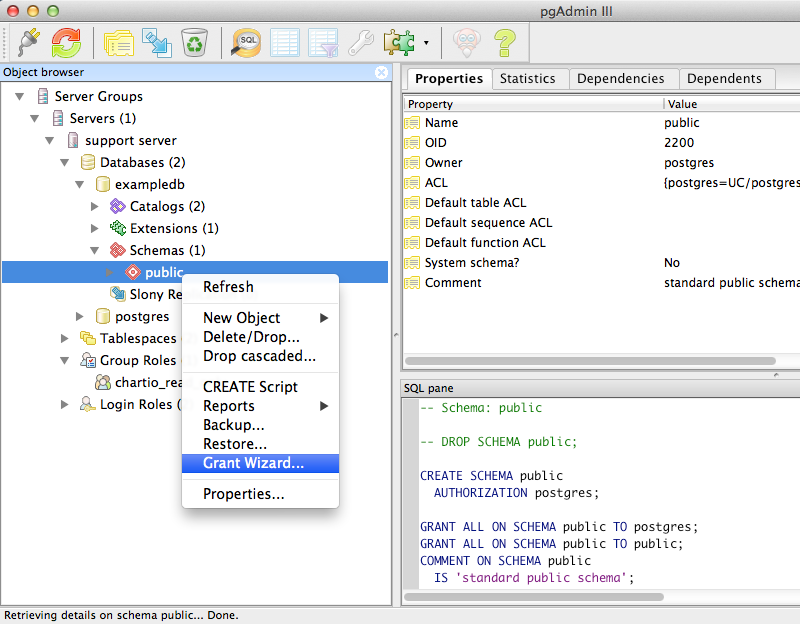
Click the expand arrow next to your database > expand ‘Schemas’ > right-click ‘public’ > select ‘Grant Wizard’.
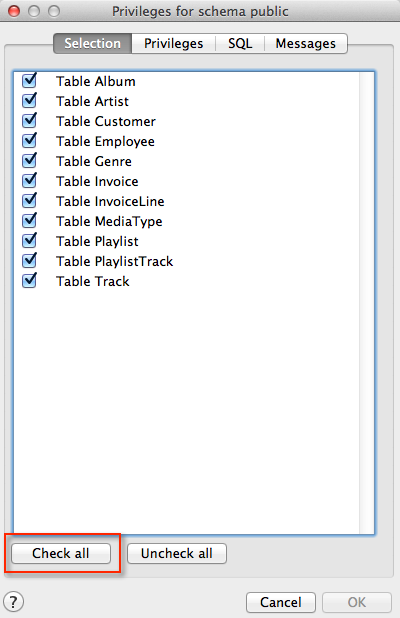
On the ‘Selection’ tab click ‘Check All’.
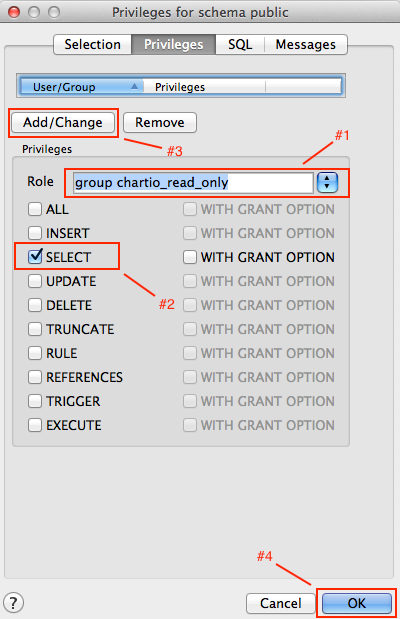
In the ‘Privileges’ tab select the newly created group from the ‘Role’ drop-down menu > check the ‘Select’ box > click ‘Add/Change’ > click ‘OK’.
If your schema is not ‘public’, you will also need to grant USAGE permissions on the schema.
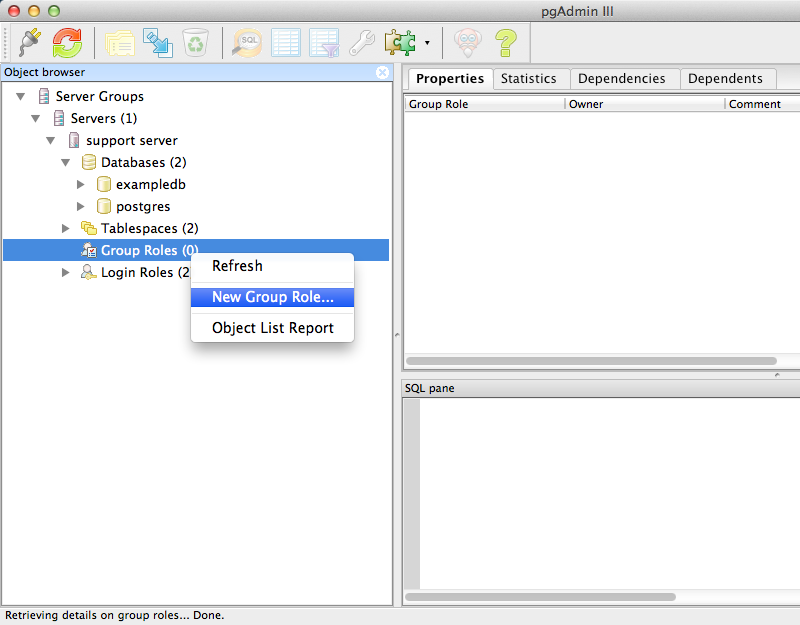
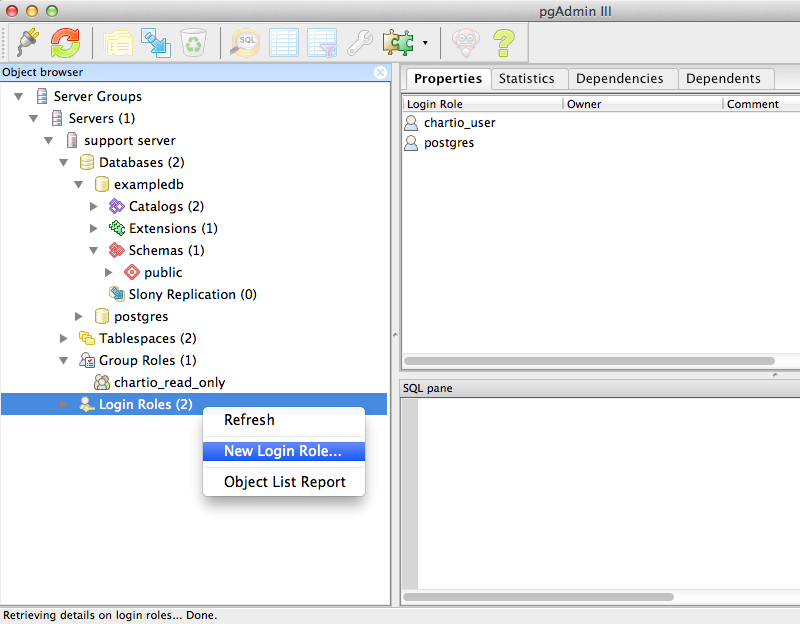
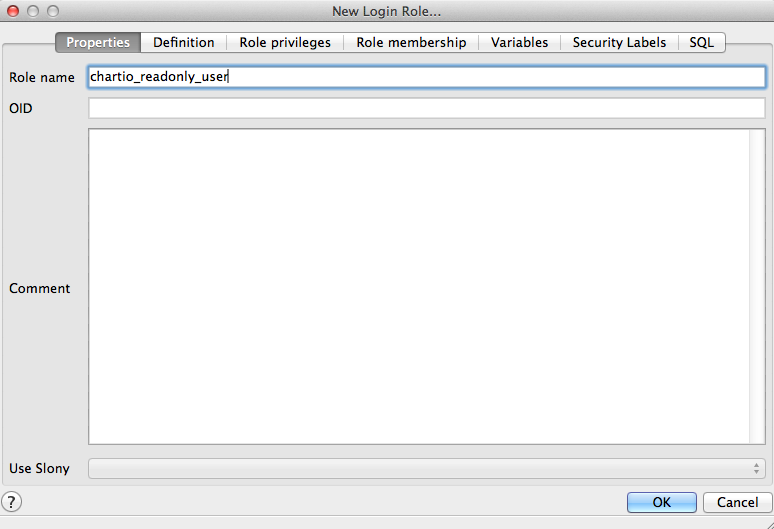
Under your server tree right-click ‘Login Roles’ > select ‘New Login Role’
Type a descriptive name for the user.
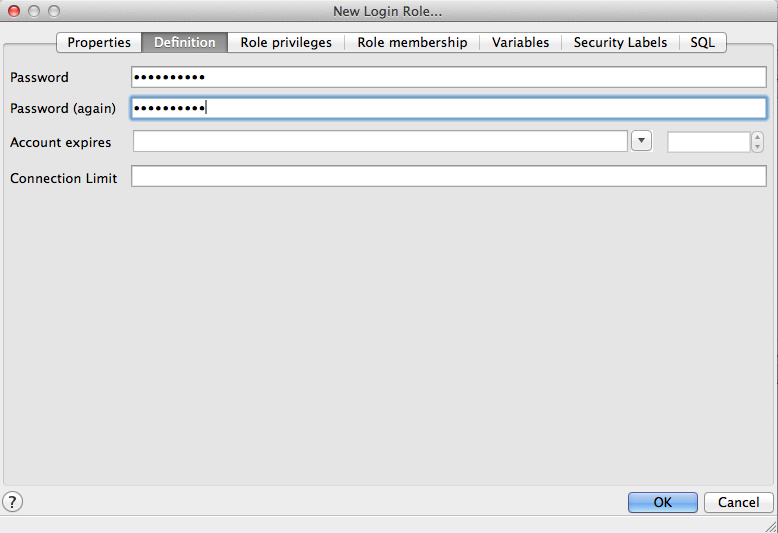
On the ‘Definition’ tab enter a secure password.
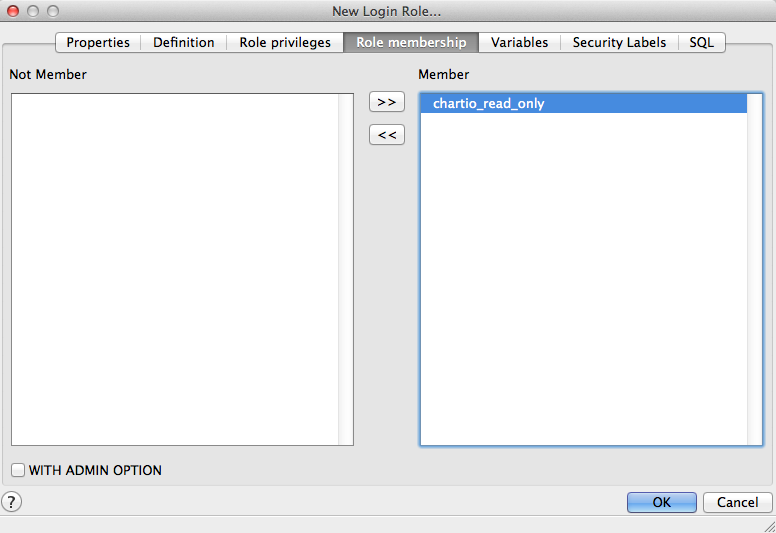
On the ‘Role membership’ tab add the newly create group to the ‘Member’ window > click ‘OK’.
You have successfully created a new read-only user for your database. Use the credentials created for the Login role when setting up your PostgreSQL connection for Atlassian Analytics.
For information on creating a user with psql, see this article.
For more information on connecting your PostgreSQL database to Atlassian Analytics, see our documentation.