使用 GitHub 部署 AWS CloudWatch 警报
.png?cdnVersion=2651)
Warren Marusiak
高级技术传播者
为了演示如何使用 Jira Software 和各种互联工具开发、部署和管理应用,我们的团队创建了 ImageLabeller,这是一款基于 AWS 构建的简单演示应用,它使用机器学习将标签应用于图像。
本页面介绍如何设置 AWS SageMaker 预定义模型,这是 ImageLabeller 成功处理图像的先决条件。在您开始之前,我们建议阅读 ImageLabeller 架构和 使用 GitHub 部署 ImageLabeller 页面,以了解背景信息。
为 Opsgenie 集成添加警报存储库
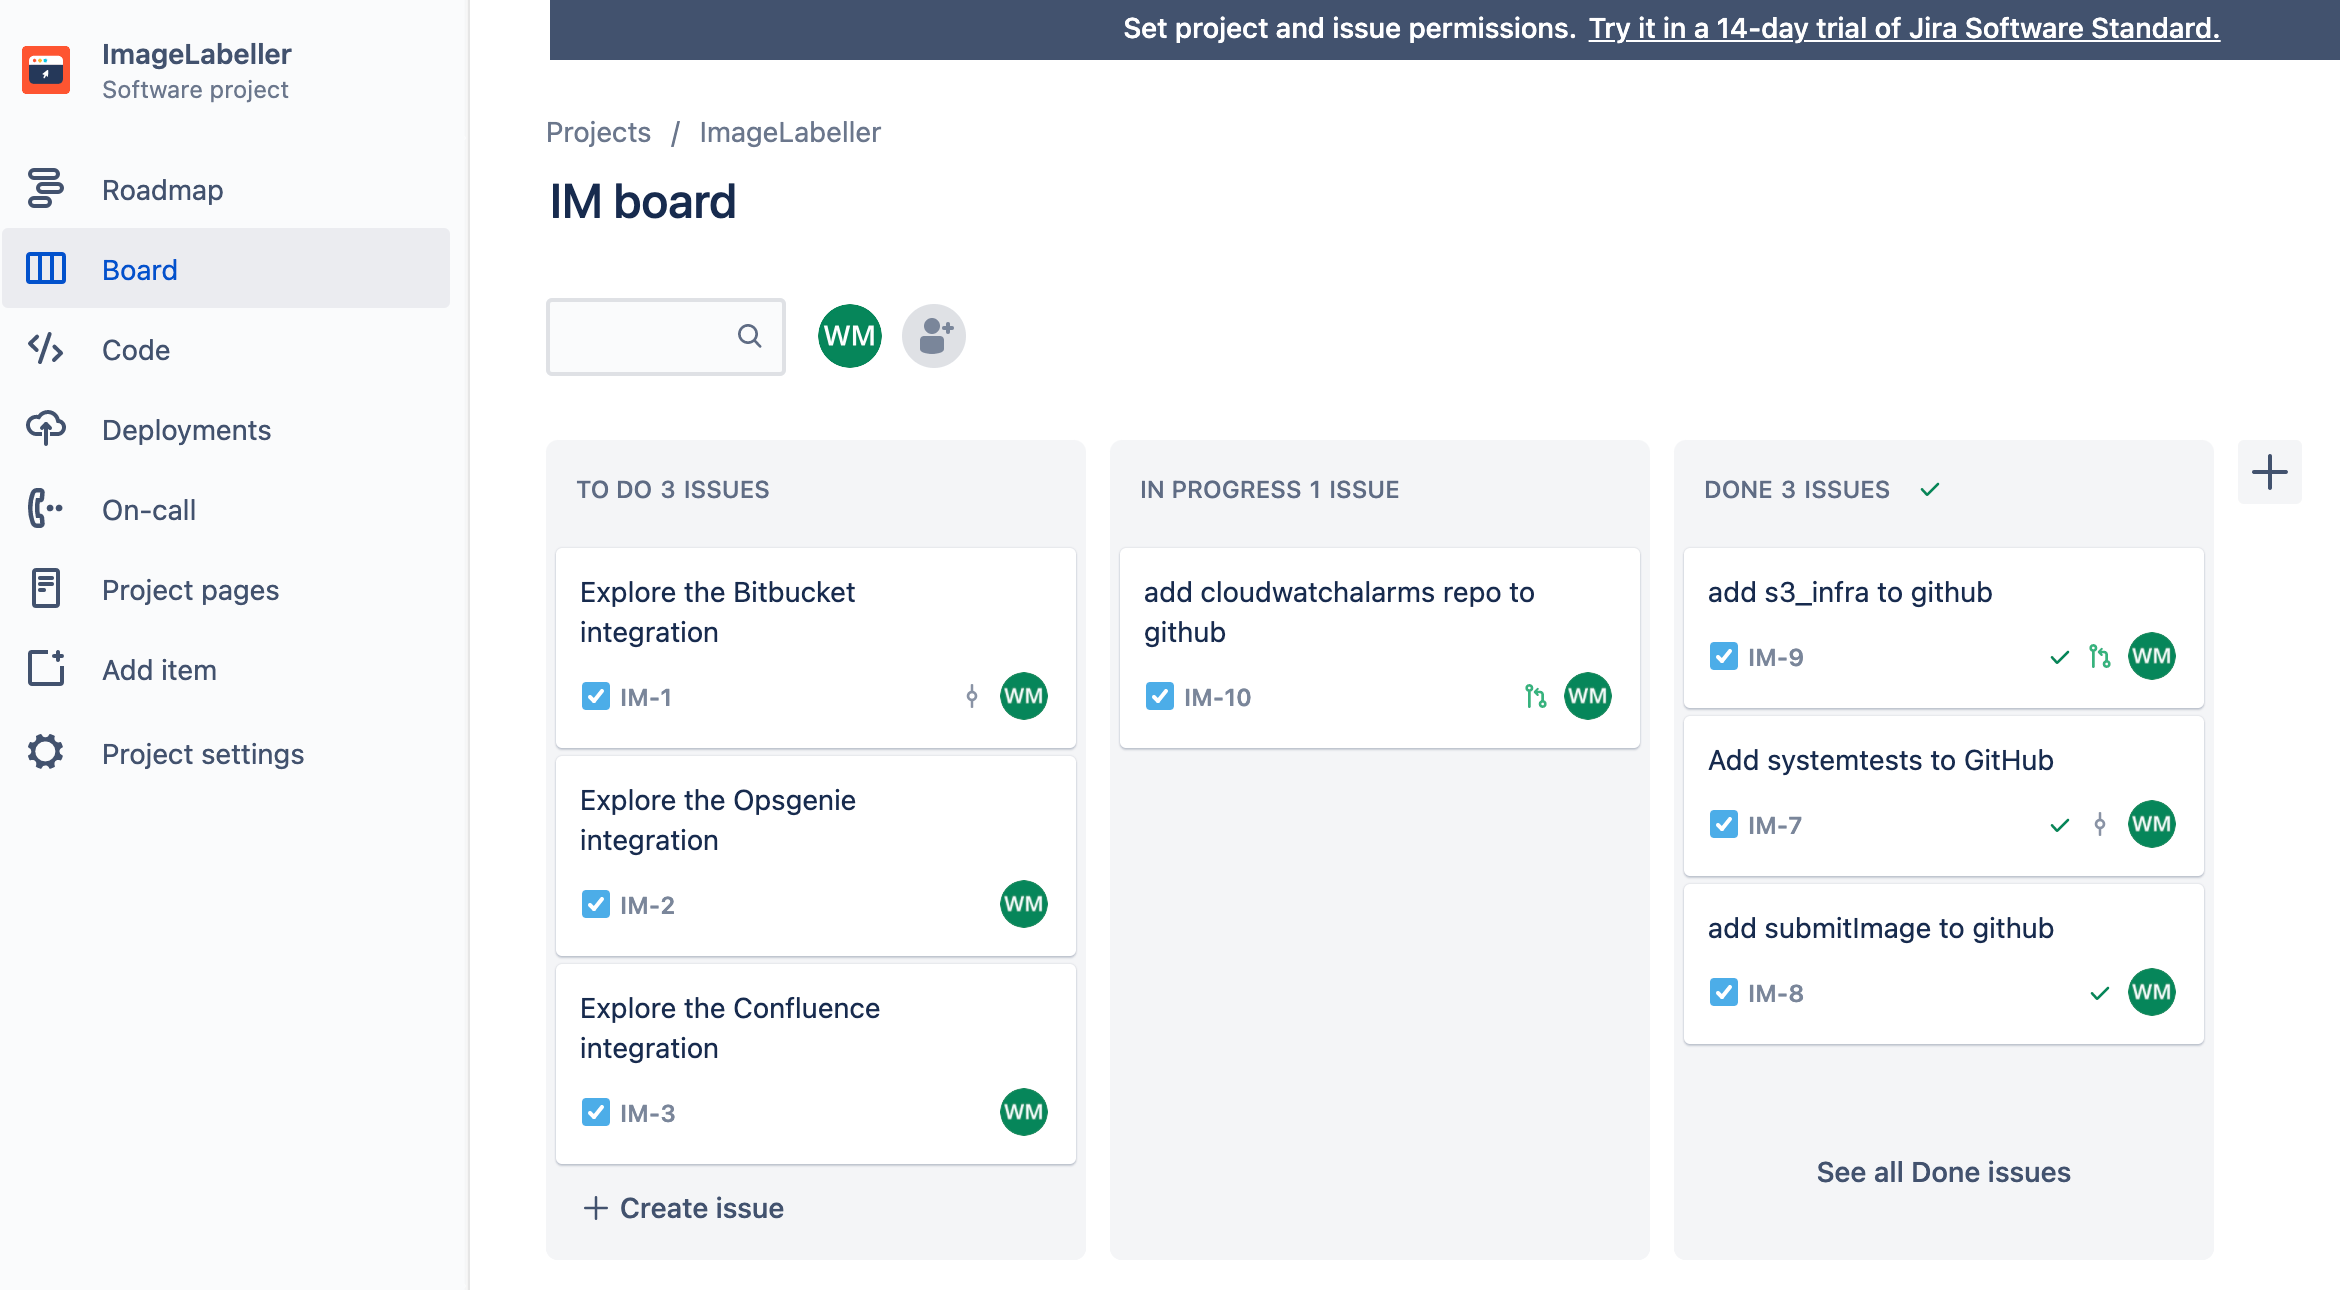
转到 Jira 并创建一个新 Jira 事务,将 AWS CloudWatch 警报存储库添加到 GitHub。在本例中,Jira 事务 ID 为 IM-10。
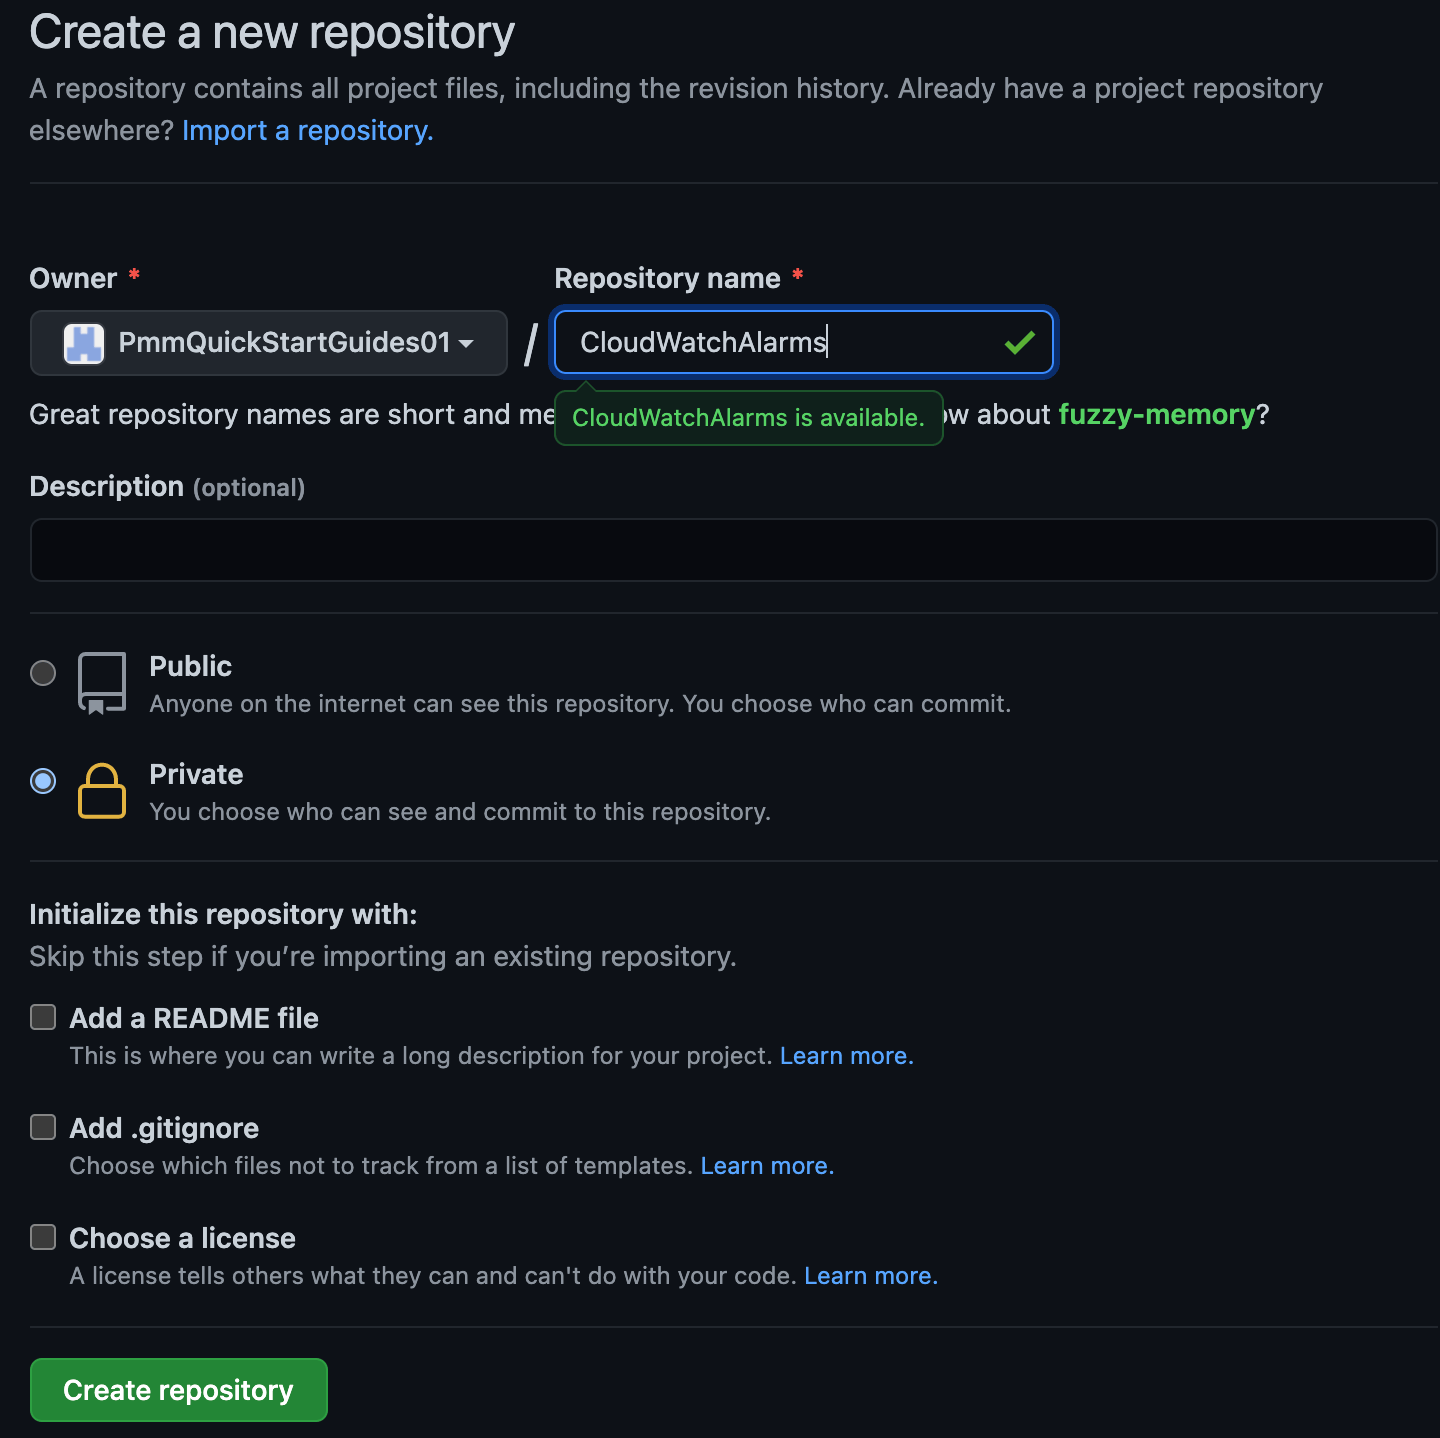
转到 GitHub 并单击“新建”。为“负责人”选择合适的组织。单击“创建存储库”以继续。
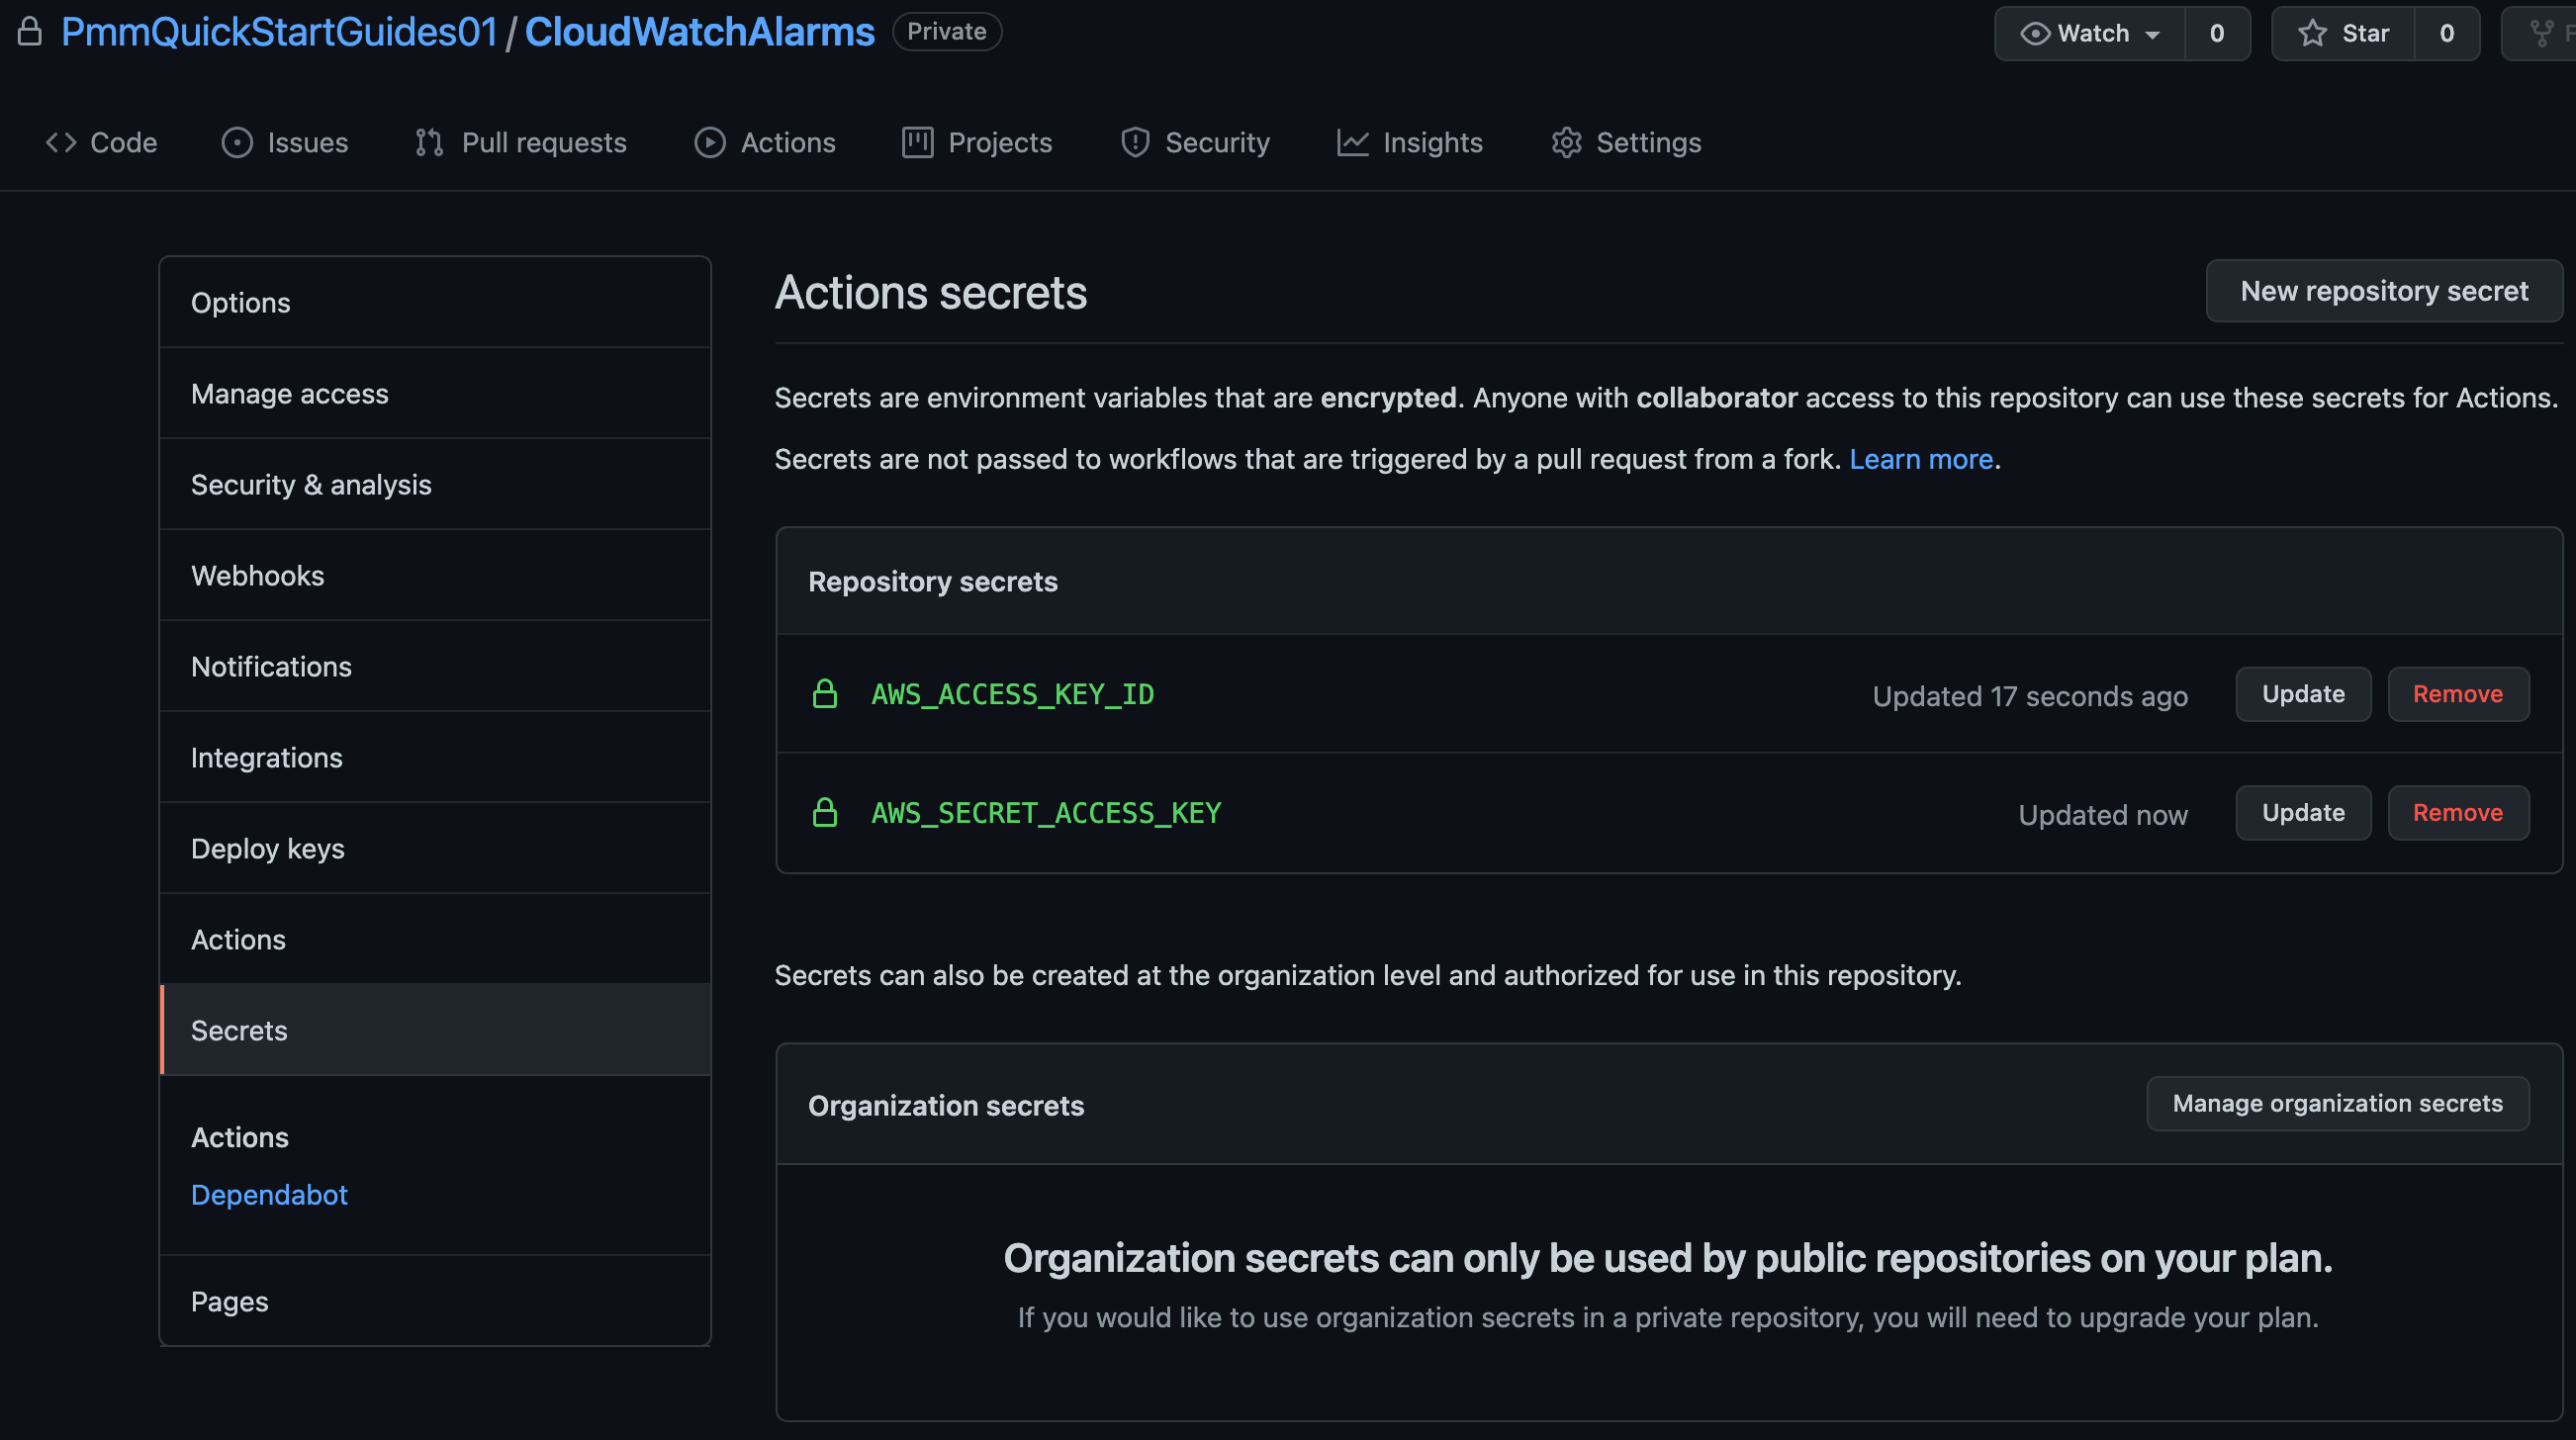
单击“设置”,然后单击“密钥”。将您的 AWS 访问密钥 ID 添加为 AWS_ACCESS_KEY_ID,将您的 AWS 秘密访问密钥添加为 AWS_SECRET_ACCESS_KEY。
在您的终端中转到您的 CloudWatchAlarms 存储库,并运行以下命令以将您的 AWS CloudFormation 代码推送到 GitHub。
git add --all
git commit -m "IM-10 add CloudWatchAlarms to github"
git remote add origin git@github.com:PmmQuickStartGuides01/CloudWatchAlarms.git
git branch -m mainline
git push -u origin mainline
警报 template.yml
Description: 'A description'

Resources:
  OpsGenieSNS:
    Type: AWS::SNS::Topic
    Properties:
      DisplayName: 'Opsgenie'
      Subscription:
        - Endpoint: 'https://api.opsgenie.com/v1/json/cloudwatch?apiKey=a4449509-6998-4d55-841d-2e6b363520c7'
          Protocol: 'HTTPS'
      TopicName: 'Opsgenie'

  SubmitImageLambdaAlarm:
    Type: AWS::CloudWatch::Alarm
    Properties:
      AlarmActions:
        - !Ref 'OpsGenieSNS'
      AlarmDescription: 'SubmitImage Too Many Invocations'
      ComparisonOperator: 'GreaterThanThreshold'
      Dimensions:
        - Name: FunctionName
          Value: !ImportValue 'SubmitImageFunctionName'
      EvaluationPeriods: 1
      MetricName: 'Invocations'
      Namespace: 'AWS/Lambda'
      Period: 60
      Statistic: 'Sum'
      Threshold: 10
将 SNS 主题订阅端点设置为您从 Opsgenie 复制的端点 URL。SubmitImageLambdaAlarm 监控 submitImage AWS Lambda 发出的单个指标。如果一分钟内调用次数超过 10 次,则会发出警报。
用于部署到 AWS 的 GitHub 操作
在您的终端中转到 CloudWatchAlarms 存储库,创建一个以您的 Jira 事务 ID 命名的分支,并创建一个 .github/workflows 目录。
git checkout -b IM-10
mkdir -p .github/workflows && cd .github/workflows
使用以下 yaml 创建 deploy-test-staging.yml。这为您的测试和暂存环境定义了部署工作流程,该工作流程在推送到主线以外的分支时运行。
name: deploy-cloudwatchalarms-test-staging
on:
  push:
    branches:
      - '*'
      - '!mainline'

jobs:
  deploy-us-west-1:
    runs-on: ubuntu-latest
    outputs:
      env-name: ${{ steps.env-name.outputs.environment }}
    steps:
      - name: Checkout code
        uses: actions/checkout@v2
      - name: Configure AWS credentials
        id: creds
        uses: aws-actions/configure-aws-credentials@v1
        with:
          aws-access-key-id: ${{ secrets.AWS_ACCESS_KEY_ID }}
          aws-secret-access-key: ${{ secrets.AWS_SECRET_ACCESS_KEY }}
          aws-region: "us-west-1"
      - name: Deploy to AWS CloudFormation
        uses: aws-actions/aws-cloudformation-github-deploy@v1
        with:
          name: OpenDevOpsAlarms
          template: template.yml
          no-fail-on-empty-changeset: "1"

  deploy-us-east-2:
    runs-on: ubuntu-latest
    needs: deploy-us-west-1
    steps:
      - name: Checkout code
        uses: actions/checkout@v2
      - name: Configure AWS credentials
        id: creds
        uses: aws-actions/configure-aws-credentials@v1
        with:
          aws-access-key-id: ${{ secrets.AWS_ACCESS_KEY_ID }}
          aws-secret-access-key: ${{ secrets.AWS_SECRET_ACCESS_KEY }}
          aws-region: "us-east-2"
      - name: Deploy to AWS CloudFormation
        uses: aws-actions/aws-cloudformation-github-deploy@v1
        with:
          name: OpenDevOpsAlarms
          template: template.yml
          no-fail-on-empty-changeset: "1"
然后使用以下 yaml 创建 deploy-prod.yml。这为您的生产环境定义了部署工作流程,该工作流程在拉取请求将变更合并到主线中时运行。
name: deploy-cloudwatchalarms-prod
on:
  pull_request:
    branches:
      - mainline

jobs:
  deploy-us-west-2:
    runs-on: ubuntu-latest
    outputs:
      env-name: ${{ steps.env-name.outputs.environment }}
    steps:
      - name: Checkout code
        uses: actions/checkout@v2
      - name: Configure AWS credentials
        id: creds
        uses: aws-actions/configure-aws-credentials@v1
        with:
          aws-access-key-id: ${{ secrets.AWS_ACCESS_KEY_ID }}
          aws-secret-access-key: ${{ secrets.AWS_SECRET_ACCESS_KEY }}
          aws-region: "us-west-2"
      - name: Deploy to AWS CloudFormation
        uses: aws-actions/aws-cloudformation-github-deploy@v1
        with:
          name: OpenDevOpsAlarms
          template: template.yml
          no-fail-on-empty-changeset: "1"

  deploy-ca-central-1:
    runs-on: ubuntu-latest
    needs: deploy-us-west-2
    steps:
      - name: Checkout code
        uses: actions/checkout@v2
      - name: Configure AWS credentials
        id: creds
        uses: aws-actions/configure-aws-credentials@v1
        with:
          aws-access-key-id: ${{ secrets.AWS_ACCESS_KEY_ID }}
          aws-secret-access-key: ${{ secrets.AWS_SECRET_ACCESS_KEY }}
          aws-region: "ca-central-1"
      - name: Deploy to AWS CloudFormation
        uses: aws-actions/aws-cloudformation-github-deploy@v1
        with:
          name: OpenDevOpsAlarms
          template: template.yml
          no-fail-on-empty-changeset: "1"

  deploy-us-east-1:
    runs-on: ubuntu-latest
    needs: deploy-ca-central-1
    steps:
      - name: Checkout code
        uses: actions/checkout@v2
      - name: Configure AWS credentials
        id: creds
        uses: aws-actions/configure-aws-credentials@v1
        with:
          aws-access-key-id: ${{ secrets.AWS_ACCESS_KEY_ID }}
          aws-secret-access-key: ${{ secrets.AWS_SECRET_ACCESS_KEY }}
          aws-region: "us-east-1"
      - name: Deploy to AWS CloudFormation
        uses: aws-actions/aws-cloudformation-github-deploy@v1
        with:
          name: OpenDevOpsAlarms
          template: template.yml
          no-fail-on-empty-changeset: "1"
推送到功能分支
从命令行运行以下命令,将您的代码推送到您的 CloudWatchAlarms 存储库的 IM-10 分支。
git add --all
git commit -m "IM-10 add github actions to CloudWatchAlarms"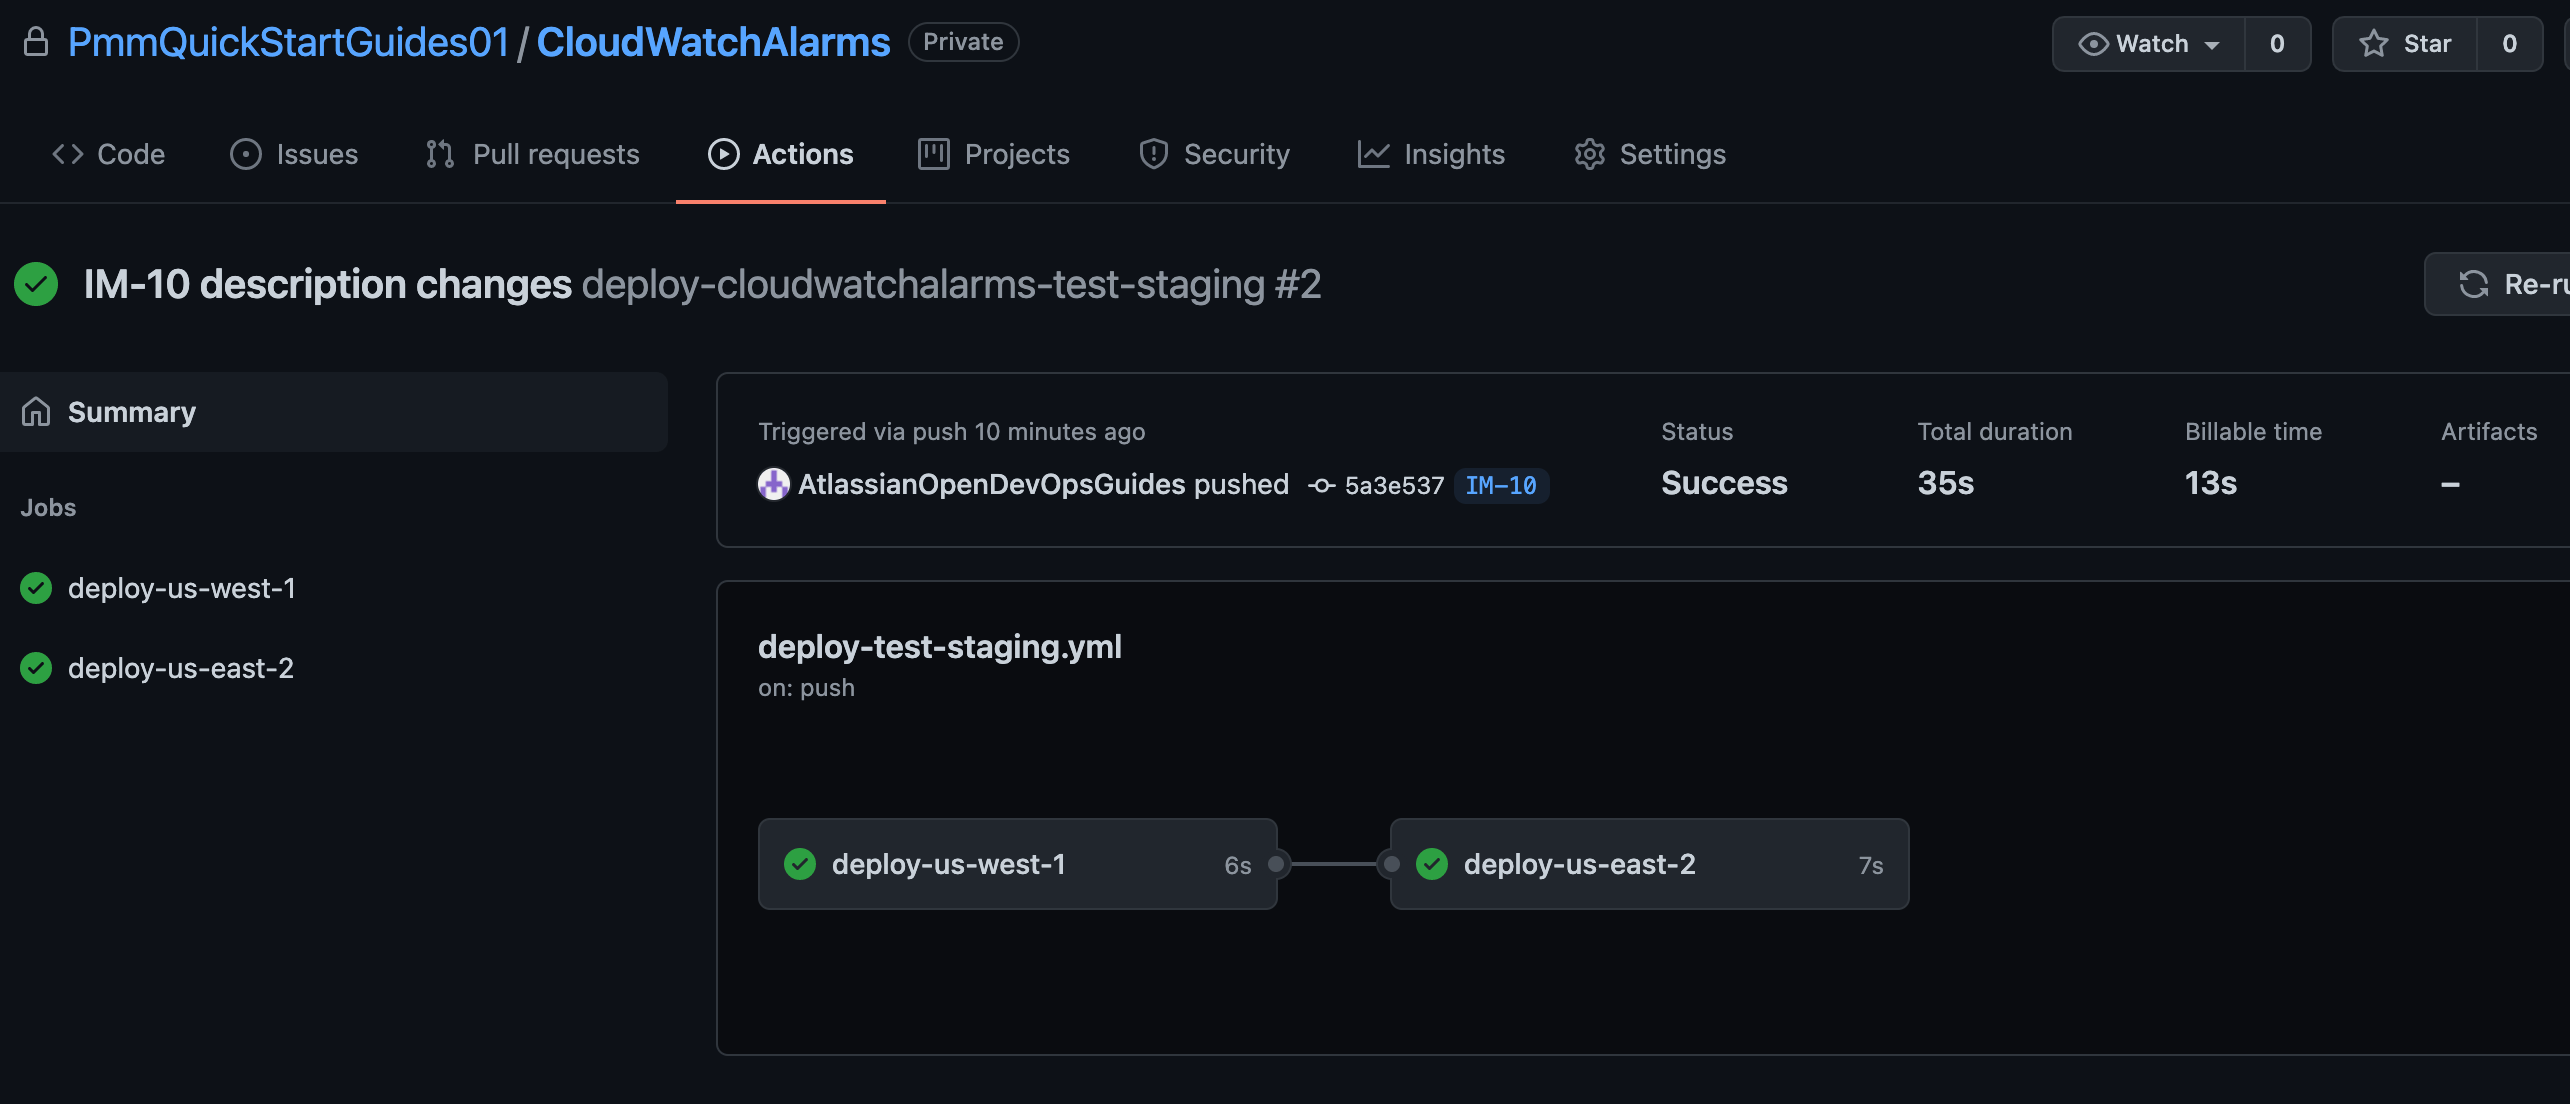
git push -u origin IM-10单击“操作”以查看正在运行的工作流程。
创建拉取请求
单击“创建拉取请求”以合并到主线中。
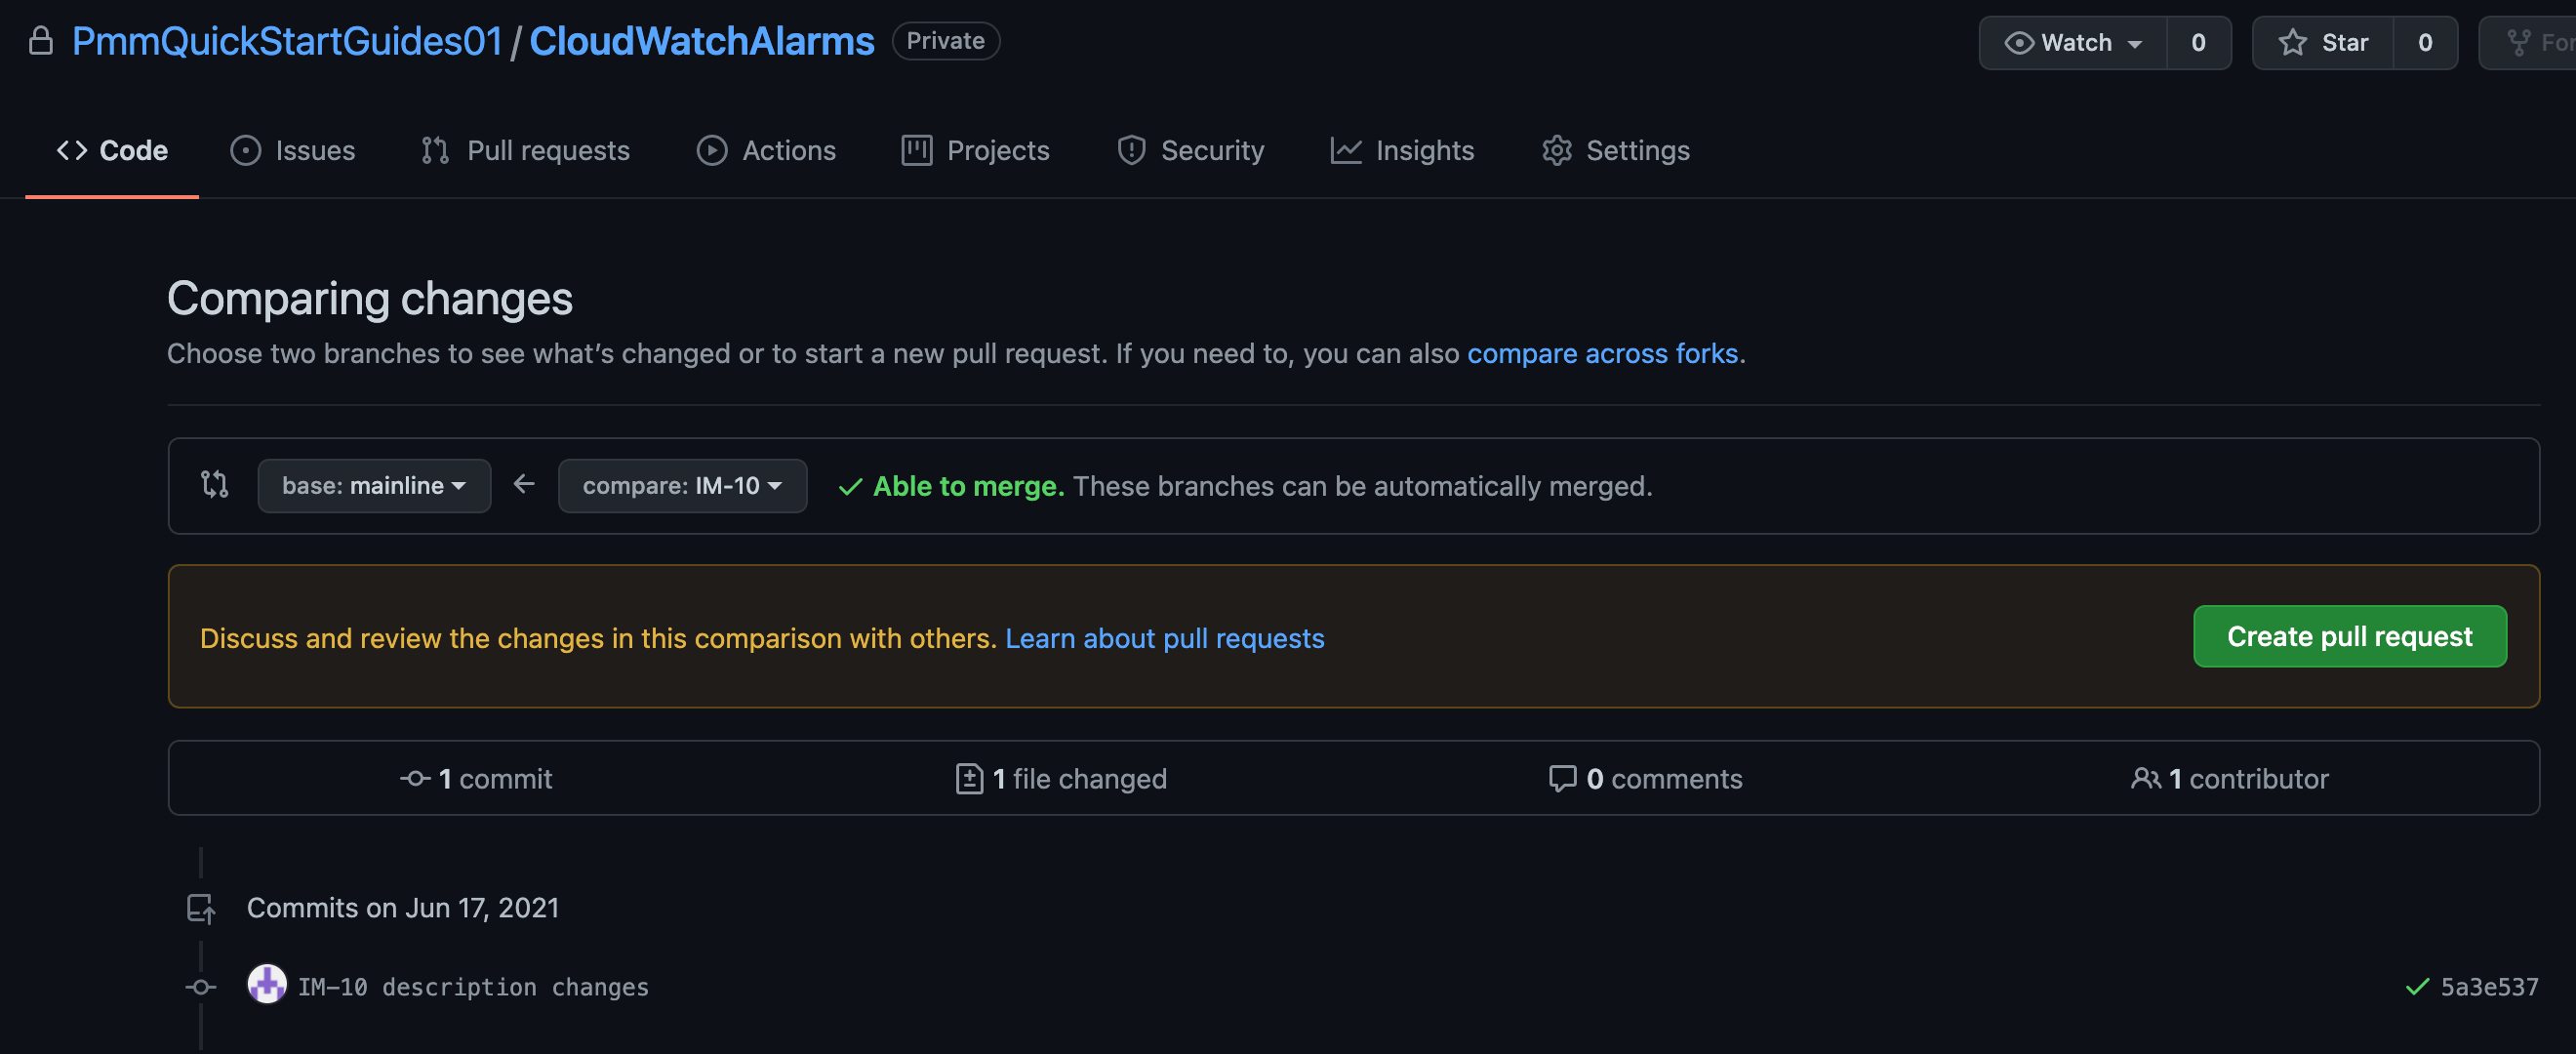
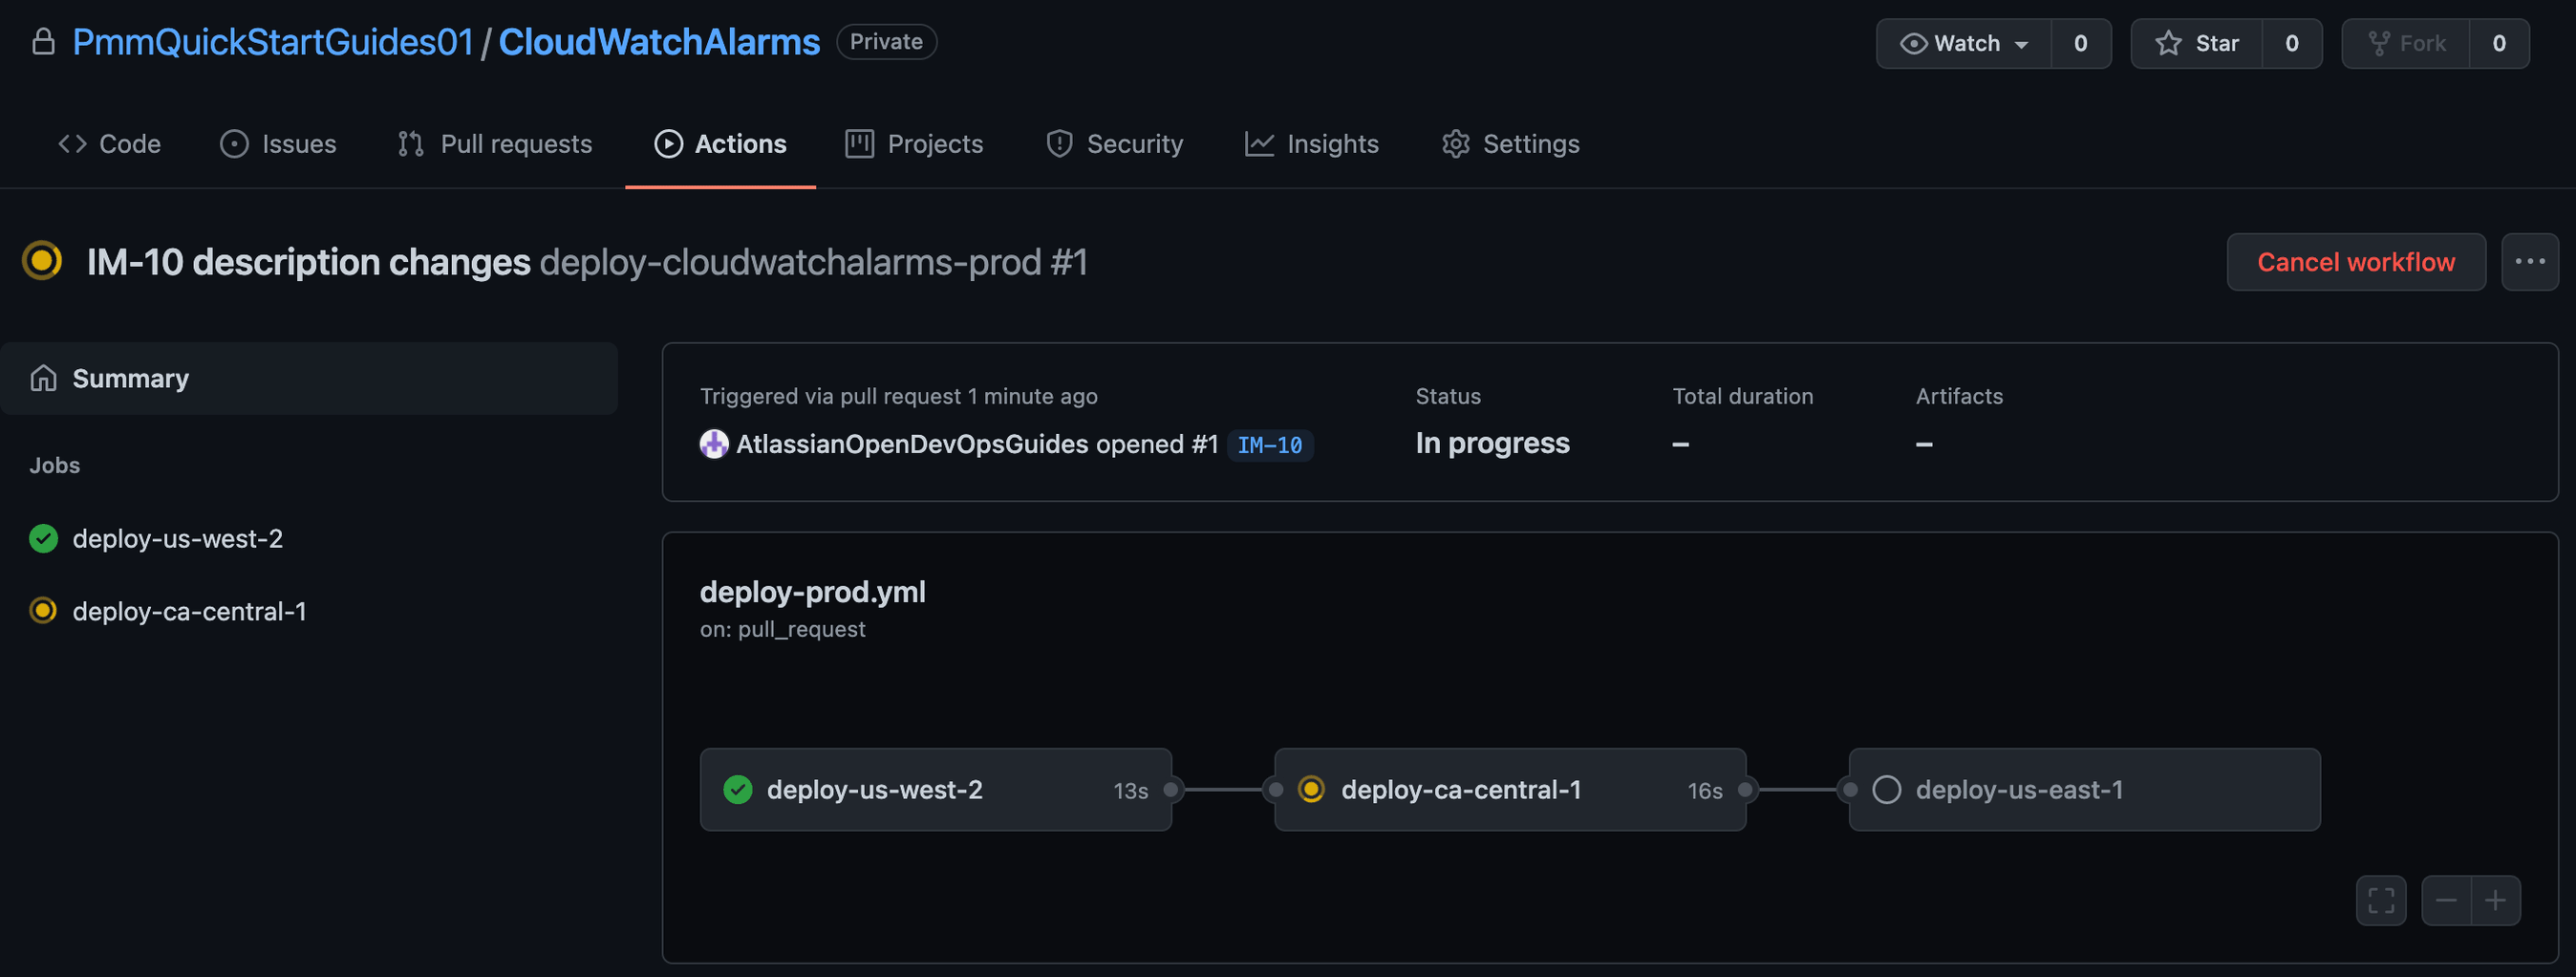
单击“操作”以监视生产部署。
测试警报
通过触发您刚才设置的 AWS CloudWatch 提醒或单击“创建提醒”来生成提醒。
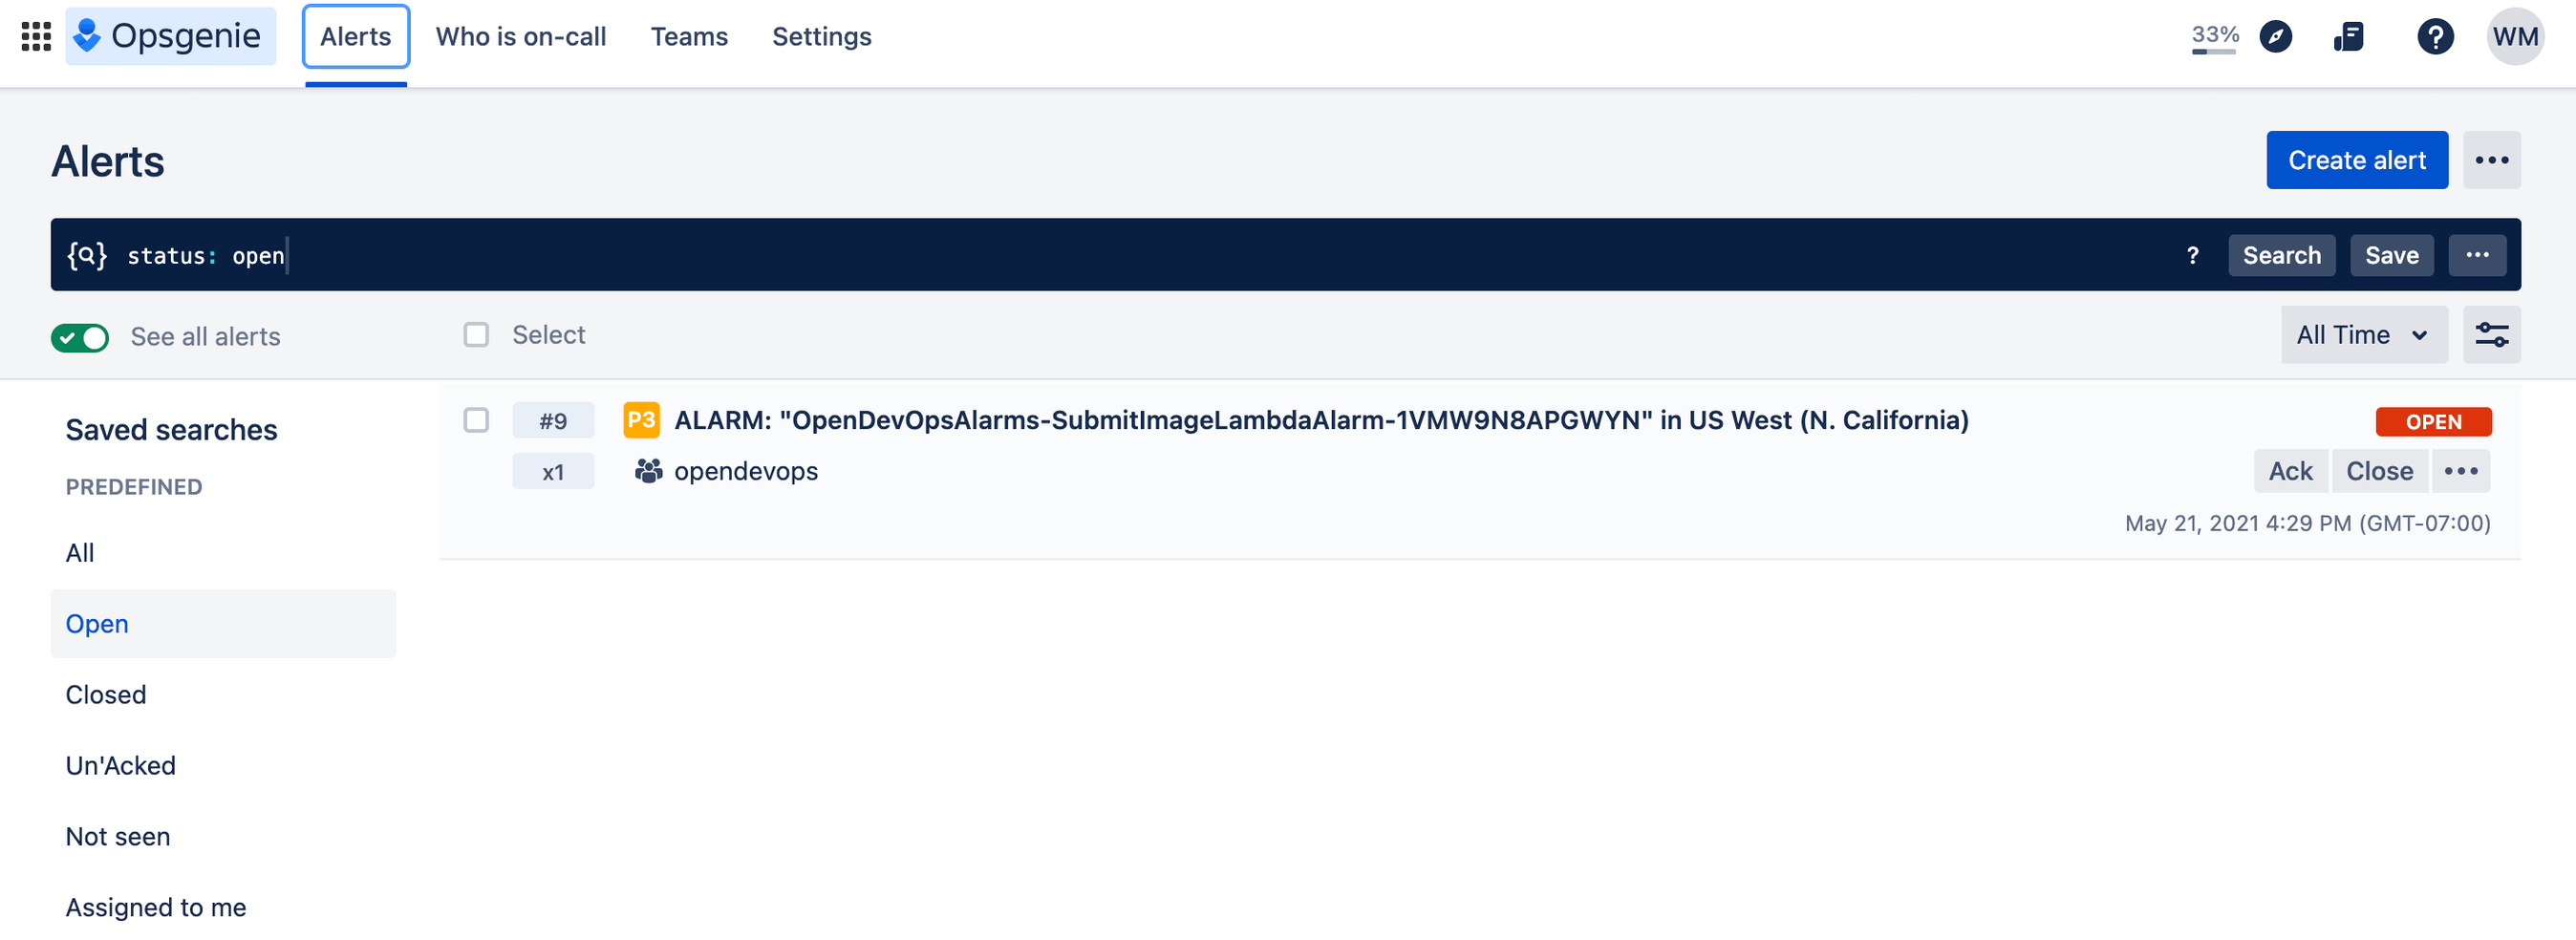
查看 Slack 可看到通知已出现。

漂亮!您做到了。ImageLabeller 现已启动并运行。
分享这篇文章
下一主题
推荐阅读
将这些资源加入书签,以了解 DevOps 团队的类型,或获取 Atlassian 关于 DevOps 的持续更新。

DevOps 社区

DevOps 学习路径