Jira 中的时间线教程
启用时间线视图
在团队管理的项目中:
时间线视图会自动启用,可在侧边导航栏中找到。如果时间线未启用:
- 导航到侧栏中的“项目设置”。
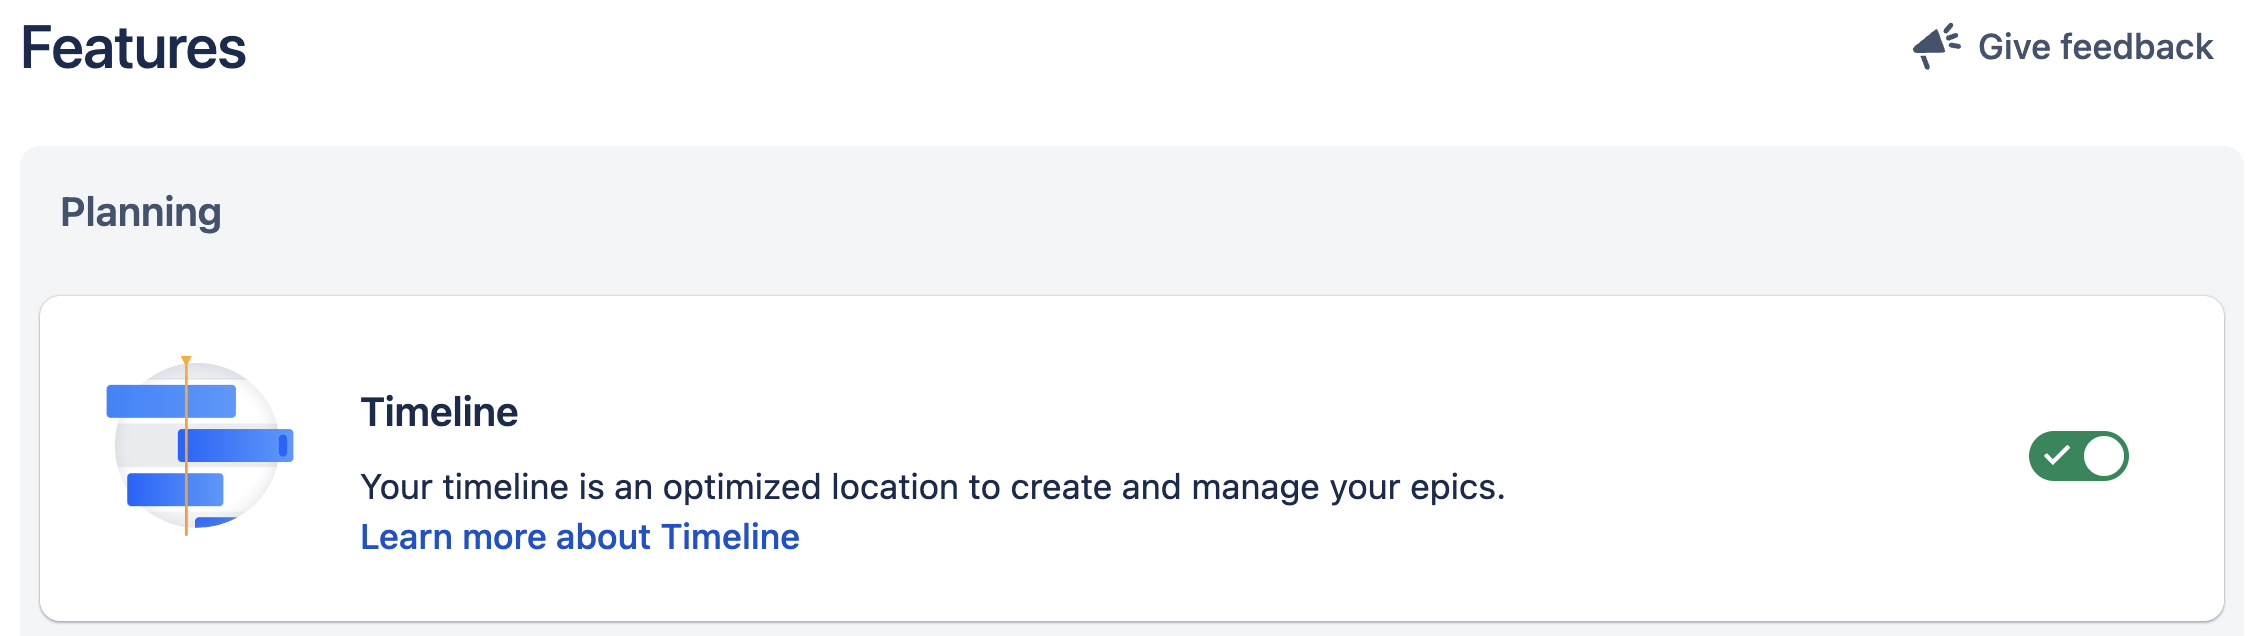
- 选择“功能”并启用时间线。
在公司管理的项目中:
- 导航到您的看板并选择右上角的 (•••)。选择“看板设置”。
- 选择“时间线”选项卡并启用该功能。
创建时间线

- 创建一个新的 Jira 项目或转到现有项目,然后导航到侧边栏并点击时间线。
- 单击时间线上的“+ 创建长篇故事”,直接在时间线上创建长篇故事。如果时间线为空,只需开始输入即可创建。
- 命名长篇故事然后按 Enter 键。您可以随时双击时间线中的长篇故事,以添加开始日期和结束日期、经办人、附件等信息。
- Add child work items to your epic from the timeline by clicking + next to the epic name. Select the type of child work item using the drop-down and then name the work item.
分配开始和到期时间
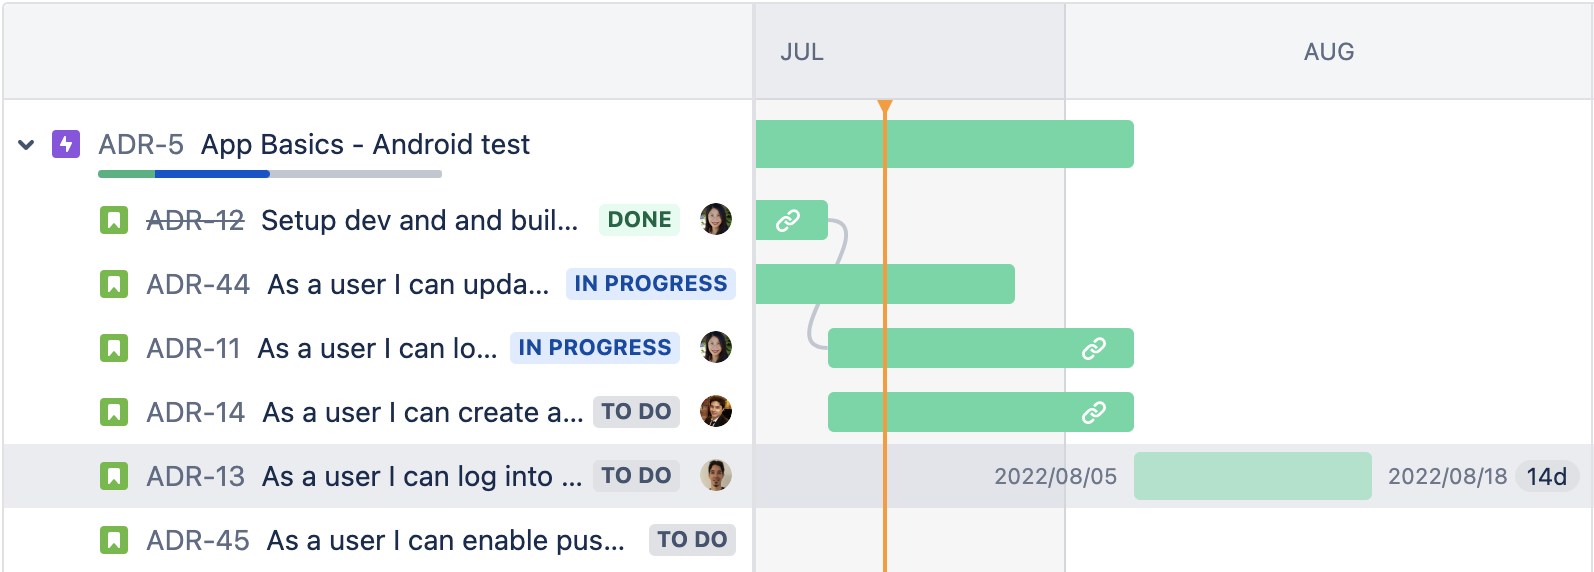
时间线上柱的长度与为长篇故事设置的开始日期和到期时间相关。为长篇故事设置日期有助于:
- 就计划与团队进行沟通,并向外部利益相关者提供可见性
- 告知依赖关系映射并协助进行资源管理
您可以通过变更条的长度来分配开始和到期时间。
筛选器和视图设置
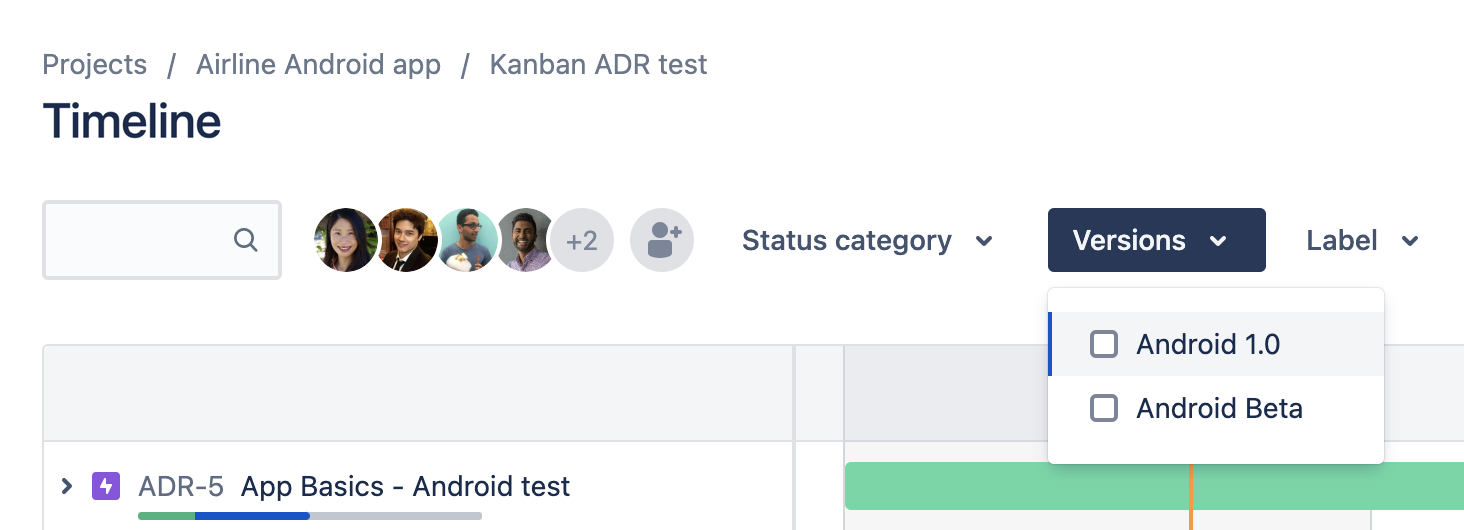
Your Jira timeline has built-in filters that make viewing and managing work simple. You can use them to only show work items that relate to product work or highlight your team’s “keep the lights on” tasks. You can find filters at the top of your timeline.
Refine your timeline by searching for keywords and filter by assignee, status, label, work type, versions, or component. The search bar is always available. Other filters appear only after you add an assignee to a work item, create more than one type of work item, or add a label to a work item on your timeline. Filters apply to all parent and child work items in your timeline view.
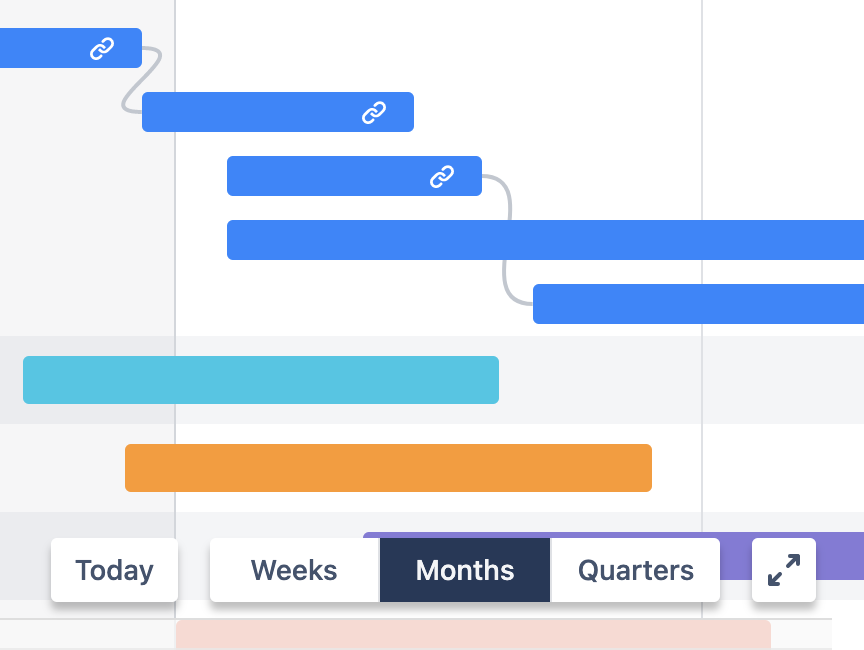
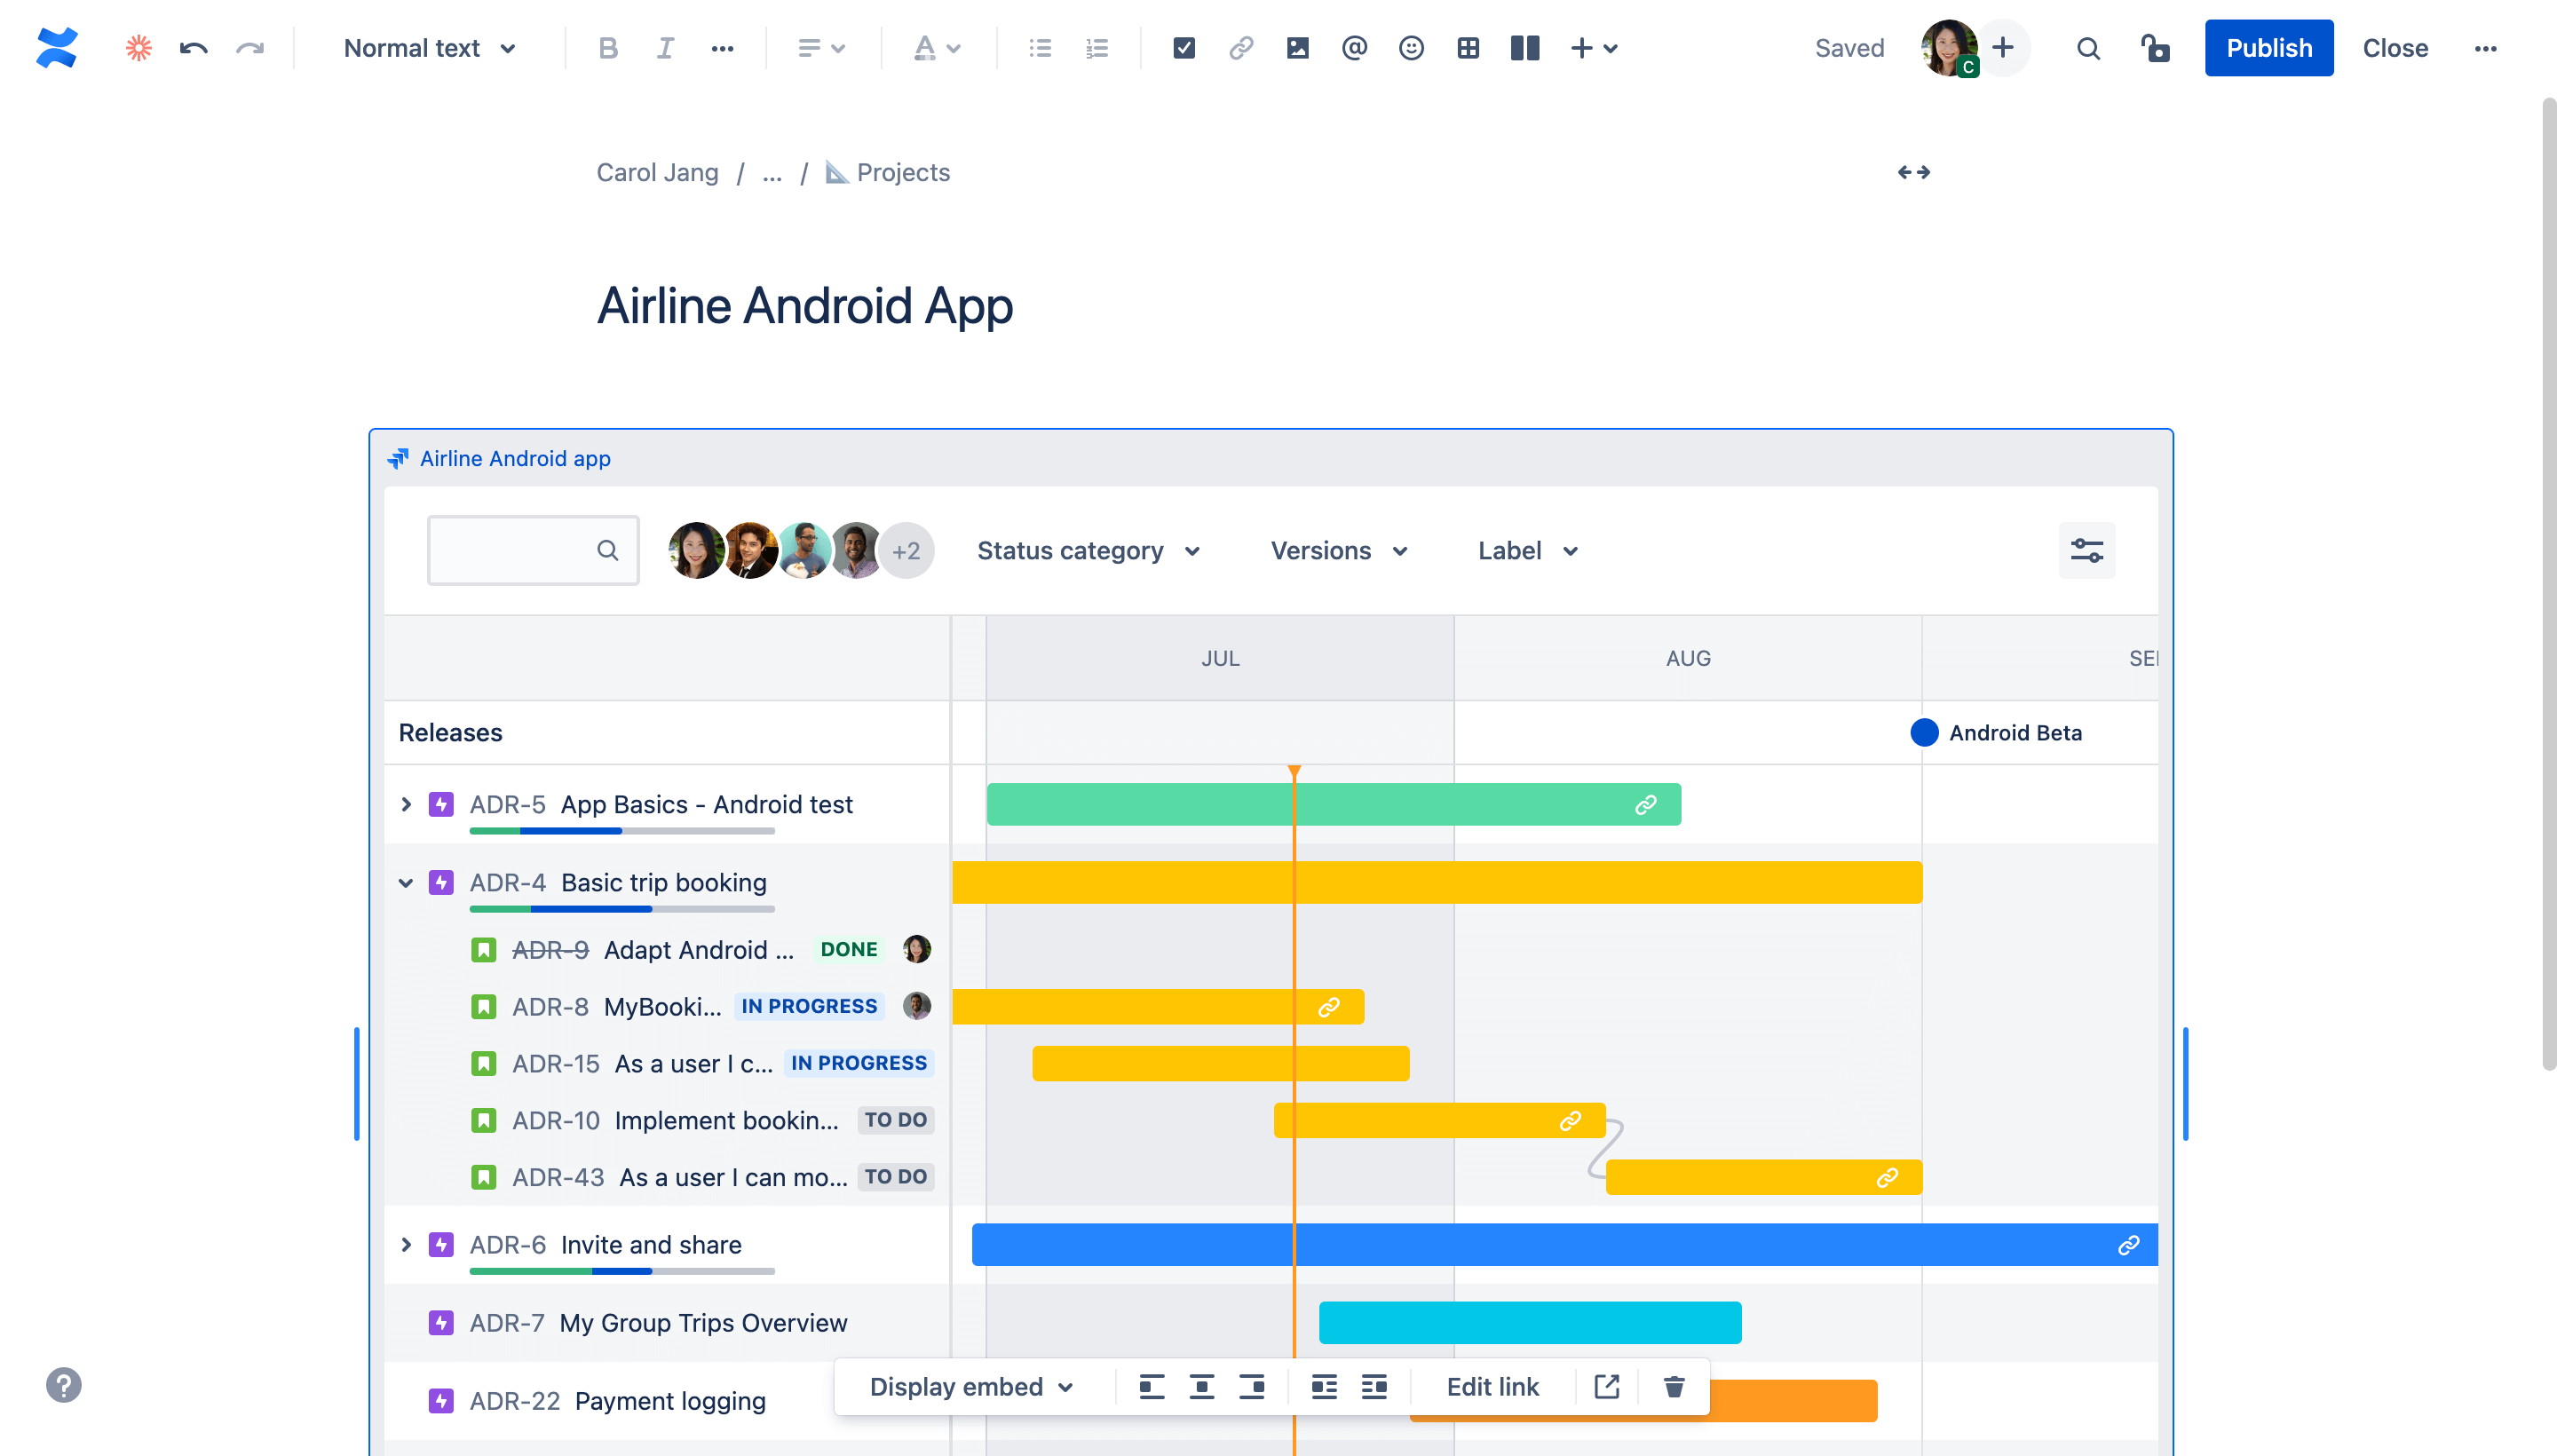
调整时间线上的视图设置以了解存在风险的内容。添加或删除依赖关系和进度视图,并按状态筛选长篇故事。

使用底部角落的时间范围选择器放大和缩小时间线,以查看即将到来的周、月或季度。
共享和导出
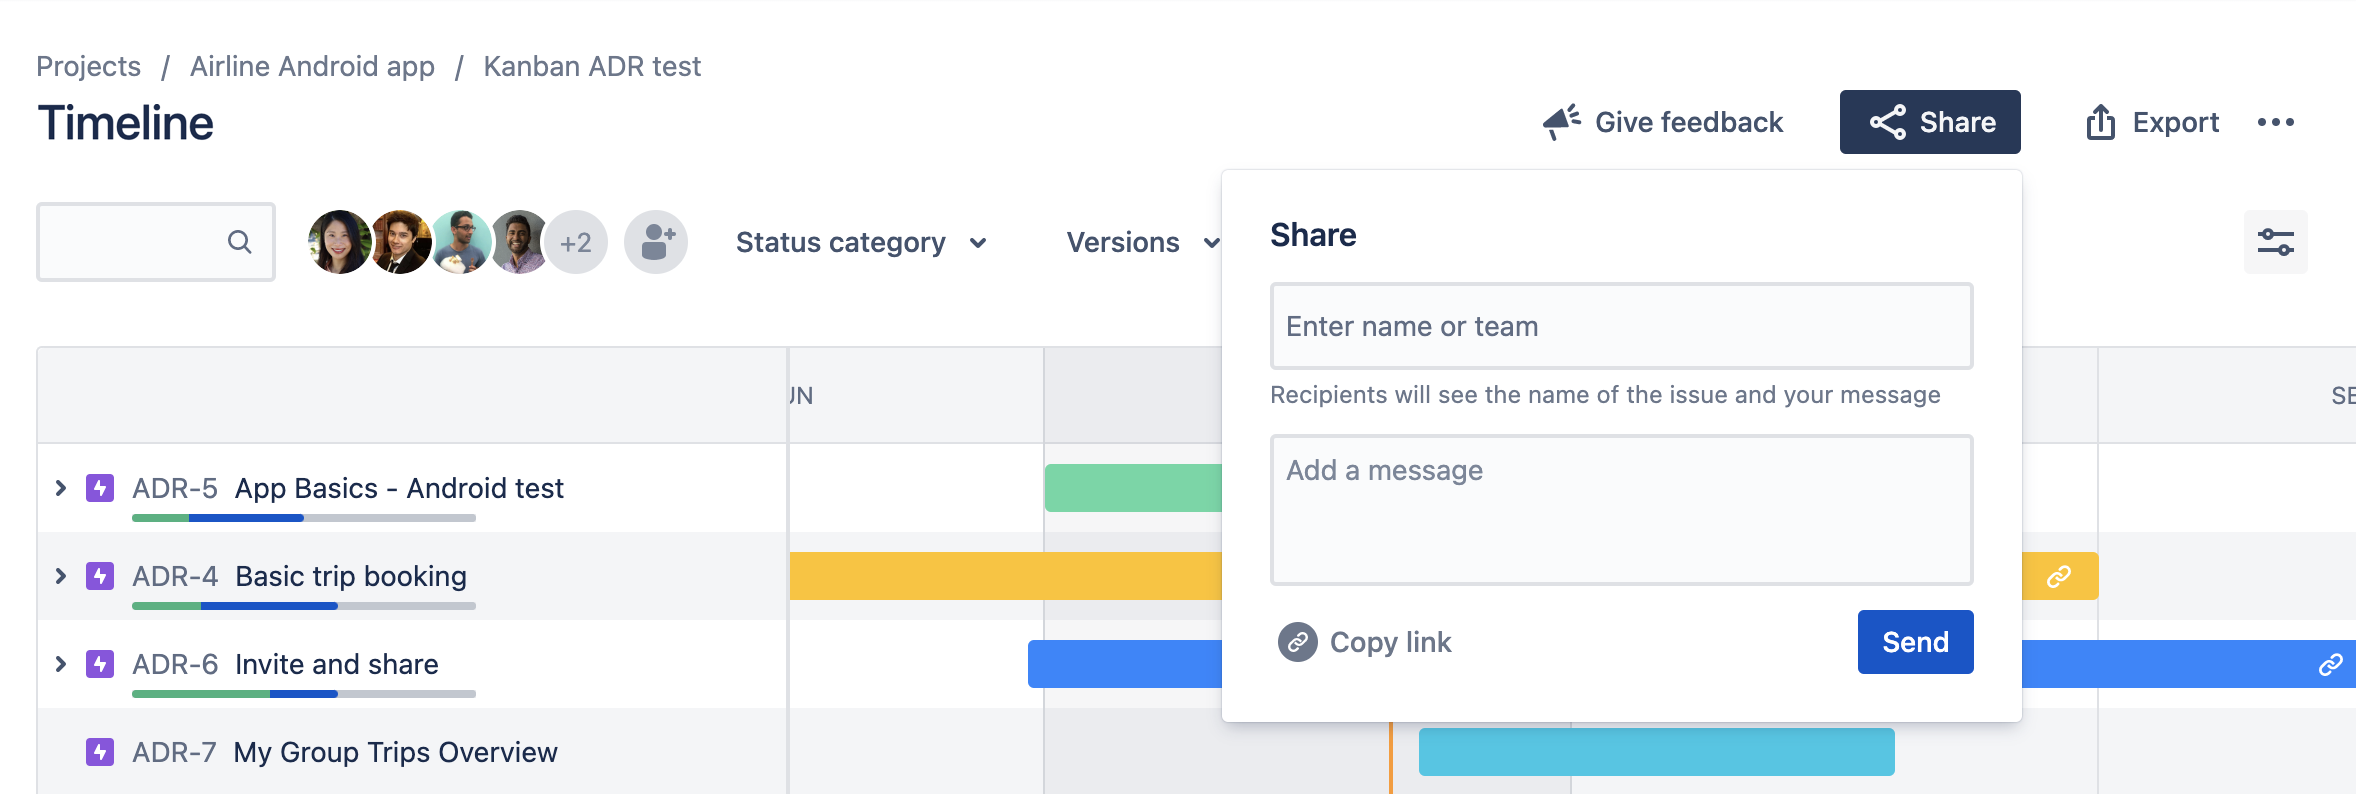
通过共享和导出功能,您可以轻松地与利益相关者共享项目时间线,将项目时间线添加到演示文稿、附加到项目文档、打印出来或添加到 Confluence Cloud 页面。
要直接从 Jira 共享时间线,请输入用户名或电子邮件地址,或是点击“复制链接”以获取时间线 URL。
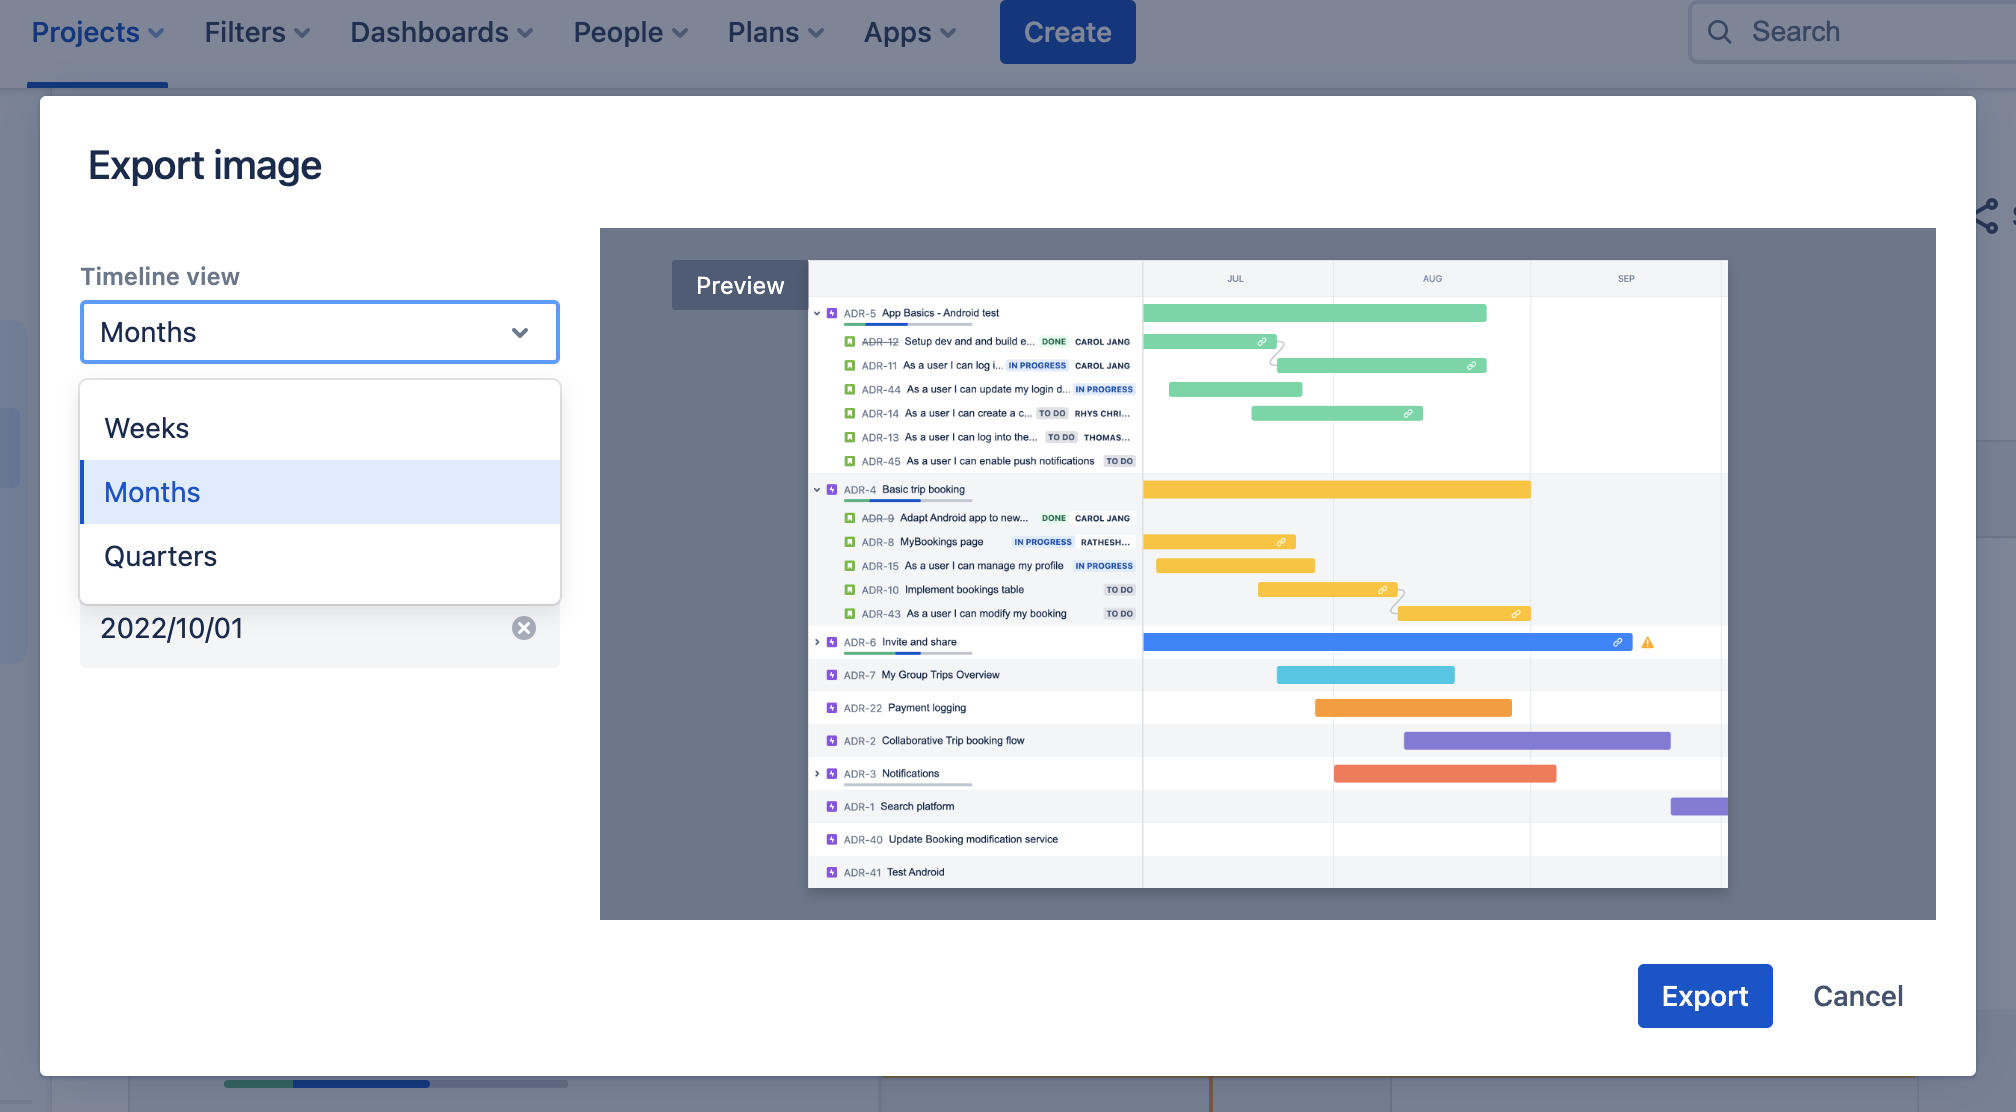
要导出为图像,请选择所需的时间线视图、要捕获的工作的开始日期和结束日期。
分配依赖关系
依赖关系管理对团队至关重要。如果依赖关系得以可视化而且映射完善,团队便可以调整和规划替代路径。在 Jira 中,您可以通过直接从时间线映射依赖关系来轻松展示长篇故事之间的关系。
要直接在时间线上创建依赖关系,请执行以下操作:

- Hover over the work item’s schedule bar to reveal dots on either side, as shown above.
- Drag one of the dots to the work item you want to link. The timeline automatically configures the order of the dependency (blocks or is blocked by) based on the order in which work items are scheduled.
To create a dependency from the side work item view panel:
- Highlight a work item on the timeline to open the side info panel.
- Select the icon to open the link menu, then choose Link work item.
- Select either blocks or is blocked by, then select the work item to link.